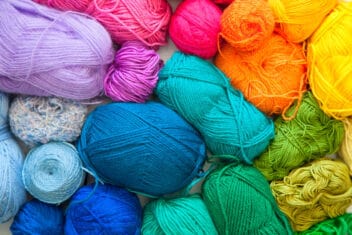
Sheep are among the most versatile livestock to raise, but many homesteaders don’t take advantage of all their useful qualities. Sheep can be raised for meat, dairy, and as great mowing machines. Then there’s that classic use: turning their wool into yarn.
It’s hard to imagine how it’s possible to take that stinky, oily wool and make it into the uniform, colorful strands that you knit into a beautiful sweater. But it’s totally possible using some basic, affordable tools.
This guide makes it easy.
Prepare the Wool in Five Steps
In this article, we’re going to discuss turning the wool you trim off your sheep into beautiful yarn you can use to knit or crochet anything you want.
First things first, which breeds have the best wool for making yarn? Some great multi-purpose breeds that are good wool producers, as well as hardy for homesteaders, are Corriedale, Finnsheep, Icelandics, and Romney.
I’ve raised Icelandics and Icelandic Shetland crosses with great success.
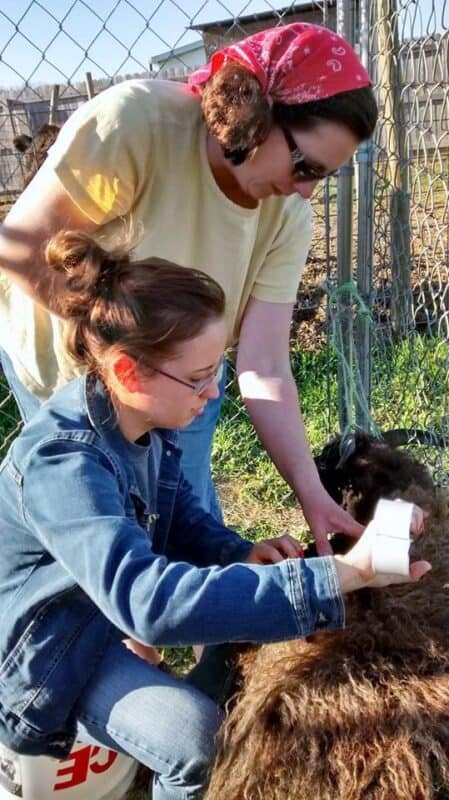
Obviously, the next step to making yarn is to shear your sheep.
Read our article on how to shear a sheep the right way if you’ve never done it before. Then, come back here and we’ll show you how to turn that wool into yarn.
1. Clean the Fleece
Once you have sheared your sheep the next step is to wash and prepare the wool. The wool contains debris and lanolin.
Many breeds of sheep come from cold, windy climates. Sheep naturally produce lots of oils – specifically lanolin – in their skin that gets into the wool. The lanolin protects the sheep’s skin and helps to keep them warm.

Lay your sheared fleece out flat on a clean floor or surface. Fleece is the name for the shorn coat from the sheep.
Remove all the dirty areas with a sharp pair of scissors or by pulling them free. Clean off any pieces of poop from the wool that was around the rear and any grains from the neck area. These are often called tags.
Cut out any of the wool that’s particularly matted.
Then, assemble two tubs of hot water. One for washing with a mix of Dawn soap and water, and one filled with plain water for rinsing.
Dip the wool in the soapy, hot water. Don’t agitate, you just want to dunk the wool gently. You don’t want to swish, either – this isn’t a washing machine.
When you wash, make sure you are not felting the wool. Felting means that you’re rubbing it into a tight lock of hair rather than a loose grouping.
When you’re done soaking, move the wool to the rinse tub. Do this by taking a section at a time, squeezing out the water, and then put the wool in the rinse tub.
Repeatedly dunk the wool into the rinse, but don’t rub. Again you’re dunking the wool in the water, you’re not agitating the fibers.
After the wool is rinsed, remove it from the tub and squeeze out all the extra water.
2. Drying

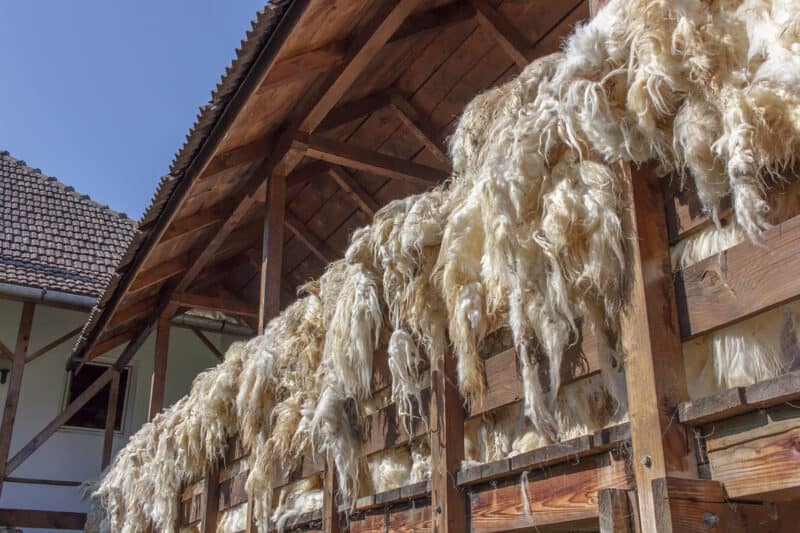
After you squeeze out the excess water, lay the wool on a flat surface to dry. Window or door screens work well for this. You can also place it in loose chunks over railings or rafters.
To speed things up, use a fan or two to blow on the wool and help it dry faster. Another helpful appliance is a dehumidifier. Wool holds a lot of moisture. A dehumidifier helps to pull the excess moisture from the air.
3. Picking the Wool
The next step in spinning wool is cleaning it once again in a process called picking or teasing. After you clean and dry the wool, it will still contain some dirt and debris.
You’ll need to pick out the fleece so there’s no dirt. You also need to smooth out the lumps. Then, pull pieces of the wool apart with your hands to create loose clumps.
Once the wool is clean and laying smooth, you’re ready to dye it and card it to prepare for spinning.

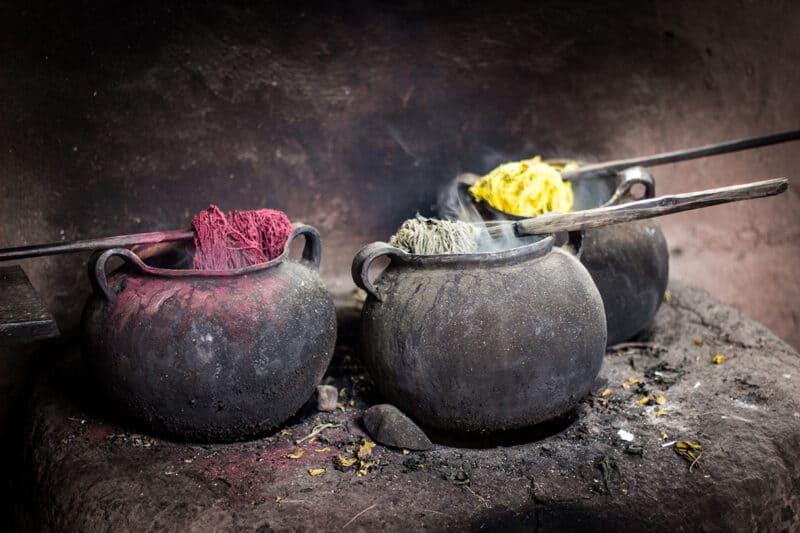
4. Dyeing
If you want to dye your wool so that it has some color, this is the time to do it. Natural dyes abound in nature or you can buy natural dyes from your favorite craft or yarn store.
Many vegetables make great dyes. Some common ones such as carrots and beets are fabulous options.

Some other plants to use as dyes are:
- Acorns and dandelions to make shades of brown
- Marigolds and sunflowers to create yellow
- Giant coreopsis and butternut seeds to make orange
- Blueberries and hibiscus for purple dye
Extract the color from the plants by cutting them into pieces and cooking. Use a 1:2 ratio of vegetable material to water. Let it simmer (don’t boil) for about an hour.
Then, let your concoction cool. If you want a deeper color let it set in the pan longer.
Strain out the solid material when you have a color you like.
As you get more advanced with natural dyes you should learn how to balance the pH of your water. Color adheres best when the water has a neutral pH.
Next, you want to mordant your fiber. This helps the dye adhere to your fiber. Vinegar and salt make good mordants.
Lastly, place your fiber in the dye and let it soak thirty minutes. Rinse the wool and gently squeeze out excess water.
Hang to dry.
5. Carding
Carding is combing the wool so that all the fibers go in the same direction. In addition, this makes the fibers light and fluffy and ready for you to spin them. It’s an essential part of the process to turn wool into yarn.


Do this using small metal brushes that look like something you’d use on a dog. You can actually even use a standard dog brush.
Lay one brush on your lap with the handle facing left. Lay wool on the teeth so they’re covered. It’s important to line up the fibers so that they’re straight.
Take the empty carder with the handle in your right hand and move it left to right across the bottom carder.
Keep moving it across until all the wool has transferred to the top carder. Then switch, so you have the filled carder on the bottom and the empty carder on top.
Repeat the process over and over until the wool looks smooth and uniform. Now you have worsted wool.
While you can card by hand if you have small amounts, for larger amounts, you may want to purchase a small carding machine.
In the last step of carding, you make the roving. Roving is thin strips of carded wool. The thicker the roving, the thicker your yarn will be.
To complete this step, pull the yarn through the lid of a spice jar or the holes in a wood spatula, or some other small circle. This smooths it and divides it into useable pieces.
At this point, roll the roving into a ball to keep it safe. We aren’t twisting the roving yet – that happens next.
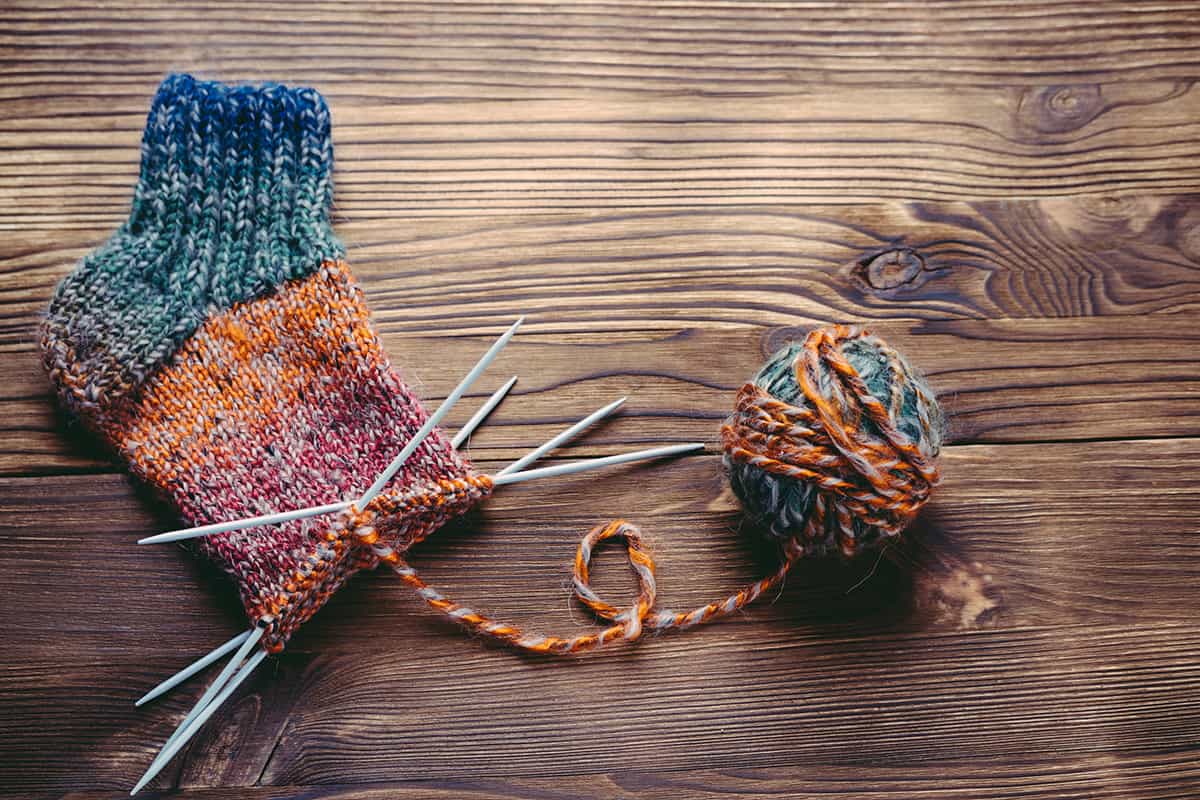
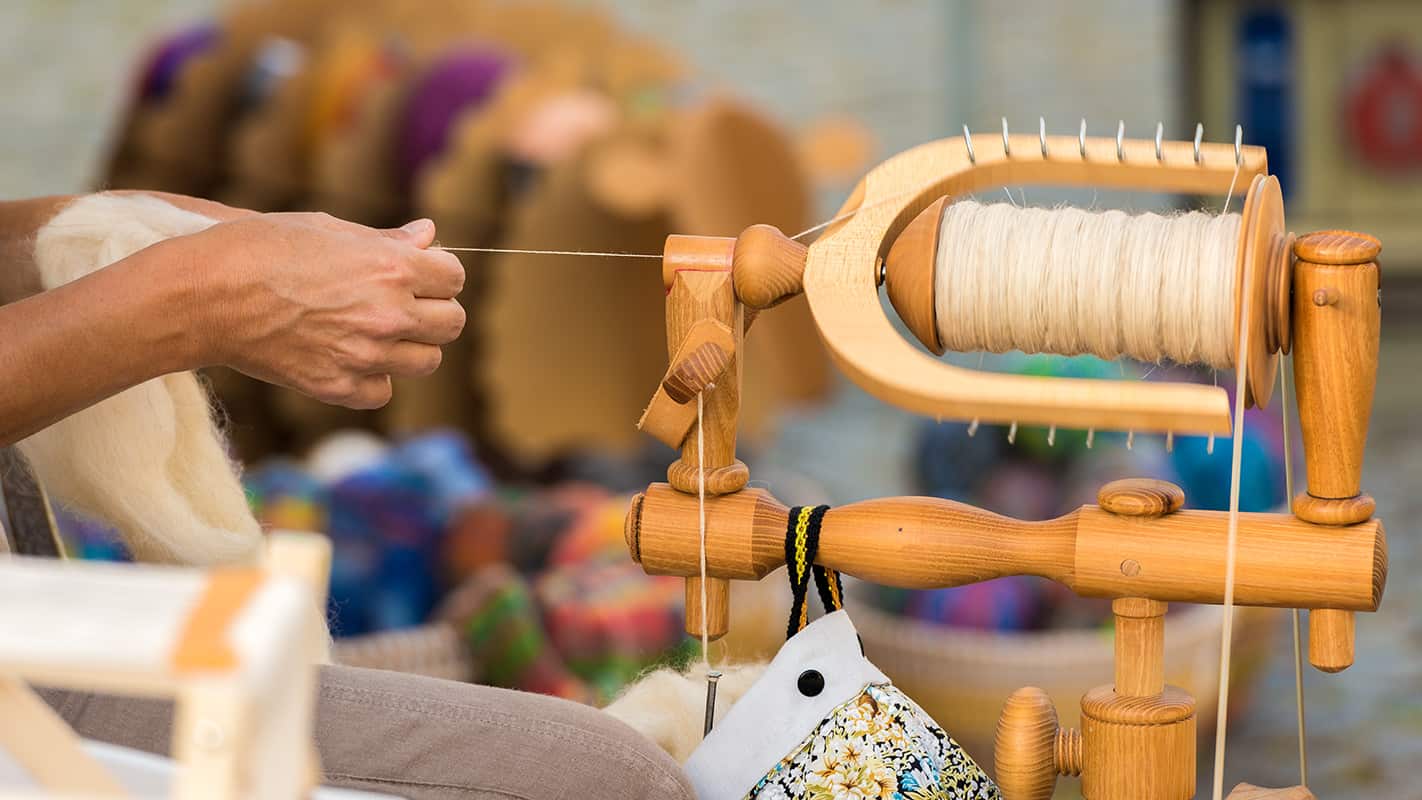
Time to Spin!
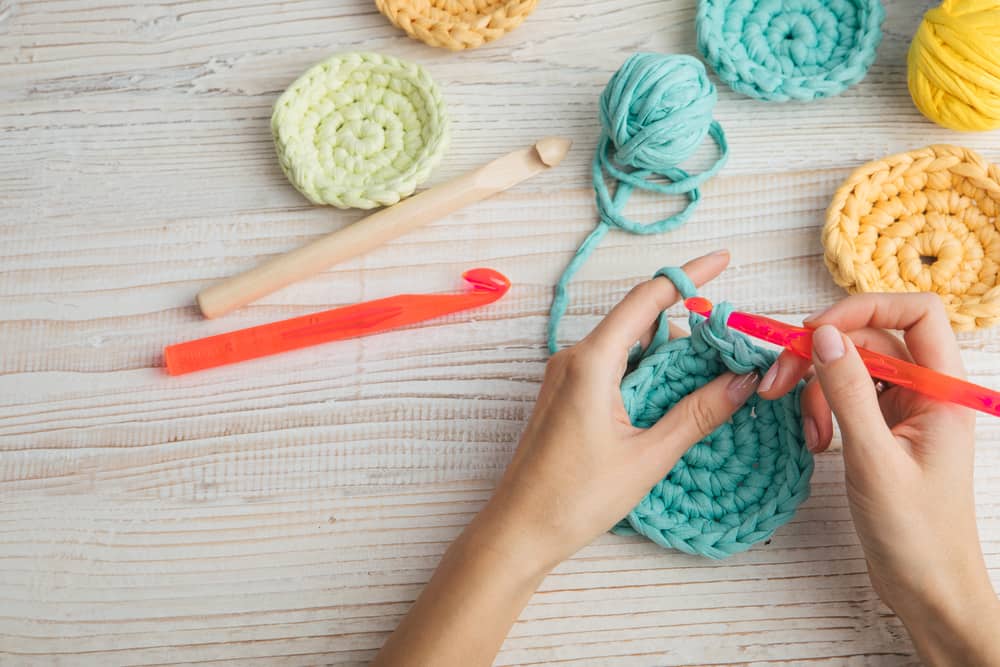
Finally, we’ve arrived at the actual process of spinning your yarn. Spinning twists the wool into a long yarn you can use in knitting, weaving, or crochet.
Get to Know Your Spinning Wheel
Spinning wheels can be fairly expensive so you may want to borrow one or use a hand spinner to make sure this is something you want to invest in. I have seen used ones for sale at craft shows that are much more affordable.
There are several types of spinning wheels. They may look a bit different but they basically all work the same way. The Saxony spinning wheel is the classic shape most of us are familiar with.

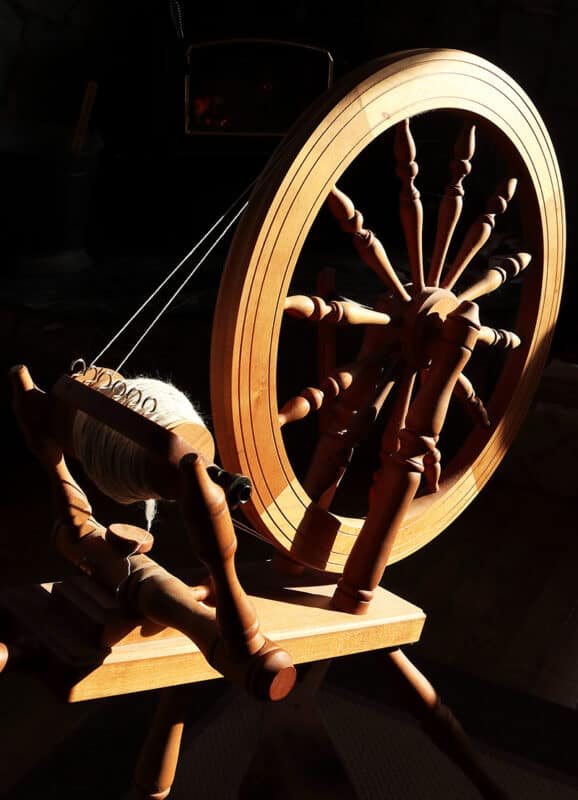
The Saxony has the flywheel in front and sits on three legs. You sit next to the wheel to feed the fiber into the bobbin.
All spinning wheels work by rotating a bobbin. They also all have a treadle and a flywheel, but the position of each may vary.
The drive band is a cord that goes around the flywheel and the flyer whorl so that the bobbin turns and puts the twist in the yarn.
The wheel turns, which causes the flyer and the bobbin to rotate. You can do this by pumping the treadle with your feet. There are also electrical ones that you don’t have to pump manually.
Using a Spinning Wheel
Set up your spinning wheel according to the directions. Every spinning wheel is different. If you are like me and inherited an older spinning wheel you may need to get some help using it properly.
My spinning wheel belonged to my great grandmother and was probably made in the 1930s. I took it to the Kentucky Wool Festival and had a spinning wheel expert look at it and tell me what I needed to do to get it functional.
The purpose of spinning is to introduce twist into the yarn and wind the yarn around the bobbin. That way it’s ready for your next fiber project.
In a continuous motion, twist the fibers through your hand. These fibers then go around the bobbin.
It’s important when you treadle to keep a smooth motion. You want your wheel to keep moving forward and not go backward.
Short draw is a method to create a worsted yarn from the roving. Worsted yarn is denser and more compact than knitting yarns.
Short draw refers to the fact that your hands are close together feeding the fiber into the wheel. The hand closest to the wheel is adding the twist.
Long draw is a popular method used with wool to make knitting yarns. This classic way produces a woolen-spun yarn that is not as smooth and has more body too it.
This video can help walk you through the process.
Hand Spinning
You don’t actually have to have a spinning wheel to turn your roving into yarn. You can use a drop spindle. Drop spindles are inexpensive and easy to use.
The drop spindle is weighted and while not as fast as a spinning wheel is a fine way to make a ball of yarn in an hour or so.
You operate a drop spindle using just your hands and gravity. One hand holds the wool and the other hand spins the spindle. It takes practice to get the movement right.
Once you get the hang of it you can spin fairly quickly.
There are different types of spinning depending on what type of yarn you wish to produce.
This video introduces you to the process:
Like any other craft, spinning takes time and practice, but it’s well worth the journey. When you turn your wool from shearing to yarn that you can knit into a pair of warm mittens or socks, you get a feeling of success and independence.