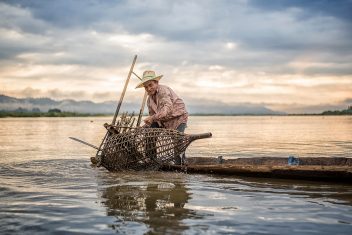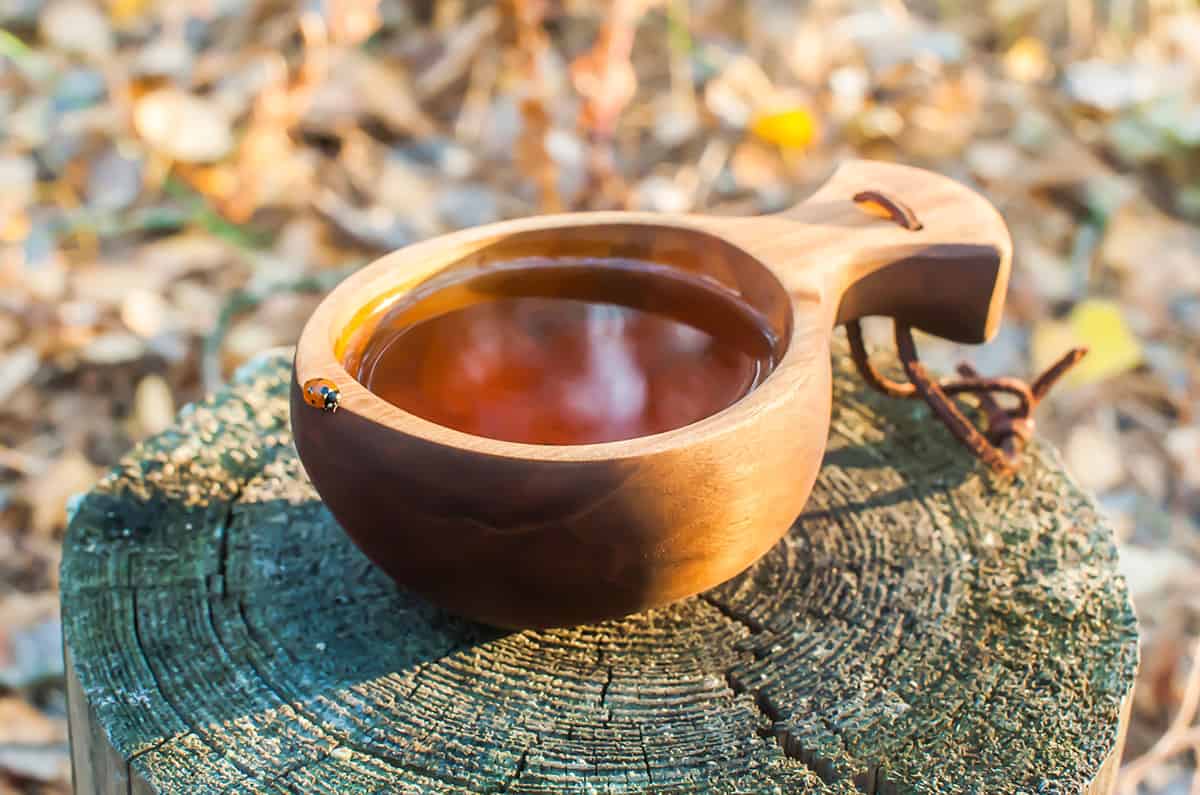
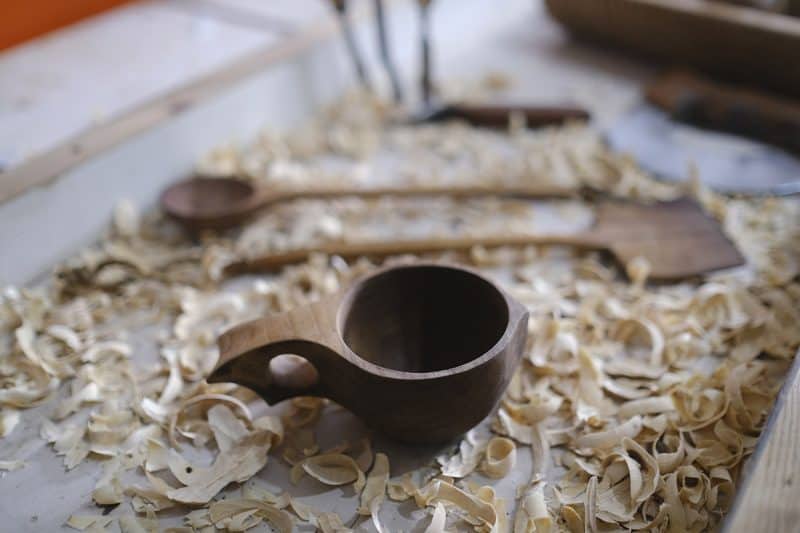
Have you ever heard the term “kuksa” before? It’s a wooden drinking cup/bowl with a handle, traditionally used by the Sami people in Finland. They’re also known as guksi in some parts of Scandinavia, and kåsa in Sweden.
These gorgeous cups are carved from birch burls and can last for decades if they’re cared for properly. If you happen to have a fallen birch tree nearby and you’re itching to get creative, let’s get carving!
What You’ll Need to Make a Kuksa

Items needed:
- A well-seasoned birch burl: try to get yourself a piece of wood that’s been seasoning (drying out) for at least a year. Preferably more than two, if possible. Alternatively, if you can’t find a burl that you like, you can also carve this from a regular piece of wood. Just aim for birch, oak, maple, or other non-toxic hardwood.
- Sharpened ax and/or hatchet
- Splitting wedges
- Small saw
- Chisels
- Hammer
- Crook knife (aka “hook” knife): This is a wood-carving knife that has a curved blade rather than a straight one. In fact, both sides of that crook blade are sharp, so you can carve concave, rounded items in several directions.
- Straight carving knife
- Pencil
- Compass (the kind you use for a writing implement, not to determine direction)
- Drill (optional)
- Sandpaper: rough and fin grades
- Mineral or walnut oil
- Beeswax
- Scrap piece of cotton or linen fabric
How to Make Your Kuska in 5 Steps

These cups are made out of birch burls, as they’re particularly strong and sturdy. This also means that they’re challenging to carve, so prepare for some serious hand cramps. Don’t worry: it’ll build character, and you’ll have stories to tell the grandkids later.
Step 1: Cut the Burl to Size
Burls are notoriously difficult to work with because the grain is all swirly. This means that you’ll probably have to use a combination of a saw and hatchet to cut yours to the right size.
You’ll be carving away the excess wood, so you can be generous about the initial cuts. Generally, if you’re aiming to make a kuksa that’s about 7″ from end to end, feel free to work with a piece that’s 10″ to 12″ long.
Step 2: Flatten it Out
Once the length is sorted out, you need to create a flat plane. You can either use an ax or a chisel, and splitters with a hammer or mallet to do this. It all depends on how crazy the wood grain is. I like to power through and use a really well-sharpened ax to do this, but super intricate burls might need gradual chisel splits.
Ultimately, you want to end up with a piece that’s nice and flat on one side.
Step 3. Map Out the Shape
Now it’s time to draw the shape.
Grab a pencil and fit it into your compass. Jam the sharp end into where you estimate the middle of the cup will be. Then expand it out to the radius you’re aiming for. Let’s say you’re going for 3″. Make the radius 1.5″ and spin that pencil right ’round a few times. Then expand it by about 1/2″ and draw another circle around it. That larger circle will be the outer edge, while the inner circle will be your cup.
At this point, you’ll have to decide whether to make a handle that’s thick or thin, and either vertical with finger holes or horizontal. A thinner, horizontal handle might look nicer, but it’ll be more likely to break off. In contrast, a vertical handle with a couple of finger holes drilled in is sturdier but not as “pretty.” Of course, it’s absolutely okay to have a solid handle too.
These decisions may also be influenced by your burl’s shape. For example, if there’s a natural piece jutting out horizontally, then it may be asking for that kind of a handle. Alternatively, if you’re starting to carve one that way and it snaps off in your hands, you may have to default to a vertical one.
I’ve learned that it’s better to err on the side of thickness. After all, you can always carve a bit more off later if you want to, but you can’t add back in. The same goes for carving out the inner bowl.
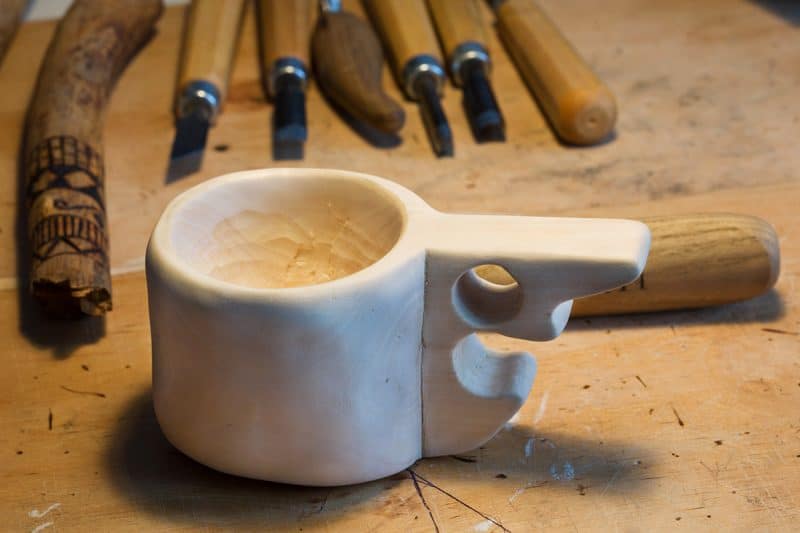
Step 4. Get Carving!

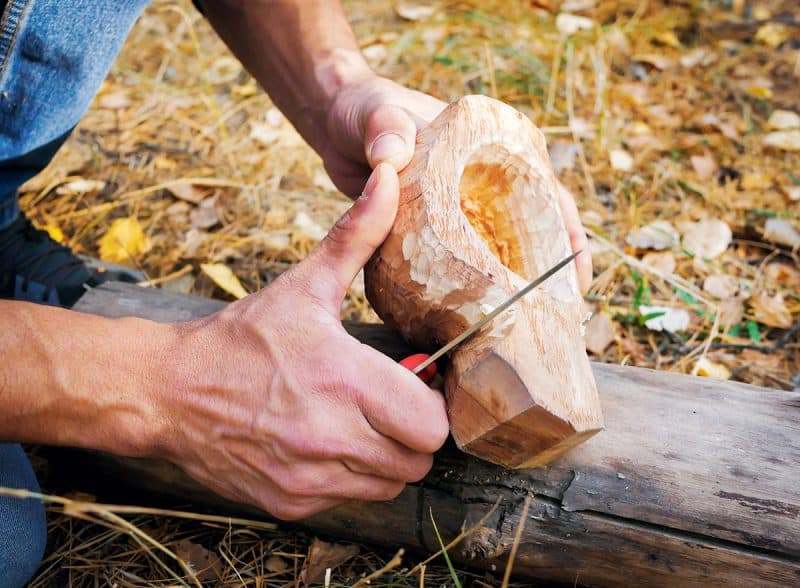
Now is when you get your knives out and start cutting away excess wood bit by bit. Imagine you’re a sculptor like Michelangelo or Rodin, and you’re freeing the kuksa shape from the wood that’s holding it.
You can use a variety of different techniques here, depending on the wood’s grain. Start by carving away as much excess from outside the bowl shape as possible. Use a sharpened hatchet in long, smooth strokes, and then switch to a sharp carving knife for smaller cuts.
Once that shape has been blocked off roughly, switch to working on the inside of the cup. Some people like to use a crook knife immediately, so try that out first if you like. Personally, I like to chisel out some chunks to give my crook knife something to “bite into.” This also hastens the process.
Similarly, you can also brace the kuksa between larger pieces of wood and use a rounded chisel and hammer to chop out as much of the inside as possible.
Once the inside is hollowed out by about 90%, switch to working on the outside. Use a carving knife to shave away the excess wood bit by bit carefully. As you’re doing this, start to shape the handle as well.
Of course, the method mentioned above is for carving a kuksa the traditional way. This means putting time, effort, and a lot of elbow grease into the piece. However, you can make one faster by using power tools like a band saw, drill, and Dremel tool.
Step 5: Finishing Touches

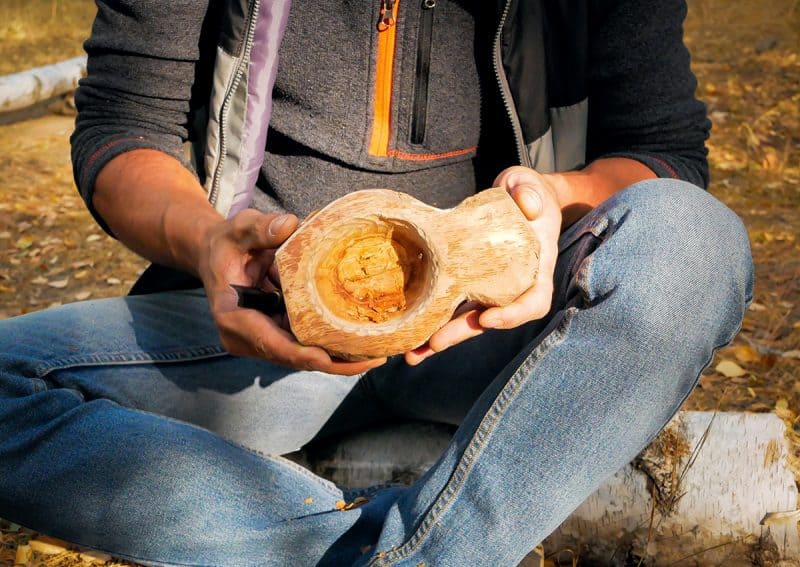
At this point, you’re really just refining your cuts. It’s the most painstaking part of the process but can also be the most enjoyable. Put on some great music or move to your favorite spot by the river, and take your time. Use your various knives to shape everything to your heart’s content. This is also the point where you’ll carve the finger holes (or a hole to hang a cord through) if you so desire.
Once it feels pretty much done to you, break out the sandpaper. Use a coarser grade to get rid of the rougher bits. Then switch to finer and finer grades until it’s buttery soft to the touch. If you want to, feel free to use a wood-burning tool now to write your name or initials at the bottom of the cup. Or do some decorative burning around the outside, if desired. Your call.
When you get it to the point that you feel like it’s done, it’s time to polish it. Melt some of that beeswax in a clean bowl or another container. Then dip the cloth scrap into it, and rub the melted wax into the wood bit by bit. Polish it gently all the way around until it’s burnished beautifully—almost glowing.
Once that’s done, your cup is ready to use! Now you just need to decide what to choose as your first beverage in it.
How to Care for Your Kuksa
Caring for a kuksa is basically the same as for other wooden utensils. Since wood is porous, you don’t want to leave liquids in it for a long time. Nor do you want to leave it in the sink! After you’ve had soup, coffee, or tea out of your cup, rinse it with warm water and dry it thoroughly with a clean towel.
It’s considered bad luck to use any soap or detergent in your kuksa! If you find that it feels a bit filmy or slimy inside, use a handful of wet sand (or dampened really fine-grade sandpaper) to wipe it out thoroughly. Then oil it well with mineral or walnut oil.
Try to oil your kuksa once a week if you’re using it regularly, or a couple of times a month with less frequent use. You want this beautiful piece to last for years, so that means keeping it clean. The oil will help prevent it from absorbing too much liquid and give it a gorgeous shine. Now and then, feel free to polish it up with some more beeswax, inside and out, just for some extra lovin’.
Most importantly, take the time to really enjoy your time with this piece. Be present and aware when you sip drinks from it, whether it’s ice-cold water on a sweltering day, or steaming bone broth in the dead of winter. Eat and drink from the land whenever possible, and take great joy in the memories you’ve made creating this beautiful cup!