Nothing Special   »   [go: up one dir, main page]

We’re happy to announce that WebGL is now on by default in Google Chrome’s beta channel, with some shiny new demos to show off what the technology can do.

WebGL is a 3D graphics API for JavaScript that developers can use to create fully 3D web apps. It is based on the OpenGL ES 2.0 API, which should be familiar to many 3D graphics developers. Google, Mozilla, Apple, Opera and graphics hardware vendors have been working together to standardize WebGL for over a year now, and since the spec is just about final at this point, we wanted to get our implementation out there for feedback.

While you may not find much WebGL content on the web, we expect developers to quickly create a lot of content given the power and familiarity of the API. To inspire developers and give users a taste of the kind of apps they can expect in the near future, we’ve worked with a few talented teams to build a few more 3D web apps:

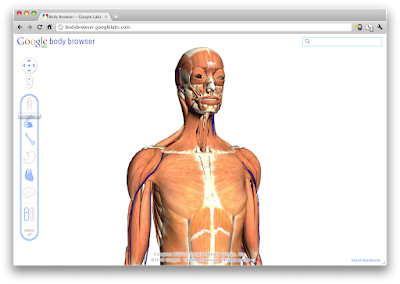
Body Browser, a human anatomy explorer built by a team at Google as a 20% project


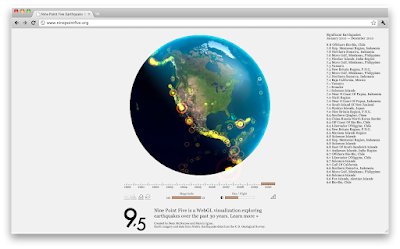
Nine Point Five, a 3D earthquake map by Dean McNamee


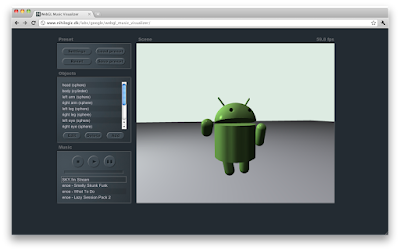
Music Visualizer, a jukebox that synchronizes 3D graphics to the beat of the music by Jacob Seidelin


You can find these and other demos in the new Chrome Experiments Gallery for WebGL demos. Now that WebGL is enabled in the beta channel, the Chrome Experiments team is looking for your cool WebGL app submissions to show off this slick technology, so don’t forget to submit your cool 3D apps!

Since we launched the Chromium project over two years ago, we’ve been hearing a lot of feedback from IT administrators who want to manage and configure Google Chrome. Of course, we were eager to do what we could to help them get Chrome deployed inside their organizations.

Today, after talking directly to administrators and testing the features extensively with other organizations, we believe the first set of features is ready for prime-time. Both Chrome and Chromium are now manageable through Group Policy objects on Windows, plist/MCX configuration on Mac, and special JSON configuration files on Linux. We polished up the NTLM and Kerberos protocol support, and created a list of supported policies and administrative templates to help administrators deploy. For users needing access to older web applications not yet qualified for Chrome, we also developed Chrome Frame, an Internet Explorer (TM) plug-in that provides Chrome-quality rendering for the broader Web, while defaulting to host rendering for any web applications that still require IE.

No feature is really useful to an administrator without great documentation, so we wrote articles to help admins in the configuration and deployment of both Google Chrome and Chromium. We also documented answers to the top questions testers encountered when deploying.

Even though the first set of features is done, we still have a lot more we’d like to do. We have some interesting ideas that we’re working on, including more policies to manage everything in the content settings and authentication protocols, and interesting new ways to deploy policy cross-platform. But we could use your help: please try out the new features by checking out the documentation, downloading the MSI installer, and filing bugs. And let your administrator know to give it a try and let us know what they think.

Chrome Developer Tools' Scripts panel provides a graphical JavaScript debugger and allows you to set breakpoints in the JavaScript source code. However, setting breakpoints in the source code does not always work well, especially when the application is large and you are not familiar with the entire code base. To better support this use case, we are introducing a new set of breakpoints that allow you to break on UI and network events.

Suppose you need to find the piece of code that modifies a specific node in a document. Right-click on that node in the Elements panel and select the appropriate “Break on...” context menu option and you are all set. The debugger will pause JavaScript execution right before the node gets modified next time.


To learn more about DOM breakpoints and other new kinds of breakpoints, visit our Breakpoints Tutorial page.

It’s hard to believe, but it’s already been a full year since we launched the Google Chrome extensions gallery.

It’s been a busy twelve months:
  • The gallery has grown to over 8,500 extensions and 1,500 themes.
  • A third of Chrome users have at least one extension installed.
  • Over 70 million extensions and themes have been installed.
On the client side, we added features like:
Looking forward, we’re very excited about the Chrome Web Store, where developers will be able to easily sell their apps, extensions, and themes.

And we’re not going to slow down on the features, either. The next Chrome release will add API support for the omnibox and pinned tabs. Beyond that, we’re hard at work on popular requests like network interception and download management APIs, as well as new experimental APIs for sidebars and development tools.

Thanks for all your support over the last year, from bug reports to testing new APIs. It’s been a bit frantic at times, but mostly it’s been fun.

Today we are introducing Crankshaft, a new compilation infrastructure for V8, Google Chrome’s JavaScript engine. By using aggressive optimizations, Crankshaft dramatically improves the performance of compute-intensive JavaScript applications - often by more than a factor of two! This will give users a faster and more responsive experience loading web pages and applications built with complex JavaScript. Here is a comparison of Chrome with and without Crankshaft on the V8 benchmark suite:


The benchmarks that benefit the most from Crankshaft are Richards, DeltaBlue and Crypto. This shows that we have taken the performance of JavaScript property accesses, arithmetic operations, tight loops, and function calls to the next level. Overall, Crankshaft boosts V8’s performance by 50% on the V8 benchmark suite. This is the biggest performance improvement since we launched Chrome in 2008.


In addition to improving peak performance as measured by the V8 benchmark suite, Crankshaft also improves the start-up time of web applications such as GMail. Our page cycler benchmarks show that Crankshaft improves the page load performance of Chrome by 12% for pages that contain significant amounts of JavaScript code.

Crankshaft uses adaptive compilation to improve both start-up time and peak performance. The idea is to heavily optimize code that is frequently executed and not waste time optimizing code that is not. Because of this, benchmarks that finish in just a few milliseconds, such as SunSpider, will show little improvement with Crankshaft. The more work an application does, the bigger the gains will be.

Crankshaft has four main components:
  1. A base compiler which is used for all code initially. The base compiler generates code quickly without heavy optimizations. Compilation with the base compiler is twice as fast as with the V8 compiler in Chrome 9 and generates 30% less code.
  2. A runtime profiler which monitors the running system and identifies hot code, i.e., code that we spend a significant amount of the time running.
  3. An optimizing compiler which recompiles and optimizes hot code identified by the runtime profiler. It uses static single assignment form to perform optimizations such as loop-invariant code motion, linear-scan register allocation and inlining. The optimization decisions are based on type information collected while running the code produced by the base compiler.
  4. Deoptimization support which allows the optimizing compiler to be optimistic in the assumptions it makes when generating code. With deoptimization support, it is possible to bail out to the code generated by the base compiler if the assumptions in the optimized code turn out to be too optimistic.
V8 with Crankshaft for the 32-bit Intel architecture is available today in the V8 bleeding edge repository and in canary builds of Chrome. Work on the ARM and 64-bit ports has started.

We are excited about the JavaScript speed improvements we are delivering with Crankshaft today. Crankshaft provides a great infrastructure for the next wave of JavaScript speed improvements in V8 and we will continue to push JavaScript performance to enable the next generation of web applications.

Since this past March, we’ve been working closely with Adobe to allow Flash Player to take advantage of new sandboxing technology in Chrome, extending the work we’ve already done with sandboxing for HTML rendering and JavaScript execution. This week, we’re excited to roll out the initial Flash Player sandbox for our dev channel users on Windows XP, Vista and 7.

This initial Flash Player sandbox is an important milestone in making Chrome even safer. In particular, users of Windows XP will see a major security benefit, as Chrome is currently the only browser on the XP platform that runs Flash Player in a sandbox. This first iteration of Chrome’s Flash Player sandbox for all Windows platforms uses a modified version of Chrome’s existing sandbox technology that protects certain sensitive resources from being accessed by malicious code, while allowing applications to use less sensitive ones. This implementation is a significant first step in further reducing the potential attack surface of the browser and protecting users against common malware.

While we’ve laid a tremendous amount of groundwork in this initial sandbox, there’s still more work to be done. We’re working to improve protection against additional attack vectors, and will be using this initial effort to provide fully sandboxed implementations of the Flash Player on all platforms.

We’ll be posting updates as we continue working with Adobe to add new security improvements to the Flash Player sandbox. For those of you on the dev channel for Windows, you’ll be automatically updated soon, and we look forward to your feedback as you test it out. If you prefer to disable this initial sandbox in your Chrome dev experience, add --disable-flash-sandbox to the command line.

This is part of a series of blog posts that provide tips and tricks on how to create better web apps as well as insights behind the technology of the Chrome Web Store - Ed.

Web development sure got fun recently, right? Local storage, notifications, new form controls, geolocation, inline multimedia... the list goes on and on. These new capabilities can help web developers build powerful new features in their apps.

However, many of these new additions to the web platform are not allowed to web pages by default. For example, to protect a user’s privacy, browsers do not allow web pages to use the geolocation API to access a user’s location unless they prompt the user. Browsers show these prompts each time a web page tries to use a potentially invasive or unsafe capability:


But these prompts can be quite annoying, especially when one web page asks for several of them. And some of these privileges are relatively obscure or incomprehensible to the user. As a result they end up being ignored or scare users from allowing a particular functionality. Most people don’t know what a “clipboard” is, so asking them about access to it is not that informative or helpful.

Now in the Chrome Web Store, developers can create “apps” that group together multiple privilege requests for a single site. Apps have a lightweight installation step that displays the privileges the app requests all together. Once an app is installed, it can use the privileges it requested during the installation process without any further nagging.


Some privileges are relatively low-risk, so we infer permission to use them from the act of installing the application. An example of this is the notifications API. The only reason it isn’t allowed to normal web sites by default is that it could be used annoyingly. When a user installs an app, we interpret that as a sign of at least some trust, and allow that application to use the Notifications API without additional prompting. If users do not like the notifications that the application generates, they can either disable them in the app’s notification UI or they can simply uninstall the app.

In this first version of apps for the Chrome Web Store, we support permission request declarations for the geolocation, notifications, and unlimited storage privileges. Over time we’ll be adding even more.

To learn more about how to build apps for the Chrome Web Store, visit the developer documentation at code.google.com/chrome/webstore.

We have discovered compatibility issues between Google Chrome and Microsoft’s Enhanced Mitigation Experience Toolkit (EMET). EMET is used to deploy and configure security mitigation technologies, often for legacy software. However, because Chrome already uses many of the same techniques (and more), EMET does not provide any additional protection for Chrome. In fact, the current version of EMET interferes with Chrome’s security and prevents Chrome from updating.

We are working closely with Microsoft on a solution to these issues. In the meantime, we advise users and enterprises not to attempt to configure EMET to work with Chrome.

Today we are kicking off a series of blog posts that provide tips and tricks on how to create better web apps as well as insights behind the technology of the Chrome Web Store - Ed.

Looking at building a web app for the Chrome Web Store? The browser landscape has changed a lot recently and user expectations about the quality and polish level of apps are extremely high thanks in part to the success of highly polished mobile apps. Can you meet these high expectations with a webapp?

Fortunately, you now have a lot more power and flexibility with the user interface thanks to the power of HTML5, CSS3, and other new web technologies. It’s now possible to make a web app that is every bit as slick and polished as the best desktop or phone app, while still maintaining the flexibility and portability of the web. For example, using CSS3 transitions and animations, you can make actions in your app feel much more interactive. You can use CSS3’s support for gradients, reflections and rounded corners to create scalable interfaces that look as if they were built using hand-crafted images. And with the rise of GPU-accelerated graphics, you’re now able to create compelling 3D experiences.

However, creating great user experiences is about more than sizzle and polish. Another important factor is focus. Ideally, an app should accomplish a single task well with a minimal amount of distractions. Be judicious with your use of links and ads that could take users away from the task at hand. When the user launches your app, they’re trying to accomplish something specific that your app enables; help them get started right away by minimizing the steps that they need to take, especially when they’re first trying your app. If the first thing a user sees is a registration screen, many will bounce off (once you need the users to sign in, you can use OpenID and Google Accounts to simplify the process). By installing your app they’ve indicated something stronger than just clicking a link - they want to use your app to accomplish something specific. Keep the distractions to a minimum and keep your app focused on the job at hand and your users will be happier.

UI responsiveness in your app is also crucial. For example, let’s say you’ve built a photo stitching app that glues together photos into one seamless larger photo. This may require a lot of CPU horsepower or even that you do the heavy lifting on the server. Maybe the whole operation takes two minutes to complete. However, you can still keep your interactive performance high while the operation proceeds asynchronously. You could ship the CPU work off of the main user interface thread using an HTML5 Worker or you could offload it to a server with an XHR. That alone isn’t enough though. You need to give the user feedback while this is happening, ideally something cool and visual and not just a progress bar. Meanwhile, the user should be able to do other things. If that’s not possible, then cancelling needs to be easy and responsive. Interactive performance is usually something that needs to be designed into your app up front rather than added later as an afterthought, so plan ahead.

In short, you need to think both like app developer as well as a web developer. Putting a little extra thought into focus, performance, feedback and polish can make the difference between “meh” and “whee!”.

The V8 benchmark suite contains a number of pure JavaScript benchmarks that capture the areas in which a JavaScript engine has to perform well to support the well-structured, maintainable, and high-performance web applications of tomorrow. These benchmarks have been useful for us when optimizing the V8 JavaScript engine and we have found that making them run faster leads to better performance for many of the web applications we enjoy using every day.

Today we have released version 6 of the V8 benchmark suite. The main changes are in the RegExp and Splay components of the benchmark suite. For reference, we describe each of the existing benchmarks in the suite below, along with any changes made in version 6.

RegExp: Regular expression benchmark generated by extracting regular expression operations from 50 of the most popular web pages. The regular expressions are exercised a number of times to reflect their popularity on those top 50 web pages. Changed in version 6: each regular expression is now exercised on a number of different input strings instead of just one.
Splay: Data manipulation benchmark that modifies a large splay tree to exercise the automatic memory management subsystem. The benchmark builds a large splay tree in a setup phase and then measures how fast nodes can be added and removed. Changed in version 6: no longer converts the same numeric key to string repeatedly and updates the splay tree in a way that increases the pressure on the memory management subsystem.

Richards: Operating system kernel simulation benchmark originally written in BCPL by Martin Richards. The Richards benchmark effectively measures how fast the JavaScript engine is at accessing object properties, calling functions, and dealing with polymorphism. It is a standard benchmark that has been successfully used to measure the performance of many modern programming language implementations.

DeltaBlue: One-way constraint solver, originally written in Smalltalk by John Maloney and Mario Wolczko. The DeltaBlue benchmark is written in an object-oriented style with a multi-level class hierarchy. As such it measures how fast the JavaScript engine is at running well-structured applications with many objects and small functions. Changed in version 6: fixed a couple of typos that do not have any impact on the behavior of the benchmark.

Crypto: Encryption and decryption benchmark based on code by Tom Wu. The benchmark encrypts an input string, decrypts the result and verifies that encryption followed by decryption yields the original input. The encryption/decryption algorithm is RSA and the benchmark measures the performance of arithmetic operations on integers and array access.

RayTrace: Ray tracer benchmark based on code by Adam Burmister. The benchmark measures floating-point computations where the object structure is constructed using the Prototype JavaScript library. Changed in version 6: removed dead code that has no impact on the behavior of the benchmark.

EarleyBoyer: Classic Scheme benchmarks, translated to JavaScript by Florian Loitsch's Scheme2Js compiler. The benchmarks exercise important areas of the JavaScript engine such as object allocation, data structure manipulation, and garbage collection. The translated nature of the benchmarks make them appear foreign, but the runtime characteristics of the benchmarks are highly representative of many real world web applications.

Curious to know how your browser performs? Give it a spin on the new version of the V8 benchmark suite.

As part of Google’s initiative to make the web faster, over the past few months we have released a number of tools to help site owners speed up their websites. We launched the Page Speed Firefox extension to evaluate the performance of web pages and to get suggestions on how to improve them, we introduced the Speed Tracer Chrome extension to help identify and fix performance problems in web applications, and we released a set of closure tools to help build rich web applications with fully optimized JavaScript code. While these tools have been incredibly successful in helping developers optimize their sites, as we’ve evaluated our progress, we continue to notice a single component of web pages is consistently responsible for the majority of the latency on pages across the web: images.

Most of the common image formats on the web today were established over a decade ago and are based on technology from around that time. Some engineers at Google decided to figure out if there was a way to further compress lossy images like JPEG to make them load faster, while still preserving quality and resolution. As part of this effort, we are releasing a developer preview of a new image format, WebP, that promises to significantly reduce the byte size of photos on the web, allowing web sites to load faster than before.

Images and photos make up about 65% of the bytes transmitted per web page today. They can significantly slow down a user’s web experience, especially on bandwidth-constrained networks such as a mobile network. Images on the web consist primarily of lossy formats such as JPEG, and to a lesser extent lossless formats such as PNG and GIF. Our team focused on improving compression of the lossy images, which constitute the larger percentage of images on the web today.

To improve on the compression that JPEG provides, we used an image compressor based on the VP8 codec that Google open-sourced in May 2010. We applied the techniques from VP8 video intra frame coding to push the envelope in still image coding. We also adapted a very lightweight container based on RIFF. While this container format contributes a minimal overhead of only 20 bytes per image, it is extensible to allow authors to save meta-data they would like to store.

While the benefits of a VP8 based image format were clear in theory, we needed to test them in the real world. In order to gauge the effectiveness of our efforts, we randomly picked about 1,000,000 images from the web (mostly JPEGs and some PNGs and GIFs) and re-encoded them to WebP without perceptibly compromising visual quality. This resulted in an average 39% reduction in file size. We expect that developers will achieve in practice even better file size reduction with WebP when starting from an uncompressed image.

To help you assess WebP’s performance with other formats, we have shared a selection of open-source and classic images along with file sizes so you can visually compare them on this site. We are also releasing a conversion tool that you can use to convert images to the WebP format. We’re looking forward to working with the browser and web developer community on the WebP spec and on adding native support for WebP. While WebP images can’t be viewed until browsers support the format, we are developing a patch for WebKit to provide native support for WebP in an upcoming release of Google Chrome. We plan to add support for a transparency layer, also known as alpha channel in a future update.

We’re excited to hear feedback from the developer community on our discussion group, so download the conversion tool, try it out on your favorite set of images, and let us know what you think.

We’re excited to see developer interest in the upcoming Chrome Web Store, particularly around installable web apps. Many of you have also asked about how extensions and apps differ, and how apps can leverage extension behavior.

To answer these questions and more, we’ve published a new article to help you decide between building extensions and building apps. In the article, you’ll read about how apps and extensions vary from the user’s perspective and how they compare in their internal architecture and capabilities. We’ve also included a deep dive on the concept of packaged apps as a blend of app and extension behaviour.

We hope this article helps clarify the distinction between pure extensions, packaged apps, and hosted apps so that you can choose the approach that makes the most sense for your work and your users. To learn more about installable webs apps and ask questions to our team, check out our discussion group. We look forward to getting your feedback!

We’re excited to share with you some new features that we just added to the developer preview of the Chrome Web Store:

Starting today, you can sign up for a Google Checkout merchant account via your developer dashboard. If you’re planning to use Chrome Web Store Payments to charge for apps, you’ll need to complete this setup before you can accept payments. If you already have a merchant account with Google Checkout, you’ll be able to associate it with your items in the store. Signing up for Chrome Web Store Payments is currently available to developers based in the US who have a US bank account. We’re working hard to also enable payments for international developers and will update you with a blog post once we have more details. If you have more questions about setting up your merchant account, see this help article we created.

We also added the ability to see how your app will appear in the store. When you preview an uploaded app, you’ll see our new design of the app’s landing page. As before, your apps are only visible to you during the developer preview until the store launches later this year.

We added several options to help you customize this page with your own header image and a larger icon. You can also upload promotional images for your app now, which will appear as banners whenever your app is featured in the store. To learn more about these new options, we encourage you to read our guidelines about creating good images and icons for apps in the store.


We’ll continue to work on the web store design and add polish, but with today’s launch you can get your app’s landing page ready for the launch. For questions and feedback, we invite you to join our developer discussion group and come back to the Chromium blog for more announcements about the Chrome Web Store.

Today, we’re very happy to take the Beta tag off of Google Chrome Frame and promote it to the Stable channel. This stable channel release provides our most polished version of Google Chrome Frame to date, allowing users to access modern web technologies like HTML5 on legacy browsers. You now can download the stable version of Google Chrome Frame and users of the Beta will be automatically updated to it in the days ahead. If you’re an IT administrator, we’ve also posted an MSI installer for deploying Google Chrome Frame in your network.

When Google Chrome Frame went into beta in June, the team set aggressive goals for speed and stability before delivering a stable channel release. We wanted it to start much faster and to reduce crashes by an order of magnitude. After months of polishing, Google Chrome Frame now starts three times faster on Windows Vista and Windows 7 and the most common conflicts with other plug-ins have been fixed.

Thanks in part to how simple it is to enable rendering with Google Chrome Frame, sites like DeviantART, Hootsuite, and github have added support, and Ruby on Rails is making a better-performing, more standards compliant experience the default for all users of Rails apps. Google applications like Orkut, Google Docs, and YouTube have already begun adding Google Chrome Frame support. Gmail and Google Calendar are planning to adopt Google Chrome Frame in the near future to improve performance and ease the transition for users as they drop support for legacy browsers.


A stable release is just the beginning for Google Chrome Frame. We’ve set aggressive goals for future releases: we’re working on making start-up speed even faster and removing the current requirement for administrator rights to install the plug-in. Expect more improvements and features in the near future, as we plan to release on the same schedule as Google Chrome.

We would not have made it this far without strong community support and feedback. The users and contributors to the preview versions have helped improve and shape the product in huge ways. If you’d like to get involved or just see what’s coming soon, you can subscribe to the new beta channel or if you are adventurous, try the dev channel to experience the very latest. The whole team continues to listen to your feedback through our project forum and we look forward to working with you to improve Google Chrome Frame even further.

The Google Chrome team is hitting the road. From now through October, we’re giving 21 talks about HTML5 and related Google Chrome topics at 16 events, in 16 cities and 9 countries, and on 4 continents. Phew!

Check out our schedule below. Registration for almost all these events is open, so come say hi and learn a thing or two about HTML5.

DateLocationsEventTopicsSpeakers
9/24Atlanta, United StatesWeb Directions USAHTML5Michael Mahemoff
9/25San Francisco, United StatesTechCrunch Disrupt Hack DayChrome Web StoreSeth Ladd
9/26Berlin, GermanyJSConf EUHTML5Paul Irish
9/28Tokyo, Japan; Kyoto, JapanGoogle Developer Day Japan (Japanese)Installable Web Apps, Google Chrome Extensions, Google Chrome Developer ToolsEiji Kitamura, Mikhail Naganov, Alexei Masterov
9/29New York, United StatesNYC GTUG MeetupChrome Web StoreJan Kleinert
10/1Taipei City, TaiwanGoogle DevFest TaiwanHTML5Arne Roomann-Kurrik
10/2New York, United StatesOpen Video ConferenceHTML5Paul Irish
10/5Hong Kong Island, Hong KongGoogle DevFest Hong KongHTML5Arne Roomann-Kurrik
10/8Amsterdam, NetherlandsFronteers ConferenceHTML5Paul Irish
10/8Jakarta, IndonesiaGoogle DevFest IndonesiaHTML5Arne Roomann-Kurrik
10/9Hilversum, Netherlands; San Francisco, United StatesHTML5 Game JamHTML5Marcin Wichary, Paul Irish
10/9Los Altos Hills, United StatesSilicon Valley Code CampHTML5, Installable Web Apps, Google Chrome Extensions, Chrome Web Store, Native ClientEric Bidelman, Ernest Delgado
10/10Bangkok, ThailandGoogle DevFest ThailandHTML5Arne Roomann-Kurrik
10/15Aizu-Wakamatsu City, JapanAizu IT Forum (Japanese)HTML5Eiji Kitamura
10/16Boston, United StatesjQuery Boston ConferenceHTML5Paul Irish
10/29São Paulo, BrazilGoogle Developer Day BrazilHTML5, Installable Web Apps, Google Chrome Extensions, Chrome Web Store, Google Chrome Developer Tools, Native Client, Google Chrome FrameEric Bidelman, Ernest Delgado

Since our previous post, we've made good progress on 2D graphics performance: 2D canvas acceleration is now available in trunk and the canary build by using the --enable-accelerated-2d-canvas command-line switch (coming to the developer channel shortly). We’ve also been hard at work improving our 3D graphics stack. Today, we’re excited to release a set of WebGL demos to help highlight what you can do with the API.

Chromium’s 2D canvas acceleration uses the same GPU process infrastructure as the compositor, which is designed to maintain the same stability and security Chromium has always had. In addition, this system picks the best graphics API to use on each OS that Chromium supports: Windows XP/Vista/7, Mac OS and Linux. We haven’t finished implementing accelerated 2D canvas support – there’s no Mac support and some functions are not accelerated yet – but Chromium already achieves some impressive gains on the recent IE9 Platform Preview Test Drive 2D canvas demos:

These early numbers show up to 60x speed improvement over the current version of Google Chrome. With Google Chrome’s fast release cycles, we expect to be able to get these enhancements to users quickly and add new performance improvements over time.

We’re excited to give developers fast 2D graphics, but we think truly hardware accelerating graphics on the web means giving developers access to a programmable 3D graphics pipeline with WebGL. Even with accelerated 2D canvas and SVG, it’s still not possible to achieve many graphics effects with these APIs. (To read more about the progression from dynamic 2D to CSS Transforms and WebGL, check out our recent blog post). With WebGL and 3D CSS, developers can create modern games, impressive photo galleries, 3D data visualizations, virtual environments, and whatever else they can dream up.

To give you a taste for what WebGL can do, we’ve worked with a number of talented artists and developers to create the first round of a series of demos, ranging from a realistic aquarium to a 3D wall of photos. We hope these demos help demonstrate even more immersive experiences made possible with these APIs. So check out our demo gallery with an up-to-date canary build or Chromium build and have some fun with using your GPU in the browser! For a quick peek at some of these demos, you can watch our playlist of preview videos:


Recently, we posted about the work we’re doing to re-architect Chromium’s graphics stack and use the GPU to accelerate rendering. As we mentioned last time, this work will help ensure that developers can take full advantage of emerging graphics standards like 3D CSS and WebGL in Chromium. To get more feedback about these cool new features, we’re enabling hardware compositing along with 3D CSS transforms and WebGL on the trunk (coming soon to the dev channel). These new capabilities are major additions to the web platform, so we wanted to take the time to provide some background information and explain how these new capabilities fit into the web.

SVG and canvas: dynamic 2D

Until recently, it wasn’t possible to create any dynamic (i.e. non-image) graphics on the web without a plug-in. Starting in 2005, this began to change as browsers began to add Scalable Vector Graphics (SVG) and HTML 2D canvas element support. Both SVG and 2D canvas allow you to compose a 2D image at run time and manipulate it to achieve animation effects, but they vary greatly in their approach to specifying how you draw an image.


<?xml version="1.0"?>
<!DOCTYPE svg PUBLIC
"-//W3C//DTD SVG 1.1//EN"
"http://www.w3.org/Graphics/SVG/1.1/DTD/svg11.dtd">
<svg xmlns="http://www.w3.org/2000/svg" xmlns:xlink="http://www.w3.org/1999/xlink">
<path style="stroke-width:1; fill:rgb(246,127,0); stroke:none" d="M204.33 13..."/>
<path style="stroke-width:1; fill:rgb(0,0,0); stroke:none" d="M203.62 139.62..." />
<path style="stroke-width:1; fill:rgb(255,246,227); stroke:none"
d="M363.73 85.73 C359.27 86.29 355.23 86.73..."/>
</svg>

*note: ellipses replace many more points

d = document.getElementById("c");
c = d.getContext("2d");
...
i = 25;
while (i--) {
c.beginPath();
...
q = (R / r - 1) * t;
// create hypotrochoid from current mouse position, and setup variables (see: http://en.wikipedia.org/wiki/Hypotrochoid)
x = (R - r) * C(t) + D * C(q) + ...
y = (R - r) * S(t) - D * S(q) + ...
if (a) {
// draw once two points are set
c.moveTo(a, b);
c.lineTo(x, y)
}
c.strokeStyle = "hsla(" + (U % 360) + ",100%,50%,0.75)";
// draw rainbow hypotrochoid
c.stroke();
...
} *note: ellipses replace code


The images above were created with SVG and canvas, but as you can see from the code, they approach graphics in a very different way: SVG allows you to provide markup that describes an image, whereas canvas allows you to describe a set of sequential steps that draw an image in JavaScript. These approaches mean that a developer changes an image that’s already been drawn, such as when animating an image, in different ways. Because the browser keeps a full representation of an SVG image, changing just a parameter in the image is enough to cause the browser to redraw the image correctly. With canvas, on the other hand, the developer must clear the image and specify all the steps to draw it again with the desired changes.

Today, modern browsers, including Firefox, Safari, Opera and Google Chrome support creating 2D graphics with these technologies, and Internet Explorer is adding support for them in the upcoming version 9 release.

CSS Transforms: easy to use 2D and 3D effects

Even today, people primarily use apps that don’t strictly require advanced graphics, but eye candy like 3D transforms, transitions and reflections still help improve the experience of everyday tasks. While canvas could be used to create many of these effects, it can’t render them efficiently, and it would be hard to integrate with the other content on the page.

CSS transforms and animations, which first appeared in WebKit in 2007, allow developers to achieve commonly used effects easily by specifying parameters in CSS that are applied to content in the DOM. In 2009, WebKit began adding 3D CSS transforms and effects, which takes flat content on the page and makes it appear as if it were in 3D space.


/* CUBE */
#transitions #cube {
-webkit-transform-style: preserve-3d;
width: 600px;
height: 400px;
position: absolute;
}
#transitions #cube.active {
-webkit-animation-duration: 1s;
-webkit-animation-iteration-count: 1;
-webkit-animation-name: cubedemo;
-webkit-transform: rotateX(-90deg);
}
#transitions #cube .face {
position: absolute;
width: 600px;
height: 400px;
display: block;
overflow: hidden;
}
#transitions #cube .front {
-webkit-transform: scale3d(.835,.835,.835) translateZ(200px);
}
#transitions #cube .back {
-webkit-transform: scale3d(.835,.835,.835) rotateY(180deg) translateZ(200px);
}
#transitions #cube .top {
-webkit-transform: scale3d(.835,.835,.835) rotateX(90deg) translateZ(200px);
}

@-webkit-keyframes cubedemo {
0% {-webkit-transform: rotateX(0); -webkit-animation-timing-function: linear; }
50% {-webkit-transform: rotateX(-92deg);-webkit-animation-timing-function: ease-in; }
70% {-webkit-transform: rotateX(-84deg); -webkit-animation-timing-function: ease-in; }
80% {-webkit-transform: rotateX(-90deg); -webkit-animation-timing-function: ease-in; }
95% {-webkit-transform: rotateX(-88deg); -webkit-animation-timing-function: ease-in; }
100% { -webkit-transform: rotateX(-90deg); }
}

As you can see from this example, 3D CSS transforms and animations make it easy to add polished 3D effects to your app. Now that we support hardware compositing in Chromium, it’s easy to perform these transforms on the GPU and display it quickly on screen, so we’ve enabled them along with the compositor. Currently, this functionality is only available in Safari and Google Chrome but Firefox is working on an implementation as well, making it a great option to add impressive effects to your app in the future.

WebGL: Low-level dynamic 3D

While 3D CSS makes it easy to display 2D content so that it looks like it’s in a 3D space, it’s not designed for writing true 3D applications like CAD software or modern games. WebGL, on the other hand, provides access to all the functionality of OpenGL ES 2.0 from JavaScript, and is designed with exactly these types of applications in mind.

(link requires a WebGL-enabled browser)

(link requires a WebGL-enabled browser)

With WebGL you can navigate 3D environments, rotate around objects with volume, add realistic lighting, and render shadows and reflections like those above. Creating a scene like this just wouldn’t be possible in real-time with 3D CSS, let alone a 2D canvas or SVG. To achieve these effects, you need direct access to graphics hardware – which is exactly what WebGL provides.

With power comes complexity, so there is definitely a learning curve to using WebGL. The good news is that because it’s based on OpenGL ES 2.0, it should be familiar to people with graphics programming experience. A number of JavaScript libraries that make WebGL more accessible are already available, for example, the examples above use two frameworks: SpiderGL and the WebGL implementation of O3D. As the technology matures, expect to see other tools and libraries emerge to make it even easier to author content. A popular blog in the community, Learning WebGL has done a great job of keeping up with the latest libraries, tools and demos and has a substantial archive of WebGL resources.

Mozilla, Apple, Opera and Google are all working on putting the finishing touches on the WebGL spec in a Khronos working group, which is expected to hit v1.0 by the end of the year, but we’ve turned it on by default to get early feedback on Chromium’s implementation.

Thanks for reading to the end, we hope this helps explain the current state of graphics on the Web!


If you’re using the Google Chrome Extensions Gallery to publish your extensions, we just added support for Google Analytics, which can help you better understand how many people visit your extension pages, where they’re coming from and more.

Starting today, you can specify a Google Analytics profile for each of your extensions. This will start tracking the extension’s page in your Google Analytics account as if that page was part of your own site. See these instructions for more information on how to set this up.


You can also use Google Analytics to track the usage of your extension once it’s installed. Check out this tutorial that explains how to integrate Google Analytics such that you can analyze how users interact with the features of your extensions.

For questions about this new feature, we encourage you to visit our developer discussion group and share your feedback with us.

We recently released a developer preview of the Chrome Web Store, which included new documentation about our upcoming payments and licensing API. With this blog post, we wanted to share a quick overview and some tips about this API so that you can start developing your apps with it.

The Chrome Web Store will offer a built-in payments system that allows you to charge for apps, making it easy for users to pay without leaving the store. If you want to work with this payments system in your apps, you can use the Chrome Web Store Licensing API to verify whether a given user has paid and should have access to your app. Here’s how the API works:

The Licensing API has two inputs: the app ID and the user ID. The app ID is a unique identifier that’s assigned to each item uploaded to the store. You can see it most easily in the URL of your detail page—for example, .../detail/aihcahmgecmbnbcchbopgniflfhgnkff.

The user ID is the OpenID URL corresponding to the user’s Google Account. You can get the OpenID URL for the current user either by using Google App Engine’s built-in OpenID support or by using a standard OpenID library and Google’s OpenID endpoint.

Given the app ID and the user ID, you make Licensing API requests using this URI:

https://www.googleapis.com/chromewebstore/v1/licenses/<appID>/<userID>

When your app makes an HTTP request to the Licensing API, the app needs to be authenticated. The app is authenticated by matching your Google Account that uploaded the app to the Google Account used to call the API.

There are a few ways the app can indicate the Google Account used to make the API call. For the Chrome Web Store Licensing API, we highly recommend the use of OAuth for Web Applications. In this approach, OAuth access tokens are used to identify the Google Account calling the API.

You can obtain the necessary token via the Chrome Developer Dashboard by clicking the “AuthToken” link for your app. (This link appears only if your app uses Chrome Web Store Payments.) You’ll need this OAuth token to sign the HTTP requests to call the Licensing API. The best way to sign your requests is with a standard OAuth library.

The OAuth tokens that the Chrome Developer Dashboard provides are limited in scope, which means that they can only be used to make Licensing API calls. They can’t be used to make calls to other authenticated Google APIs or for anything else.

Once you’re ready to make authenticated calls, give the API a try by making your first request. For more information read the Licensing API docs, try out the Getting Started tutorial, check out the samples, and watch the video below:


Note that current version of the Licensing API is a stub, which means that it doesn’t return live data that’s based on purchases just yet. Instead, it returns dummy responses that you can use to verify the various scenarios of your implementation. However the protocol, response format, and URL endpoints of the API are all final, so your implementation shouldn’t need to change before the final launch of the store.

We look forward to receiving your feedback on the current Licensing API implementation at our developer discussion group.

For some time now, there’s been a lot of work going on to overhaul Chromium’s graphics system. New APIs and markup like WebGL and 3D CSS transforms are a major motivation for this work, but it also lets Chromium begin to take advantage of the GPU to speed up its entire drawing model, including many common 2D operations such as compositing and image scaling. As a lot of that work has been landing in tip-of-tree Chromium lately, we figured it was time for a primer.

At its core, this graphics work relies on a new process (yes, another one) called the GPU process. The GPU process accepts graphics commands from the renderer process and pushes them to OpenGL or Direct3D (via ANGLE). Normally, renderer processes wouldn’t be able to access these APIs, so the GPU process runs in a modified sandbox. Creating a specialized process like this allows Chromium’s sandbox to continue to contain as much as possbile: the renderer process is still unable to access the system’s graphics APIs, and the GPU process contains less logic.

With this basic piece of infrastructure, we’ve started accelerating some content in Chromium. A web page can naturally be divided into a number of more or less independent layers. Layers can contain text styled with CSS, images, videos, and WebGL or 2D canvases. Currently, most of the common layer contents, including text and images, are still rendered on the CPU and are simply handed off to the compositor for the final display. Other layers use the GPU to accelerate needed operations that touch a lot of pixels. Video layers, for example, can now do color conversion and scaling in a shader on the GPU. Finally, there are some layers that can be fully rendered on the GPU, such as those containing WebGL elements.

After these layers are rendered, there’s still a crucial last step to blend them all onto a single page as quickly as possible. Performing this last step on the CPU would have erased most of the performance gains achieved by accelerating individual layers, so Chromium now composites layers on the GPU when run with the --enable-accelerated-compositing flag.

If you’d like to read more about this work, take a look at this design doc which outlines Chromium’s accelerated compositing system. Over time, we’re looking into moving even more of the rendering from the CPU to the GPU to achieve impressive speedups.


Foreword: When we released Google Chrome almost two years ago, we also released the source code under an open-source license. Just as Firefox, WebKit, and other open source projects helped to drive the web forward, we wanted to follow suit and ensure that others could use the code we developed to make their products better. The Chromium codebase provides a complete browser to build on, so that if you want to focus on one particular piece, such as drastically changing the user interface, you can do that without having to worry about how to get amazing performance in the rest of the browser.

Recently, Flock released a new beta version of their browser built on top of the Chromium codebase. For those of us in the Chromium project, this is extremely exciting and encouraging. We believe that users having a choice between multiple browsers is a great thing, as it spurs innovation and competition, and lets users choose a browser that provides the best experience for them. Flock brings an innovative approach to their "social web browser," and we are glad to welcome them into the Chromium community. As part of that, we wanted to offer the team behind Flock an opportunity to talk about the ideas behind Flock, how Chromium helped them in achieving their goals, and their vision for the future. What follows is a perspective from Clayton Stark, VP Engineering at Flock.

When Flock began developing its first web browser five years ago, "the social web" was a small, niche market. Today social is the mainstream web, and this evolution in the market drove our development roadmap. With the new Flock browser, our engineering team focused on designing a straightforward and integrated social dashboard that delivers an experience simple enough for a mass audience. This is where the technology behind Chromium came into the picture for Flock. As Chromium emerged, we saw that not only was there significant improvements to performance, but also apparent was a simple and elegant user interface and architecture across all the various systems.

A core goal of new Flock is to keep our users in touch with all of their friends and feeds with a minimum of configuration, and at the same time, make it fun and simple. With all of the users’ feeds and social activity streams flowing into the scrolling sidebar, we knew the performance had to be first-rate, and that techniques we used for earlier versions of Flock were unlikely to perform at scale. With Chromium under the hood, we were able to leverage web workers, and that, combined with the raw horsepower of V8, allowed us to scale the use of the sidebar to manage very large data sets (in the first few weeks after the beta launched we saw a few hundred million activities flowing into Flock’s sidebar). Most importantly, benchmark testing shows us that New Flock with Chromium performs in the top-tier of all browsers available in the market.

Clearly the web is evolving very quickly, and we are seeing more and more people discovering content through their friends. The Flock team is energized by the big developments coming fast in this emerging, interest-graph-enabled web, and we have a roadmap in front of us that we are really excited about. The browsing platform needs to continue to mature at a rapid pace to support the dramatic changes in online user behavior. And, as it does, we already see the performance and power in Chromium that we need to allow us to focus on the innovations we want to bring forward, on top of the platform.

So, I’d like to send out a huge thanks on behalf of the Flock team to all those who have contributed to the Chromium project. Your work has made our project possible, and made new Flock our best release ever.

Clayton Stark, VP Engineering
Flock, Inc.

Since we launched the Google Chrome extension system, one of the most frequent requests we’ve gotten is to add the ability to integrate with the context menu (the menu that pops up when you right-click on a link, image, or web page).


Now in Google Chrome Beta, developers can do just that. The new context menu API allows extension developers to register menu items for all pages or for a subset of pages. Developers can also register menu items for specific operations, like right-clicking on an image or movie. For example, you could create an extension that makes it easy for users to share interesting images from images.google.com with their friends on Google Buzz.

Some users have lots of extensions installed. To help these users avoid ending up with gigantic unwieldy context menus, Google Chrome automatically groups multiple menu items from the same extension into a sub-menu.


We’d also like to announce two new experimental APIs. These APIs aren’t quite ready for prime-time yet, but we’re really excited about them and couldn’t wait to get your feedback.
  • The omnibox API allows extension developers to integrate with the browser’s omnibox. With this API, you can build custom search support for your favorite website, keyboard macros to automate tasks, or even a chat client right into the omnibox.
  • The infobars API allows extension developers to display infobars across the top of a tab. These infobars are built using normal HTML, so they can be heavily customized and interactive.
For the complete list of new extension APIs in Google Chrome beta, see the docs. And let us know if you make something cool. If we like it, we’ll send you a free extensions hoodie and may even feature you in the gallery.

We look forward to seeing what you come up with!

Since our announcement of the Chrome Web Store at Google I/O, our team has been hard at work preparing for our launch later this year. Today we’re making the first step towards this milestone by making available a developer preview of the Chrome Web Store.

Developers can now start uploading apps and experiment with packaging them, installing them in Chrome (using the latest Chrome dev channel) and integrating our payments and user authentication infrastructure.

To get started, take a look at our recently updated documentation for installable web apps, which explains how to prepare and package your apps. You should also review some additional documentation we just released on the store’s licensing and user authentication features.

To upload your app, you’ll need to use the upload flow of the Google Chrome Extensions Gallery .


When the Chrome Web Store launches, it will replace the current gallery, featuring a completely new design for users to discover great apps, extensions and themes all in one place. Until then, only you can see the apps you upload - they will not be visible to other visitors of the gallery during this developer preview. In the meantime, you can continue to use the gallery for publishing Chrome extensions and making them available to Chrome users.

We look forward to sharing more news about the store and its features over the next weeks. Meanwhile, we encourage you to subscribe to our developer discussion group for apps and look for updates on the Chromium blog.

Since we introduced extensions in Google Chrome, we focused on making the platform more robust, by continuously exposing new APIs to developers. This has helped our extensions gallery blossom where more than 6,000 extensions are listed today and more than 10 million extensions are downloaded by Chrome users every month.

We designed security into the extensions system from day 1 but we’re always looking for more ways to protect users. So, today, we are introducing two significant changes in the Google Chrome Extensions Gallery: a developer signup fee and a domain verification system.

The developer signup fee is a one-time payment of $5. It is intended to create better safeguards against fraudulent extensions in the gallery and limit the activity of malicious developer accounts. Starting today, this fee will be required to publish extensions, themes and soon apps in the gallery. We are waiving the fee for developers who already registered with the gallery (specifically before 11am PST today), so that they can continue to update their extensions and publish new items without paying the fee.

Domain verification is another addition that we believe will protect users and developers alike. Developers will be able to associate their extensions (and soon their apps) with domains they own or manage using Google’s Webmaster Tools. This way, they can clearly associate their extension with their brand and website, which in turn will help users identify “official” extensions in the gallery.


We believe that these are important improvements to the security of the gallery. We understand that changes like these can create a lot of questions, so please reach out to us on our developer discussion group for extensions.


We think HTML5 will make your work more engaging and create a faster, more responsive experience for your users, so we're happy to add today a slew of new content to html5rocks.com.

If you want to not only get up to speed, but understand the browser differences and techniques for a robust implementation, please take a look through the new guides for implementing HTML5 video, understanding "offline," auditing your webapp with the Chrome developer tools, and using web workers and @font-face. You can now comment about your experiences with these features and stay up to date on new content via our new RSS feed.

We're also sharing the new HTML5 Studio, a collection of samples of these features in use, with code you can learn from and hack on.


If you'd like to contribute code, guides, or samples, please get in touch on the bug tracker or on @ChromiumDev. We'd love to incorporate your work.

Since Google Chrome launched almost 2 years ago, the team has embraced the “launch early and often” strategy by releasing Dev channel builds almost weekly. But sometimes, such as when we’re in the process of moving a Dev channel release to the Beta channel, we’re unable to release a new Dev channel build, and other times, even a week is too long to wait to get feedback from the field on a change.

The team considered updating the Dev channel more frequently, but doing so would require us to forgo our manual testing pass on these builds. Even though the Dev channel is often rough around the edges, we realized that this lack of testing would result in a Dev channel that’s too unstable even for early adopters and developers. That’s why, a few days ago, we released a new experimental version of Google Chrome called Google Chrome Canary Build. We plan to update the Canary Build more frequently than the Dev channel, with riskier changes, and usually without a human being ever verifying that it works, so the Canary Build is only for users who want to help test Google Chrome and are comfortable using a highly unstable browser that will often break entirely. To enable you to continue using the same browser you love when the canary croaks, we’ve made it possible to install the Canary Build in addition to the Dev, Beta or Stable channel versions of Google Chrome.

The Canary Build is still brand new so it currently has a few limitations. Currently, it’s only available for Windows and cannot be set as your default browser. You can star the issues for Mac and Linux support, as well as the issue for default browser support to cast your vote and be notified of progress there.

If you like to live on the bleeding edge, give the Google Chrome Canary Build a shot and let us know what you think. The early feedback on crashes, performance regressions, broken features and other problems is incredibly valuable to us, so thanks!

The Web Timing draft specification presents a standard set of metrics for measuring web page load time across browsers. We’re happy to announce that in Chrome 6, web developers can now access these new metrics under window.webkitPerformance.

Measuring web page load time is a notoriously tricky but important endeavor. One of the most common challenges is simply getting a true start time. Historically, the earliest a web page could reliably begin measurement is when the browser begins to parse an HTML document (by marking a start time in a <script> block at the top of the document).

Unfortunately, that is too late to include a significant portion of the time web surfers spend waiting for the page: much of the time is spent fetching the page from the web server. To address this shortcoming, some clever web developers work around the problem by storing the navigation start time in a cookie during the previous page’s onbeforeunload handler. However, this doesn’t work for the critical first page load which likely has a cold cache.

Web Timing now gives developers the ability to measure the true page load time by including the time to request, generate, and receive the HTML document. The timeline below illustrates the metrics it provides. The vertical line labeled "Legacy navigation started" is the earliest time a web page can reliably measure without Web Timing. In this case, instead of a misleading 80ms load time, it is now possible to see that the user actually experienced a 274ms time. Including this missing phase will make your measurements appear to increase. It’s not because pages are getting slower – we’re just getting a better view on where the time is actually being spent.


Across other browsers: Web Timing metrics are under window.msPerformance in the third platform preview of Internet Explorer 9 and work is underway to add window.mozPerformance to Firefox. The specification is still being finalized, so expect slight changes before the browser prefixes are dropped. If you’re running a supported browser, please try the Web Timing demonstration and send us feedback.