Shower Room
| Shower Room | |
|---|---|

| |
| Location | Perplexing Pool |
| Sublevels | 7 |
| Treasures | 14 |
| Hazards | |
|
The following article or section contains guides. |
The Shower Room (シャワールーム?, lit.: "Shower Room") is a cave found in the Perplexing Pool area of Pikmin 2, the sublevels of which are themed around tiled washrooms and piping systems. The boss of the cave is the Ranging Bloyster. Due to the Bloyster's leader swapping gimmick, it’s recommended for one to take extra care in keeping both leaders alive. In the US version of this cave, there are × 1220 worth of treasure. In the European version of this cave, there are
× 1240 worth of treasure. In the Japanese version of this cave, there are
× 1140 worth of treasure.
How to reach[edit]
To the right of base is a large pond containing a Toady Bloyster. By going into this pond, you can find a bridge. Build this bridge, and use the ledge that was required in Pikmin to collect the Repair-type Bolt to bring Yellow Pikmin across the river, and have them destroy the electric gate. Use Blue Pikmin to destroy the clog, revealing the cave. A side effect of destroying the clog is that all Pikmin types can cross the river.
There are few special considerations in terms of Pikmin squads. However, there are a few heavy treasures that might appear in water, making sufficient Blue Pikmin a must.
One can use the bridge's geometry to get a leader on top of the nearby ledge, and go out of bounds to the entrance of the cave without having to destroy the electric gate.[1]
Notes
Ship's dialogs
“A large rock sits in a reservoir of water. May I interject here?
I have been observing the two of you working together. You have been cooperating well.
Yet, to face the dangers ahead, you must be free of the shackles of a boss-worker relationship!
Learn to use X to separate and Y to change leaders.
If you can master teamwork, you can overcome any impediment!”Sublevel 1[edit]
- Theme: Tiles
- Music: Tile
- Treasures:
Merciless Extractor (US) /
Divine Cooking Tool (Europe/Japan)
- Enemies:
Mitite (group of 10) × indefinite amount (from eggs)
Watery Blowhog × 2
Wolpole × 7
Wollyhop × 2
- Obstacles:
Boulder × 3
Electrical wire × 3
- Vegetation:
Ivory Candypop Bud × 1 (if max Pikmin requirement is met)
- Others:
Egg × 1 or more
Electrical wires should block the paths, sometimes with Watery Blowhogs nearby. In this instance, Yellow Pikmin should still be used to shut off the wires because they can still be easily saved from any water. Apart from the enemies, some boulders may fall from the ceiling. However, the level has a simple layout, so the treasure should be easy to find. The Ivory Candypop Bud here only appears if the player has less than 20 White Pikmin in total.
Humorously, Wolpoles will occasionally drop from the sky, and since they are not in water, they will flail about helplessly and pose no problem for the player.
| Technical sublevel information | |||||
|---|---|---|---|---|---|
| Internal cave name | yakushima_3 | ||||
| "Main" object maximum (?) | 14 | ||||
| "Treasure" object maximum (?) | 1 | ||||
| "Gate" object maximum (?) | 0 | ||||
| Dead end unit probability (?) | 60 | ||||
| Number of rooms (?) | 3 | ||||
| Corridor-to-room ratio (?) | 0.1 | ||||
| Escape geyser (?) | No | ||||
| Clogged hole (?) | No | ||||
| Cave units file (?) | 3_units_a_d_north_tile.txt | ||||
| Lighting file (?) | suityu_light_lv0.ini | ||||
| Background (?) | None | ||||
| Cave units (?) | |||||
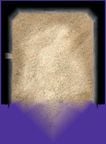
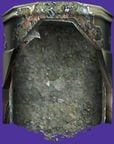
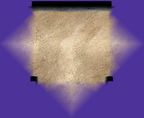
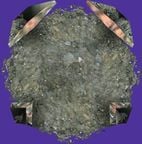
| Dead end | Dead end with item | Dead end with item | Three-way crossing | Four-way crossing | Turning corridor |
| Corridor | Long corridor | Room with 4 exits | Room with 4 exits | Square room with 1 exit | |
| Detailed object list | ||||
|---|---|---|---|---|
| The game spawns these "main" objects: | ||||
| ID | Object | Amount | Fall method | Spawn location |
| 1 | 1 | None | "Hard" enemy spots | |
| 2 | 2 | None | "Hard" enemy spots | |
| 3 | 3 | None | "Hard" enemy spots | |
| 4 | 3 | Falls from the sky | "Hard" enemy spots | |
| 5 | 2 | Falls from the sky | "Easy" enemy spots | |
| 6 | 3 | None | Cave unit seams | |
| Then it spawns these "treasure" objects: | ||||
| ID | Object | Amount | Fall method | Spawn location |
| 7 | 1 | None | Treasure spots | |
| Then it spawns these "dead end" objects: | ||||
| ID | Object | Amount | Fall method | Spawn location |
| 8 | 1 | None | Dead ends | |
| 9 | 1 | None | Dead ends | |
| 10 | 2 | Falls from the sky | Dead ends | |
| 11 | 1 | Falls from the sky | Dead ends | |
| Then it spawns "dead end" objects in as many dead ends as it can. Chances: | ||||
| ID | Object | Chance | Fall method | Spawn location |
| 9 | 100% | None | Dead ends | |
- For details on how objects are spawned, and how some may fail to spawn, see here.
Sublevel 2[edit]
- Theme: Tiles
- Music: Jellyfloat
- Treasures:
Durable Energy Cell (US/Europe) /
Revised Eternal Fuel Dynamo (Japan)
Sud Generator
- Enemies:
Dwarf Orange Bulborb × 6
Lesser Spotted Jellyfloat × 1
Mitite (group of 10) × indefinite amount (from eggs)
Orange Bulborb × 1
- Obstacles:
Boulder × 3
Poison emitter × 3
- Vegetation:
Violet Candypop Bud × 1 (if max Pikmin requirement is met)
- Others:
Apart from the boulders, Dwarf Orange Bulborbs fall from the ceiling as well. They could become a nuisance when attacking the Jellyfloat or the larger Orange Bulborb. The Violet Candypop Bud here will only appear if the player's total Purple Pikmin count is less than 20.
| Technical sublevel information | |||||
|---|---|---|---|---|---|
| Internal cave name | yakushima_3 | ||||
| "Main" object maximum (?) | 10 | ||||
| "Treasure" object maximum (?) | 2 | ||||
| "Gate" object maximum (?) | 1 | ||||
| Dead end unit probability (?) | 50 | ||||
| Number of rooms (?) | 2 | ||||
| Corridor-to-room ratio (?) | 0.2 | ||||
| Escape geyser (?) | No | ||||
| Clogged hole (?) | No | ||||
| Cave units file (?) | 2_units_ud_dry_tile.txt | ||||
| Lighting file (?) | suityu_light_lv1.ini | ||||
| Background (?) | None | ||||
| Cave units (?) | |||||
| Dead end with item | Three-way crossing | Four-way crossing | Long corridor | Dead end | Dead end with item |
| Turning corridor | Corridor | Room with 2 ramps | Room with waterless pool | ||
| Detailed object list | ||||
|---|---|---|---|---|
| The game spawns these "main" objects: | ||||
| ID | Object | Amount | Fall method | Spawn location |
| 1 | 1 | None | "Hard" enemy spots | |
| 2 | 1 | None | "Hard" enemy spots | |
| 3 | 3 | None | "Hard" enemy spots | |
| 4 | 2 | None | "Easy" enemy spots | |
| 5 | 2 | None | "Easy" enemy spots | |
| 6 | 1 | None | Cave unit seams | |
| Then it spawns these "decoration" objects: | ||||
| ID | Object | Amount | Fall method | Spawn location |
| 7 | 2 | None | Plant spots | |
| Then it spawns these "treasure" objects: | ||||
| ID | Object | Amount | Fall method | Spawn location |
| 8 | 1 | None | Treasure spots | |
| 9 | 1 | None | Treasure spots | |
| Then it spawns these "dead end" objects: | ||||
| ID | Object | Amount | Fall method | Spawn location |
| 11 | 1 | None | Dead ends | |
| 12 | 1 | None | Dead ends | |
| 13 | 2 | Falls from the sky | Dead ends | |
| Then it spawns "dead end" objects in as many dead ends as it can. Chances: | ||||
| ID | Object | Chance | Fall method | Spawn location |
| 12 | 100% | None | Dead ends | |
| Then it spawns 1 "gate" objects. Chances: | ||||
| ID | Object | Chance | Fall method | Spawn location |
| 10 | Gate (4000 HP) | 100% | None | Gate spots |
- For details on how objects are spawned, and how some may fail to spawn, see here.
Sublevel 3[edit]
- Theme: Tiles
- Music: Jellyfloat
- Treasures:
Mirrored Stage (inside Greater Spotted Jellyfloat)
Scrumptious Shell
Vorpal Platter
- Enemies:
Greater Spotted Jellyfloat × 1
Hermit Crawmad × 1
Lesser Spotted Jellyfloat × 4
Mitite (group of 10) × indefinite amount (from eggs)
Water Dumple × 4
Wollyhop × 1
- Obstacles:
- None
- Vegetation:
- None
- Others:
Sometimes this level has 6-7 enemies all gathered in one spot; should this happen, a bitter spray would be recommended, or regenerating the sublevel by resetting. Be prepared for any Water Dumples that drop from above.
| Technical sublevel information | |||||
|---|---|---|---|---|---|
| Internal cave name | yakushima_3 | ||||
| "Main" object maximum (?) | 10 | ||||
| "Treasure" object maximum (?) | 2 | ||||
| "Gate" object maximum (?) | 2 | ||||
| Dead end unit probability (?) | 50 | ||||
| Number of rooms (?) | 4 | ||||
| Corridor-to-room ratio (?) | 0 | ||||
| Escape geyser (?) | No | ||||
| Clogged hole (?) | No | ||||
| Cave units file (?) | 4_units_a_d_f_l_tile.txt | ||||
| Lighting file (?) | suityu_light_lv2.ini | ||||
| Background (?) | None | ||||
| Cave units (?) | |||||
| Dead end | Dead end with item | Dead end with item | Three-way crossing | Four-way crossing | Turning corridor |
| Corridor | Long corridor | Room with 4 exits | Room with 4 exits | Room with 4 exits and a raised edge | Room with dead end after U-turn |
| Detailed object list | ||||
|---|---|---|---|---|
| The game spawns these "main" objects: | ||||
| ID | Object | Amount | Fall method | Spawn location |
| 1 | 1 | None | "Hard" enemy spots | |
| - | Carried inside entry with ID 1 | |||
| 2 | 4 | None | "Hard" enemy spots | |
| 3 | 1 | None | "Hard" enemy spots | |
| 4 | 3 | None | "Hard" enemy spots | |
| 5 | 1 | Falls from the sky | "Hard" enemy spots | |
| Then it spawns these "treasure" objects: | ||||
| ID | Object | Amount | Fall method | Spawn location |
| 6 | 1 | None | Treasure spots | |
| 7 | 1 | None | Treasure spots | |
| Then it spawns these "dead end" objects: | ||||
| ID | Object | Amount | Fall method | Spawn location |
| 9 | 1 | None | Dead ends | |
| 10 | 1 | Falls from the sky | Dead ends | |
| Then it spawns "dead end" objects in as many dead ends as it can. Chances: | ||||
| ID | Object | Chance | Fall method | Spawn location |
| 9 | 100% | None | Dead ends | |
| Then it spawns 2 "gate" objects. Chances: | ||||
| ID | Object | Chance | Fall method | Spawn location |
| 8 | Gate (4000 HP) | 100% | None | Gate spots |
- For details on how objects are spawned, and how some may fail to spawn, see here.
Sublevel 4[edit]
- Theme: Concrete
- Music: Relax
- Treasures:
- Enemies:
Unmarked Spectralids (group of 9) × 1
- Obstacles:
- None
- Vegetation:
Clover × 7
Fiddlehead × 4
Figwort (small brown) × 6
Figwort (small red) × 3
Queen Candypop Bud × 2
- Others:
- None
A very large rest level. This is a unique level layout, only seen once in the main game mode. It appears to take the place in some pipes and under a street drainage vent. There are some Queen Candypop Buds here. Also, if you need to leave, there is a geyser available. Although water flows through the pipes, it is shallow enough so that any Pikmin type can pass through without any trouble. This rest level is also similar to the Hidden Garden, Challenge Mode's twenty-third level, with a few minor changes.
| Technical sublevel information | |||||
|---|---|---|---|---|---|
| Internal cave name | yakushima_3 | ||||
| "Main" object maximum (?) | 15 | ||||
| "Treasure" object maximum (?) | 1 | ||||
| "Gate" object maximum (?) | 0 | ||||
| Dead end unit probability (?) | 0 | ||||
| Number of rooms (?) | 1 | ||||
| Corridor-to-room ratio (?) | 0 | ||||
| Escape geyser (?) | Yes | ||||
| Clogged hole (?) | No | ||||
| Cave units file (?) | 1_unit_16x17r_conc.txt | ||||
| Lighting file (?) | yakushima_3_16x17r_light.ini | ||||
| Background (?) | None | ||||
| Cave units (?) | |||||
| Huge rest room | |||||
| Detailed object list | ||||
|---|---|---|---|---|
| The game spawns these "main" objects: | ||||
| ID | Object | Amount | Fall method | Spawn location |
| 1 | 2 | None | "Hard" enemy spots | |
| 2 | 1 | None | "Hard" enemy spots | |
| 3 | 1 | None | "Easy" enemy spots | |
| 4 | 1 | None | "Easy" enemy spots | |
| 5 | 1 | None | "Easy" enemy spots | |
| 6 | 1 | None | "Easy" enemy spots | |
| 7 | 4 | None | "Special" enemy spots | |
| 8 | 4 | None | "Special" enemy spots | |
| Then it spawns these "decoration" objects: | ||||
| ID | Object | Amount | Fall method | Spawn location |
| 9 | 5 | None | Plant spots | |
| 10 | 3 | None | Plant spots | |
| Then it spawns these "treasure" objects: | ||||
| ID | Object | Amount | Fall method | Spawn location |
| 11 | 1 | None | Treasure spots | |
- For details on how objects are spawned, and how some may fail to spawn, see here.
Sublevel 5[edit]
- Theme: Tiles
- Music: Tile
- Treasures:
Broken Food Master (US) /
Merciless Extractor (Europe) /
Broken Cooking God (Japan)
Endless Repository (US) /
Permanent Container (Europe/Japan)
Pondering Emblem (US) /
Happiness Emblem (Europe) /
Milky Cradle (Japan)
- Enemies:
Dwarf Orange Bulborb × 5
Fiery Blowhog × 2
Lesser Spotted Jellyfloat × 1
Mitite (group of 10) × indefinite amount (from eggs)
Munge Dweevil × 2
Withering Blowhog × 2
Wollyhop × 1
- Obstacles:
Fire geyser × 5
- Vegetation:
- Others:
In rare occasions, a Fiery and a Withering Blowhog are behind a gate that must be destroyed to collect treasure. Not only does this mean that one should only use Red Pikmin, but that these will also be deflowered. Restarting this layout is highly recommended. Also, some fire geysers could pose a threat to non-Reds. Note that the Violet Candypop Bud here may fail to appear entirely, as detailed here and here.
| Technical sublevel information | |||||
|---|---|---|---|---|---|
| Internal cave name | yakushima_3 | ||||
| "Main" object maximum (?) | 15 | ||||
| "Treasure" object maximum (?) | 3 | ||||
| "Gate" object maximum (?) | 3 | ||||
| Dead end unit probability (?) | 0 | ||||
| Number of rooms (?) | 3 | ||||
| Corridor-to-room ratio (?) | 0.2 | ||||
| Escape geyser (?) | No | ||||
| Clogged hole (?) | No | ||||
| Cave units file (?) | 3_units_d_f_ujikou_tile.txt | ||||
| Lighting file (?) | suityu_light_lv2.ini | ||||
| Background (?) | None | ||||
| Cave units (?) | |||||
| Dead end | Dead end with item | Dead end with item | Three-way crossing | Four-way crossing | Turning corridor |
| Corridor | Long corridor | Room with 4 exits | Room with 4 exits and a raised edge | Room with waterway and grill | |
| Detailed object list | ||||
|---|---|---|---|---|
| The game spawns these "main" objects: | ||||
| ID | Object | Amount | Fall method | Spawn location |
| 1 | 2 | None | "Hard" enemy spots | |
| 2 | 1 | None | "Special" enemy spots | |
| 3 | 2 | None | "Hard" enemy spots | |
| 4 | 3 | None | "Hard" enemy spots | |
| 5 | 2 | None | "Easy" enemy spots | |
| 6 | 2 | None | "Hard" enemy spots | |
| 7 | 3 | None | Cave unit seams | |
| Then it spawns these "treasure" objects: | ||||
| ID | Object | Amount | Fall method | Spawn location |
| 8 | 1 | None | Treasure spots | |
| 9 | 1 | None | Treasure spots | |
| 10 | 1 | None | Treasure spots | |
| Then it spawns these "dead end" objects: | ||||
| ID | Object | Amount | Fall method | Spawn location |
| 12 | 1 | None | Dead ends | |
| 13 | 1 | None | Dead ends | |
| 14 | 1 | Falls from the sky | Dead ends | |
| 15 | 2 | Falls from the sky | Dead ends | |
| Then it spawns "dead end" objects in as many dead ends as it can. Chances: | ||||
| ID | Object | Chance | Fall method | Spawn location |
| 13 | 100% | None | Dead ends | |
| Then it spawns 3 "gate" objects. Chances: | ||||
| ID | Object | Chance | Fall method | Spawn location |
| 11 | Gate (4000 HP) | 100% | None | Gate spots |
- For details on how objects are spawned, and how some may fail to spawn, see here.
Sublevel 6[edit]
- Theme: Tiles
- Music: Jellyfloat
- Treasures:
Abstract Masterpiece (US) /
Plentiful Tank (Europe) /
Estimated Object GF (Japan)
Behemoth Jaw
Rubber Ugly
- Enemies:
Anode Dweevil × 1
Bumbling Snitchbug × 1
Doodlebug × 1
Dwarf Orange Bulborb × 7
Munge Dweevil × 1
Orange Bulborb × 1
Volatile Dweevil × 1
Wollyhop × 1
- Obstacles:
- None
- Vegetation:
- Others:
The first thing one should do is set off the Volatile Dweevil that is hiding in one of the pipes. The Orange Bulborb may be sitting in front of the Rubber Ugly; also, just like the Volatile Dweevil, all Dweevils are hiding in the pipes, so they could take treasures that are being carried by Pikmin. One good way to deal with Dweevils is to throw a Purple Pikmin at or near it to stun it, but do not throw Purples at Volatile Dweevils, since the Pikmin will very likely be killed in the following explosion.
| Technical sublevel information | |||||
|---|---|---|---|---|---|
| Internal cave name | yakushima_3 | ||||
| "Main" object maximum (?) | 10 | ||||
| "Treasure" object maximum (?) | 3 | ||||
| "Gate" object maximum (?) | 3 | ||||
| Dead end unit probability (?) | 50 | ||||
| Number of rooms (?) | 3 | ||||
| Corridor-to-room ratio (?) | 0.1 | ||||
| Escape geyser (?) | No | ||||
| Clogged hole (?) | No | ||||
| Cave units file (?) | 3_units_a_l_yuko_tile.txt | ||||
| Lighting file (?) | suityu_light_lv3.ini | ||||
| Background (?) | None | ||||
| Cave units (?) | |||||
| Dead end with item | Long corridor | Dead end with item | Three-way crossing | Four-way crossing | Turning corridor |
| Corridor | Room with 4 exits | Room with dead end after U-turn | Corridor with 6 pipes | ||
| Detailed object list | ||||
|---|---|---|---|---|
| The game spawns these "main" objects: | ||||
| ID | Object | Amount | Fall method | Spawn location |
| 4 | 1 | None | "Hard" enemy spots | |
| 5 | 1 | None | "Hard" enemy spots | |
| 6 | 1 | None | "Hard" enemy spots | |
| 7 | 4 | None | "Hard" enemy spots | |
| 8 | 3 | None | "Easy" enemy spots | |
| Then it spawns these "decoration" objects: | ||||
| ID | Object | Amount | Fall method | Spawn location |
| 1 | 1 | None | Plant spots | |
| 2 | 1 | None | Plant spots | |
| 3 | 1 | None | Plant spots | |
| Then it spawns these "treasure" objects: | ||||
| ID | Object | Amount | Fall method | Spawn location |
| 9 | 1 | None | Treasure spots | |
| 10 | 1 | None | Treasure spots | |
| 11 | 1 | None | Treasure spots | |
| Then it spawns these "dead end" objects: | ||||
| ID | Object | Amount | Fall method | Spawn location |
| 13 | 1 | None | Dead ends | |
| 14 | 1 | None | Dead ends | |
| 15 | 1 | Falls from the sky | Dead ends | |
| 16 | 1 | Falls from the sky | Dead ends | |
| Then it spawns 3 "gate" objects. Chances: | ||||
| ID | Object | Chance | Fall method | Spawn location |
| 12 | Gate (4000 HP) | 100% | None | Gate spots |
- For details on how objects are spawned, and how some may fail to spawn, see here.
Sublevel 7[edit]
- Theme: Tiles
- Music: Boss (only when combating)
- Treasures:
Amplified Amplifier (inside Ranging Bloyster)
- Enemies:
Mitite (group of 10) × indefinite amount (from eggs)
Ranging Bloyster × 1
- Obstacles:
- None
- Vegetation:
- None
- Others:
- See also: Ranging Bloyster strategy.
Some gates have to be torn down to get to the Bloyster. Be careful, as sometimes its tentacles can reach through the gate. See the link above for a very effective strategy.
Note that due to the way sublevel generation works, there is a 1 in 2,147,483,648 chance that the Ranging Bloyster will not appear, as explained here.
| Technical sublevel information | |||||
|---|---|---|---|---|---|
| Internal cave name | yakushima_3 | ||||
| "Main" object maximum (?) | 1 | ||||
| "Treasure" object maximum (?) | 0 | ||||
| "Gate" object maximum (?) | 6 | ||||
| Dead end unit probability (?) | 30 | ||||
| Number of rooms (?) | 2 | ||||
| Corridor-to-room ratio (?) | 0.5 | ||||
| Escape geyser (?) | Yes | ||||
| Clogged hole (?) | No | ||||
| Cave units file (?) | 1_units_a_tile.txt | ||||
| Lighting file (?) | suityu_light_lv4.ini | ||||
| Background (?) | None | ||||
| Cave units (?) | |||||
| Dead end with item | Dead end with item | Three-way crossing | Four-way crossing | Turning corridor | Corridor |
| Long corridor | Long corridor | Room with 4 exits | |||
| Detailed object list | ||||
|---|---|---|---|---|
| The game spawns these "main" objects: | ||||
| ID | Object | Amount | Fall method | Spawn location |
| 1 | 1 | None | "Special" enemy spots | |
| - | Carried inside entry with ID 1 | |||
| Then it spawns these "dead end" objects: | ||||
| ID | Object | Amount | Fall method | Spawn location |
| 3 | 1 | Falls from the sky | Dead ends | |
| Then it spawns "dead end" objects in as many dead ends as it can. Chances: | ||||
| ID | Object | Chance | Fall method | Spawn location |
| 3 | 100% | Falls from the sky | Dead ends | |
| Then it spawns 6 "gate" objects. Chances: | ||||
| ID | Object | Chance | Fall method | Spawn location |
| 2 | Gate (100 HP) | 100% | None | Gate spots |
- For details on how objects are spawned, and how some may fail to spawn, see here.
Gallery[edit]
Trivia[edit]
- The Shower Room is the only cave whose entrance is initially blocked off.
- The area around the entrance to the Shower Room is in the shape of a sink, with the entrance being fittingly placed right on top of the sink's drain hole.
Names in other languages[edit]
| Language | Name | Meaning |
|---|---|---|
| シャワールーム? Shawārūmu |
Shower Room | |
(traditional) |
淋浴間 | |
| Salle Aqua | Aquatic Room | |
| Duschraum | Shower Room | |
| Sala da Bagno | Bath Room | |
| Salón de Ducha | Shower Room |
See also[edit]
References[edit]
- ^ YouTube video explaining how to reach Shower Room without Yellow Pikmin, published on July 13th, 2018, retrieved on April 9th, 2020
| Caves in Pikmin 2 | |
|---|---|
| Valley of Repose | Emergence Cave • Subterranean Complex • Frontier Cavern |
| Awakening Wood | Hole of Beasts • White Flower Garden • Bulblax Kingdom • Snagret Hole |
| Perplexing Pool | Citadel of Spiders • Glutton's Kitchen • Shower Room • Submerged Castle |
| Wistful Wild | Cavern of Chaos • Hole of Heroes • Dream Den |

