Nothing Special   »   [go: up one dir, main page]

Welcome to the Memory Blog

Memory blog will bring you fresh ideas and tech news related to memory storage world, you can find a new entrance for the information of customized Memory card, USB Flash drives and storage gadgets. Our blog has plenty of latest memory products, intriguing tech story and practical order skills catering for the needs of everyone.

How to Remove Write Protection from an SD Card?

When an SD card displays a write-protected error, it’s easy to feel stuck. But resolving this issue is simpler than you might think. This guide will help you remove Write Protection from SD Card, whether the cause is a lock switch or a software setting. With these steps, you’ll be saving files again in no time.

Understanding SD Card Write Protection

Write protection on an SD card prevents data from being altered. Knowing how this works can help you solve issues when they arise.

There are two ways write protection occurs:

The physical type uses a small switch on the side of the card. When this switch is down, the card locks.

Common causes include:

  • A faulty or mispositioned lock switch
  • Virus or malware infections
  • Bad sectors or corrupted files
  • System registry conflicts
  • Operating system limitations
  • Physical damage to the card
  • Third-party software interference

If your SD card is write-protected, you’ll see clear signs. You won’t be able to:

  • Copy or delete files
  • Format the card
  • Modify any stored data

In this locked state, the card becomes read-only. Recognizing these signs helps you determine if the issue is hardware-related or more complex.

Quick Physical Solutions

Let’s begin with the easiest physical methods to fix write protection on your SD card. These fixes often work without needing software.

Lock Switch

There’s a small lock switch on the left side of most SD cards. Lay it label-up on a flat surface and slide the switch upward to unlock it.

Note: If the switch won’t stay up, secure it with clear tape.

Adapter Troubleshooting

For micro SD cards, the adapter contains the lock switch. Sometimes, this switch becomes loose.

Try this:

  • Remove the micro SD card from the adapter.
  • Check if the adapter’s switch moves freely.
  • Replace the adapter if it’s loose.
  • Make sure the micro SD card fits properly.

Cleaning the Contacts

Sometimes, dirty or oxidized contacts cause write protection errors.

To clean them:

  • Wipe the contacts with a soft, dry cloth.
  • For oil, use a cotton swab with alcohol.
  • Rub oxidation off with a pencil eraser.
  • Be gentle while cleaning.

If these physical methods don’t fix the issue, we’ll move on to software solutions next.

Software-Based Solutions

If your SD card still has write protection after trying physical fixes, Windows tools can help. These software methods offer a more reliable solution.

Using Disk Management Tools

Windows comes with built-in tools for storage management. However, we’ll rely on easy command-line solutions for better, more reliable results.

storage managementstorage management

Command Prompt Method

The Command Prompt method, using Diskpart, offers a powerful way to remove write protection.

Here’s how to proceed:

  • Press Windows + R and type cmd
  • In the Command Prompt window, type diskpart
  • Enter the list disk to view all connected drives
  • Locate your SD card by its size in the list
  • Type select disk X  (replace X with your SD card’s number)
  • Enter attributes disk clear read-only

Important: Double-check the disk number to avoid modifying the wrong drive.

Registry Editor Fix

If Command Prompt doesn’t help, you can try the Registry Editor. But, be aware that improper changes could harm your system.

Follow these steps carefully:

  • Press Windows + R and type regedit
  • Navigate to: – HKEY_LOCAL_MACHINESYSTEMCurrentControlSetControlStorageDevicePolicies
  • Look for “WriteProtect” value
  • Change the value to “0”

If “StorageDevicePolicies” doesn’t exist:

  • Right-click on “Control”
  • Select New > Key
  • Name it “StorageDevicePolicies”
  • Create a new DWORD (32-bit) Value
  • Name it “WriteProtect”
  • Set the value to “0”

Accordingly, after applying any of these methods, restart your computer to ensure the changes take effect.
Safety Precautions:

  • Backup your important files.
  • Follow instructions carefully.
  • Don’t alter the registry unless required.
  • Close all programs that access the SD card.

Software fixes can often resolve write protection issues that physical fixes can’t. Double-check the drive you’re working with before proceeding.

Advanced Troubleshooting

When the easy fixes fail, advanced solutions are the next step. Specialized tools can often succeed when the simpler methods don’t.

Third-Party Write Protection Removal Tools

Supporting multiple storage devices, AOMEI Partition Assistant is a solid tool for removing write protection. Another option, MiniTool Partition Wizard, provides an easy interface for managing disk settings.

Be sure to:

  • Backup your data
  • Download software from trusted sources
  • Scan for malware

Formatting Options

While formatting may seem serious, it can help solve persistent write protection problems.

Consider these options:

  • Standard Format: Via Windows File Explorer
  • Long Format: Useful for detecting bad sectors
  • Low-Level Format: Provided by manufacturer tools If your SD card is failing, formatting is important. SD cards often default to write protection after reaching their maximum read/write cycles.

Data Recovery Steps

Certainly, data recovery should be your first priority before attempting any formatting procedures. Follow these steps to safeguard your files:

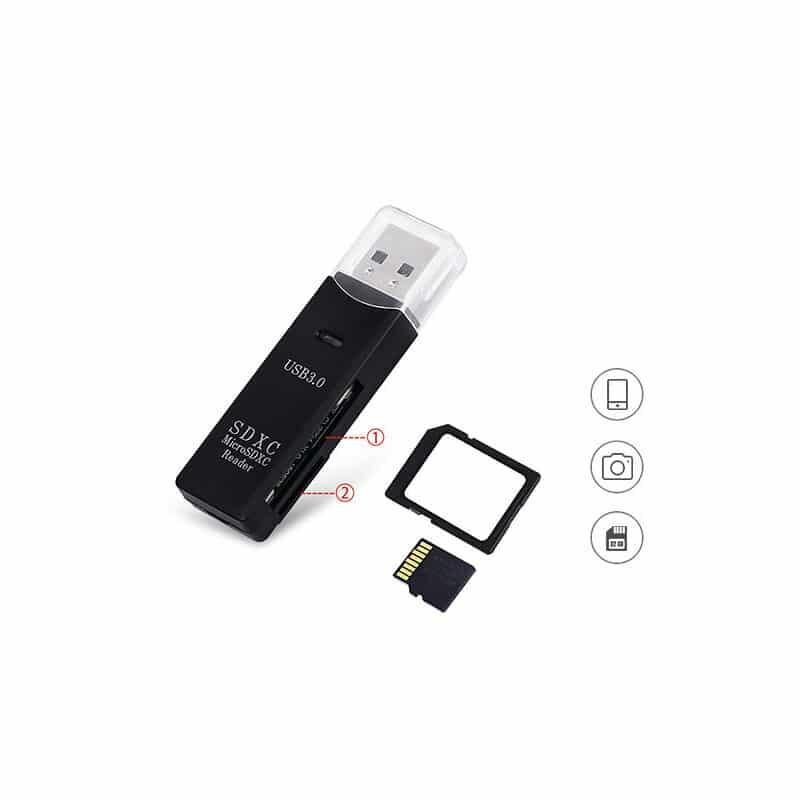
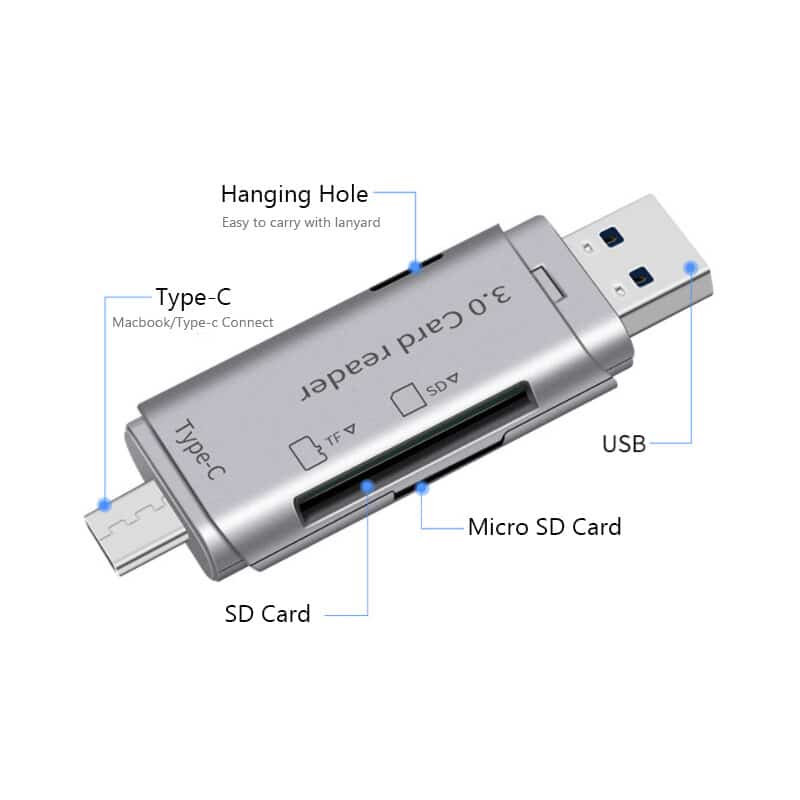
  1. Connect your SD card through a reliable card reader
  2. Run a malware scan to check for potential infections
  3. Use specialized recovery software for corrupted files
  4. Save recovered data to a different storage device
  5. Verify the integrity of recovered files

Critical Warning: Consider professional help if your SD card shows physical damage or constant errors. Your computer’s repair tools can sometimes fix issues behind write protection. They may not remove the lock entirely but can help you understand the problem.
If all attempts fail, assume the card is permanently locked. Retrieve what data you can, and replace the card.

Prevention Tips

Proper care is key to avoiding write protection problems on your SD card. Prevention saves time and effort compared to fixing issues later.

Best Practices for SD Card Usage

Proper SD card storage prevents damage and extends its life. A case protects against dust, moisture, and sunlight. Limit device-switching to lower corruption risks. Keep these practices in mind:

  • Safely eject your card before removing it.
  • Regularly backup data to secure locations.
  • Keep devices and software up-to-date.
  • Store the card in a cool, dry area.

Regular Maintenance Steps

Coupled with proper storage, regular maintenance ensures optimal performance. Follow these maintenance steps:

  • Clean the card contacts gently with a soft, lint-free cloth
  • Format cards in the camera before each use
  • Maintain approximately 10% free space on your card
  • Keep firmware updated for better compatibility
  • Rotate multiple cards to distribute wear evenly

Warning Signs to Watch For

Spotting trouble early can save your memory card. Be alert to these issues:

  • Write protection turning on for no reason.
  • Sluggish read or write speeds.
  • File transfer errors.
  • Lost or corrupted data.
  • Intermittent connections.

Leaving some space on your card improves performance. A full card can struggle with demanding tasks like 4K video recording.Smaller cards are safer than large cards. Larger cards are more vulnerable to corruption and have limited write cycles.Choose high-quality cards with wear-leveling features to ensure durability. These spread data evenly to avoid the overuse of individual cells.Keep your card safe from extreme temperatures, magnetic fields, and physical damage like bending or twisting.

Conclusion

SD card write protection often sounds more complex than it really is. Most problems are resolved through simple checks or fixes. Knowing your card’s protection features helps you quickly spot and solve issues.To avoid trouble, prioritize regular maintenance. Store your card in safe conditions, handle it with care, and back up your data often. Catching problems early also prevents bigger headaches.From locked switches to corrupted files, solutions exist for most issues. Begin with physical inspections, move to software solutions, and try advanced techniques if needed. Always prioritize securing your data during the process.Following these steps helps keep your SD card working smoothly and extends its life. If problems arise, you’re well-prepared to fix them and continue using your card without delay.

Which SD Card Capacity Do You Need? SD vs SDHC vs SDXC vs SDUC Guide

Choosing the right SD card can feel overwhelming with options like SD, SDHC, SDXC, and SDUC. However, selecting the correct capacity is essential. A card too small can force you to constantly delete files, while one too large may leave you paying for unused space. This guide breaks down SD card types to help you find the best fit for your needs, whether for photos, videos, or apps.

Understanding the Four Types of SD Cards

SD cards come in four types, each designed for specific storage capacities and file systems. Here’s an overview:

SD Standard (Up to 2GB)

  • Capacity: Up to 2GB
  • File System: FAT12 and FAT16

These original SD cards are versatile and compatible with all devices supporting SD, SDHC, SDXC, and SDUC. They’re ideal for small files but limited by today’s standards.

SDHC Cards (2GB-32GB)

  • Capacity: 2GB to 32GB
  • File System: FAT32

Introduced after 2008, SDHC cards work with SDHC, SDXC, and SDUC devices. They’re perfect for general use like photography and basic storage.

SDXC Cards (32GB-2TB)

  • Capacity: 32GB to 2TB
  • File System: exFAT

Released in 2009, SDXC cards are excellent for storing high-resolution images and videos. They’re supported by SDXC and SDUC devices.

SDUC Cards (2TB-128TB)

  • Capacity: 2TB to 128TB
  • File System: exFAT

The newest addition, SDUC cards, offers massive storage capacities for advanced use cases. They require SDUC-compatible devices.

Card Type

Capacity Range

File System

SD

Up to 2GB

FAT12/16

SDHC

2GB-32GB

FAT32

SDXC

32GB-2TB

exFAT

SDUC

2TB-128TB

exFAT

Choosing the Right SD Card Capacity

The right SD card depends on your storage needs and intended use. Let’s explore key considerations:

Storage Requirements by Use Case

  • Photography and General Use: 64GB to 256GB cards are usually sufficient.
  • 4K Video Recording: Opt for SDXC cards with larger capacities to handle high-bitrate footage.
  • Gaming or App Storage: Consider capacities above 128GB to accommodate large file sizes.

Cost per Gigabyte

Price often depends on capacity, but larger cards typically offer better value per gigabyte. Look for cards with TLC NAND Flash technology for cost-efficiency without compromising performance.

Future-Proofing

Storage demands are growing. Many modern games and apps now require over 100GB. To future-proof:

  • Ensure your device supports newer SD card standards.
  • Factor in the growing file sizes of media and applications.
  • Choose a card with room to grow beyond your current needs.

SD Card Speed Classes and Performance

Speed class ratings measure a card’s minimum write speed. This is critical for activities like video recording or file transfers.

Speed Class Ratings

These are the most basic performance indicators:

  • Class 2: 2MB/s
  • Class 4: 4MB/s
  • Class 6: 6MB/s
  • Class 10: 10MB/s

UHS Speed Classes

Ultra High Speed (UHS) cards offer better performance:

  • U1: 10MB/s minimum write speed.
  • U3: 30MB/s minimum write speed.

UHS cards use specific bus interfaces:

  • UHS-I: Max speeds of 104MB/s.
  • UHS-II: Max speeds of 312MB/s.
  • UHS-III: Max speeds of 624MB/s

Video Speed Class

For advanced video recording, Video Speed Classes are critical:

  • V6: 6MB/s
  • V10: 10MB/s
  • V30: 30MB/s (suitable for 4K recording)
  • V60: 60MB/s
  • V90: 90MB/s (needed for 8K video)

Manufacturers often exceed these baseline speeds, ensuring reliable performance.

Common SD Card Compatibility Issues

SD card issues often arise due to compatibility problems. Here’s how to avoid them:

Device Compatibility Matrix

  • SDUC cards: Only work with SDUC devices.
  • SDXC cards: Compatible with SDXC and SDUC devices.
  • SDHC cards: Work with SDHC, SDXC, and SDUC devices.
  • Standard SD cards: Universal compatibility with all devices.

Operating System Support

  • exFAT: Supported natively on Windows Vista SP1 and later, macOS 10.6.5 and newer.
  • FAT32: Widely supported but limited to 4GB file sizes.

Older systems may require patches or firmware updates for compatibility.

Format and File System Limitations

  • FAT32 is ideal for broad compatibility but unsuitable for large files.
  • exFAT removes size restrictions but isn’t supported by older devices.

Use the official SD Card Formatter tool to ensure proper formatting and troubleshoot issues like improper card seating or device firmware limitations.

Future of SD Card Technology

SD card technology continues to advance, promising exciting possibilities:

  • SD Express: Combines PCIe and NVMe architectures for transfer speeds up to 2GB/s.
  • Self-Encrypted Drives: Enhance security with built-in encryption.
  • Thermal Management: Improves performance and durability.
  • 3D NAND Technology: Stacks memory cells vertically, increasing storage density and reducing costs.

Yangtze Memory NAND chip Yangtze Memory NAND chip
Western Digital’s 8TB SD card is a game-changer, and SD 9.1 specifications introduce new speed classes ranging from 150 to 600. These innovations support demanding tasks like AI processing, high-resolution video capture, and edge computing.

Conclusion

SD cards have evolved to meet diverse storage needs, from standard 2GB cards to SDUC formats capable of holding up to 128TB. Selecting the right card requires careful consideration of storage capacity, speed class ratings, and device compatibility.To make the best choice:

  • Match the card type to your device’s specifications.
  • Plan for both current and future storage demands.
  • Verify speed class requirements for your intended use.
  • Check operating system compatibility and file system limitations.

By understanding these factors, you can choose an SD card that fits your needs perfectly and delivers reliable performance.

Best SD Card Reader for Trail Cameras

Trail cameras are an essential tool for hunters, wildlife photographers, and outdoor enthusiasts. These devices capture high-quality photos and videos, helping you monitor wildlife activity or secure your property. Accessing the data on your trail camera’s SD card can be tricky without the right equipment. This is where an SD card reader becomes invaluable.An SD card reader streamlines the process of transferring files from your trail camera to your computer, smartphone, or tablet. In this guide, we’ll explore the best SD card readers for trail cameras, discuss their features, and help you choose the perfect option to enhance your trail camera experience.

What is an SD Card Reader?

An SD card reader is a small device designed to read data stored on Secure Digital (SD) cards, which are commonly used in digital devices like cameras, smartphones, and trail cameras. The reader acts as a bridge, allowing you to transfer data from the card to a secondary device, such as a computer, phone, or external hard drive.

Types of SD Card Readers

Lorem ipsum dolor sit amet, consectetur adipiscing elit. Ut elit tellus, luctus nec ullamcorper mattis, pulvinar dapibus leo.

USB SD Card Readers

Plug into USB ports and are compatible with most devices.

Wireless SD Card Readers

Connect via Wi-Fi or Bluetooth for added convenience.
128GB Wifi SD card 128GB Wifi SD card

Built-in SD Card Readers

Found in some laptops and tablets for direct file access.

Multi-format SD Card Readers

Support various SD card sizes and formats, including MicroSD.

Why Use an SD Card Reader for Trail Cameras?

While many trail cameras allow you to view images on a small built-in screen, the experience can be limiting. SD card readers offer a faster, more efficient way to access and organize your data.

Benefits

  1. Convenience: Quickly transfer large files to your device.
  2. Portability: Compact designs make them easy to carry anywhere.
  3. Faster Transfer Speeds: Many SD card readers support USB 3.0 or higher for rapid file transfers.
  4. Better Organization: Easily sort and store files on your computer or cloud storage.

Top 5 Best SD Card Readers for Trail Cameras

  1. SanDisk MobileMate USB 3.0 microSD Card Reader (Model SDDR-B31-001): This compact and lightweight reader is perfect for on-the-go use.
    • Max Read Speed: Up to 170MB/s
    • Supported Card Types: microSD, microSDHC, microSDXC
    • Pros: Very affordable, small, and portable.
    • Cons: Only supports microSD cards.
  2. Lexar Professional Multi-Card 3-in-1 Reader (Model LMR330): This reader offers versatility by supporting multiple card formats.
    • Max Read Speed: Up to 312MB/s (UHS-II)
    • Supported Card Types: SD, SDHC, SDXC, CompactFlash (Type I and II), microSD, microSDHC, microSDXC
    • Pros: Supports a wide range of card types, and fast transfer speeds.
    • Cons: Slightly larger than some other options.
  3. MRT3C USB-C SD Card Reader (MRTATCR003): Ideal for modern devices with USB-C ports.
    • Max Read Speed: Up to 104MB/s
    • Supported Card Types: SD, SDHC, SDXC
    • Pros: Compact and portable, USB-C connectivity.
    • Cons: Transfer speeds are adequate but not the fastest.
  4. ProGrade Digital Dual-Slot Card Reader (Model PG05.5): Designed for professionals needing high-speed transfers and simultaneous card reading.
    • Max Read Speed: Up to 1.25GB/s (USB 3.2 Gen 2×2)
    • Supported Card Types: SD, SDHC, SDXC (UHS-II), microSD, microSDHC, microSDXC (UHS-II)
    • Pros: Extremely fast transfer speeds, durable build, simultaneous reading.
    • Cons: More expensive than other options.
  5. Kingston Nucleum USB-C Hub (Model HUB-C1): This is a versatile hub that includes an SD card reader along with other ports.
    • Max Read Speed: Up to 104MB/s
    • Supported Card Types: SD, SDHC, SDXC
    • Pros: Provides multiple ports in addition to the SD card reader, useful for laptops with limited ports.

Top Brands to Consider

When shopping for an SD card reader, consider these trusted brands:

  • SanDisk: Known for reliability and performance.
  • Lexar: Popular among professionals for speed and durability.
  • MRT3C: Affordable and versatile options for casual users.
  • Kingston: Offers excellent build quality and wide compatibility.

How to Choose the Right SD Card Reader?

Selecting the best SD card reader for your trail camera involves assessing your needs and understanding the features that align with your preferences.

Assessing Your Needs

  • Hunting and Wildlife Photography: If you frequently venture into remote areas, opt for a portable and durable reader with fast transfer speeds. A wireless reader may be beneficial for convenience in the field.
  • Monitoring and Security: For home-based use, a reliable wired card reader is sufficient. Consider one with multi-format compatibility if you use multiple devices.

Budget Considerations

SD card readers come in a range of prices:

  • Under $20: Basic readers with decent speed and single-format compatibility.
  • $20–$50: Mid-range readers offering better build quality, dual slots, and USB 3.0 or higher.
  • $50 and Up: High-end readers with premium materials, dual slots, and exceptional speed for professionals.

Durability and Weather Resistance

For rugged environments, consider SD card readers with a durable, weather-resistant design. Metal housing and sealed components can withstand rough use and unpredictable weather.

Wireless vs. Wired SD Card Readers

When deciding between a wired or wireless SD card reader, weigh the pros and cons.

Wireless SD Card Readers

  • Pros: No need for cables, compatible with multiple devices, portable.
  • Cons: Slower transfer speeds, require charging or batteries.

Wired SD Card Readers

  • Pros: Reliable and faster transfers, no need for additional power.
  • Cons: Requires a physical connection to the device.

Best Practices for Using SD Card Readers with Trail Cameras

Proper usage and maintenance of your SD card reader are vital for long-term performance. Follow these tips for optimal results:

Handle SD Cards with Care

Always remove and insert SD cards gently to avoid damaging the connectors.

Store Properly

Keep your SD card reader in a protective case to prevent dust and debris from interfering with its functionality.

Transferring Data Safely

Avoid interrupting the transfer process to prevent file corruption. Always eject the card reader safely from your device after use.

Regular Cleaning

Use a soft, dry cloth to clean the SD card slots and connectors.

Common Issues and Troubleshooting

Even the best SD card readers can encounter issues. Here are some common problems and solutions:

SD Card Reader Not Recognized by Device

Solution: Ensure the reader is properly connected. Check for driver updates or try connecting to another device.

Slow Transfer Speeds

Solution: Verify that you’re using a high-speed SD card and a USB 3.0 or higher port. Older USB ports may limit transfer speeds.

Corrupted or Inaccessible SD Cards

Solution: Use data recovery software to retrieve lost files. Always format your SD card in the trail camera before use to prevent compatibility issues.

Conclusion

SD card readers are essential tools for anyone using trail cameras, making it easy to access, transfer, and organize data. Whether you’re a hunter, photographer, or outdoor enthusiast, choosing the right SD card reader can significantly enhance your experience.From budget-friendly models to premium options, there’s a perfect fit for every need. Take the time to evaluate your requirements, consider the features discussed, and make an informed decision to get the most out of your trail camera setup.

How to Uncorrupt an SD Card in Windows?

It’s a stressful situation when Windows tells you your SD card is corrupted. Your photos, documents, and videos are locked away.If you’re dealing with this now or want to know what to do in the future, learning how to repair an SD card in Windows can prevent permanent loss. The good news is that most SD card issues can be fixed in minutes. This guide will take you through the steps to fix and recover your files, from basic tools to more advanced options.

Signs of SD Card Corruption

Common Corruption Symptoms

Your SD card might be corrupted if you notice these warning signs:

  • Files suddenly appear empty or missing
  • Windows displays the card as RAW format
  • Read/write errors occur during file transfers
  • The card freezes or becomes stuck during operations
  • Photos fail to load or appear distorted

How to Diagnose the Issue?


To detect SD card corruption, observe its behavior. If it’s slow to be recognized or not detected at all, there’s a chance of file system damage.A prompt from Windows to format the card suggests serious corruption.

Understanding Corruption Severity Levels

Corruption severity typically falls into three distinct categories:

  • Minor Corruption: Occasional read/write errors, slow performance during transfers, files occasionally appearing missing
  • Moderate Corruption: Frequent connection issues, wrong capacity display, consistent formatting errors
  • Severe Corruption: Complete inability to access files, physical damage signs, continuous system crashes when connected

Corruption often happens when a card is removed mid-transfer or experiences sudden power loss. Virus infections and using the card across multiple devices can worsen it. Understanding these patterns is key to recovering your data.As soon as you spot any signs of corruption, stop using the card. Continuing to write data can worsen the damage and reduce your chances of fixing it.

Quick Recovery Methods

When your SD card shows signs of corruption, several quick recovery methods can help restore access to your files. Starting with Windows’ built-in tools offers the fastest path to recovery.

Using Windows Built-In Repair Tools

storage managementstorage management
Windows provides two powerful tools for SD card repair. First, launch Disk Management by following these steps:

  • Right-click the Start menu
  • Select “Disk Management”
  • Locate your SD card
  • Right-click and select “Change Drive Letter” if no letter is assigned

Rather than immediately formatting the card, try using the Command Prompt (CMD) to remove write protection, which often resolves common access issues.

Third-Party Recovery Software Options

Professional recovery software offers higher success rates for severely corrupted cards. Notable options include:

  • EaseUS Data Recovery
  • Stellar Data Recovery
  • Disk Drill

Before purchasing any software, utilize their free versions to verify successful file detection. Professional recovery tools generally provide preview capabilities, allowing you to confirm file recovery potential before committing.

Emergency Data Backup Procedures

The most critical step before attempting any repair is creating a backup of your corrupted SD card. This ensures you have a safety net if repair attempts fail.To create an emergency backup:

  • Connect your SD card via a reliable card reader
  • Create a byte-to-byte backup image using recovery software
  • Save the backup to a different drive

Leave a corrupted SD card alone during recovery. Writing new files risks losing recoverable data forever. For physical damage or when recovery software isn’t enough, professional services can help. Also, check your warranty. Manufacturers sometimes offer free recovery or replacement for covered cards.

Advanced Repair Techniques

When standard recovery tools can’t do the job, advanced users often choose command-line methods or professional help. These solutions offer robust and reliable options for difficult recoveries.

CHKDSK Command Line Solutions

The CHKDSK utility serves as a powerful tool for repairing corrupted SD cards. To execute this command effectively, open Command Prompt as administrator and use these essential parameters:

  • /F – Fixes errors on the disk
  • /R – Locates bad sectors and recovers readable information
  • /X – Forces the volume to dismount first
  • /B – Performs a more thorough scan (NTFS only)

Execute the command using: chkdsk X: /f /r /x (replace X with your SD card’s drive letter). This process might take several hours, depending on your card’s size and condition.

Disk Management Tools

Disk Management provides advanced options for handling corrupted SD cards. Sometimes corruption occurs due to drive letter conflicts or partition issues. To resolve these problems:

  • Access Disk Management through Windows + X
  • Right-click the SD card and select “Change Drive Letter and Paths”
  • Choose a new drive letter to eliminate potential conflicts

Professional Repair Options

Some cases require expert intervention. Professional recovery services offer specialized solutions with notable advantages:

  • Recovery centers utilize X-ray technology for precise diagnostics, identifying critical damage without risking device integrity
  • These services typically provide clean room environments with professional equipment, recovery guarantees, and low-level access to flash memory cells

The type of memory card and the severity of the issue both influence professional recovery costs. Reliable services provide free diagnostics, so you’ll know exactly what to expect before committing.

Formatting Solutions

Formatting is often the last resort for fixing SD card corruption. It’s the go-to solution when other recovery attempts fail. Knowing when and how to format properly can mean recovering your data or losing it forever.

When to Consider Formatting?

Formatting becomes necessary in several situations:

  • Your SD card appears as a RAW format in Windows
  • The card shows an incorrect capacity
  • Previous repair attempts have failed
  • Regular read/write errors persist

Use formatting only as a last measure because it deletes everything on the card. Before you proceed, explore recovery tools that can retrieve your data. In many cases, files remain recoverable even after formatting.

Safe Formatting Procedures

To safely format your corrupted SD card, follow these critical steps:

  • Back up any accessible data
  • Select the correct drive letter in Windows
  • Choose the appropriate file system:
    • FAT32 for cards 32GB or smaller
    • exFAT for cards 64GB or larger

Windows offers two formatting options: Quick Format and Full Format. A Quick Format simply overlays a new filesystem while preserving underlying data, whereas a Full Format thoroughly erases everything.

Post-Format Recovery Options

If you’ve accidentally formatted your card, recovery possibilities still exist. The success rate depends primarily on several factors:

  • The type of formatting performed (Quick vs. Full)
  • Time elapsed since formatting
  • Whether new data has been written to the card

Stop using the formatted card immediately if you need to recover data. Most Quick Format operations don’t physically erase data, making recovery possible with specialized software.For optimal recovery chances after formatting:

  • Avoid writing new data to the card
  • Use professional recovery software
  • Consider professional services for critical data

Hardware-Related Fixes

Hardware issues often underlie SD card corruption problems, making physical troubleshooting essential for successful recovery.

Card Reader Troubleshooting


A malfunctioning card reader frequently causes SD card recognition problems. To properly diagnose reader issues, follow these steps:

  • Clean the card reader slot using compressed air to remove dust
  • Inspect for bent pins or debris inside the slot
  • Test the card in multiple USB ports
  • Check Device Manager for driver updates
  • Try a different card reader to isolate the issue

Physical Damage Assessment

Physical damage to SD cards manifests in several ways:

  • Visible cracks or breaks in the casing
  • Water exposure marks or corrosion
  • Bent or broken connectors
  • Oxidation on contact points
  • Heat damage or warping

Stop using your card right away if you notice any signs of damage. Physical recovery needs professional tools and skills. Trying to fix it yourself can often result in losing your data permanently.

Connection Issues Resolution

Connection problems typically stem from multiple sources. Primarily, poor contact between the card and the reader causes intermittent recognition issues. To resolve these problems:

  • Test alternative USB ports and use rear ports on desktop computers for better power supply
  • Ensure your adapter supports the card’s capacity and check for proper microSD to SD adapter fit

Using different card readers can help isolate hardware-specific problems. If your card contains critical data, professional evaluation becomes necessary. It’s especially true if the card shows signs of physical damage or makes unusual noises during operation.

Conclusion

Data recovery from a corrupted SD card starts with identifying the problem. Using Windows’ built-in tools early on can save valuable time.If they don’t help, turn to professional software for more advanced recovery options. Formatting is often a last resort after trying everything else. If there’s physical damage, it’s best to have the card professionally assessed. Quick intervention and careful handling of your card can improve recovery success. Prevent issues by backing up regularly and using the card properly.

How to Format SD Cards Like a Pro: Best SD Card Formatter Guide

The right SD card formatter can make a significant impact on your card’s reading and writing speed. If you use your SD card for photos, gaming, or mobile devices, its performance matters.Many users don’t realize their built-in formatter may not provide the best results. SD cards have been the leading flash memory format since 1999, so it’s important to format them correctly.The right formatter improves speed, prevents corruption, extends the card’s life, and keeps data organized. Let me guide you through how to format your SD card properly for maximum efficiency.

Understanding SD Card Formatting Basics

Formatting an SD card is key to maintaining its health. It sets up a file system that controls how your data is stored and accessed. When formatted, your SD card will have a DCIM folder for photos and videos. A properly formatted card ensures better performance and less fragmentation.

These are the main SD card format types you’ll find:

  • FAT32: Compatible with most devices, limited to 4GB file sizes
  • exFAT: Designed for files larger than 4GB, ideal for SDXC cards
  • NTFS: Windows-specific format with advanced features

You should format your SD card if you:

  1. Install it on a new device
  2. Experience performance issues
  3. Clear corrupted files
  4. Switch between different devices

Regular formatting helps your SD card last longer by reducing wear and tear on internal components.

Choosing the Best SD Card Formatter

The SD Association recommends their official SD Memory Card Formatter instead of regular operating system tools to get the best results.

Official SD Formatter Tool vs Built-in Options

The official SD Memory Card Formatter works better because it formats cards to meet SD specification standards. Regular operating system formatters can handle simple formatting tasks, but they aren’t optimized for SD cards. This can make your card run slower.

Feature

Official SD Formatter

Built-in OS Tools

Optimization

SD-specific

General purpose

Compatibility

All SD types

Limited

Performance

Improved

Standard

Top Free SD Card Formatters for Windows and Mac

You should pick a formatter based on what you need:

  • Windows Built-in Options:
    • File Explorer: Quick formatting for simple needs
    • Disk Management: Extra partition management features
    • DiskPart: Command-line tool for advanced users

The official SD Memory Card Formatter works great on both Windows and Mac. It’s compatible with different types of SD cards.

SD Card Formatters for Android and iOS

Android devices come with built-in formatting options in their settings menu. The system doesn’t let you choose file systems during formatting. iOS users need a computer to format SD cards since iOS devices can’t format cards directly.

Online SD Card Formatting Tools

You should avoid online SD card formatting tools because they aren’t secure or reliable. Desktop-based solutions are better for proper formatting and data security. They often have potential security risks (like malware or data theft), and the lack of standardization is another factor to keep in mind.

Step-by-Step SD Card Formatting Guide

Proper preparation is vital for successful SD card formatting. Back up all your important files because formatting will permanently erase all data on your card.

Preparing Your SD Card for Formatting

  • Remove the SD card from your device
  • Check the write-protection switch position
  • Connect to your computer via a card reader
  • Verify the card is recognized by your system

Using the SD Formatter Tool Effectively

The official SD Memory Card Formatter provides the most reliable approach and optimizes the layout of data structures. This optimization leads to faster sequential reads and random faster writes.

Step

Action

1

Select your SD card from the list

2

Choose format type (Quick/Full). A full format checks for bad sectors, the key difference.

3

Select an appropriate file system

4

Begin the formatting process

Troubleshooting Common Formatting Issues

When you encounter formatting problems, try these solutions:

  • For the “Windows unable to complete format” error:
    • Ensure proper connection
    • Disable write protection
    • Use administrative privileges

Your camera’s built-in formatter offers the quickest way to format the SD card. Windows users can access Disk Management through Computer Management for advanced formatting options.Note that formatting doesn’t completely delete files—it only removes their references. Users with sensitive data should think about secure formatting methods that overwrite the whole card.

Advanced Formatting Techniques

With proper maintenance and correct formatting, your SD card works more efficiently and lasts longer. MLC Flash cards handle up to 10,000 write cycles, while SLC Flash cards can handle 100,000.

Regular Formatting Schedule

A consistent formatting routine helps curb data fragmentation and keeps performance optimal. Here’s a recommended schedule:

Usage Type

Formatting Frequency

Professional Use

Weekly

Regular Use

Every 2-3 weeks

Occasional Use

Monthly

Backup Strategies Before Formatting

Creating reliable backups is crucial before formatting your SD card. These proven methods work well:

  • Cloud storage solutions give you remote access
  • Local backups on external drives protect your data
  • Byte-to-byte disk images offer complete protection

Tips to Extend SD Card Life

Proper care can substantially extend your card’s lifespan. A professional-grade SD card can last many years with normal usage. Follow these steps for optimal longevity:

  • Keep sufficient free space for wear leveling
  • Shield from extreme temperatures
  • Use separate cards for different devices
  • Turn off swap operations when possible
  • Check card health regularly

Cards with larger capacities last longer thanks to advanced wear leveling algorithms. The best results come from high-quality card readers and safely ejecting your SD card before removal.

Conclusion

SD card formatting is an essential part of maintaining top performance. Proper formatting boosts read and write speeds. For the best results, use the official SD Memory Card Formatter. This tool is more reliable than basic operating system options and ensures compatibility with your devices. With regular care, high-quality SD cards can last longer. Simple habits like keeping some free space, using good readers, ejecting safely, and using separate cards for different devices will protect your data and keep your card in good condition.

How to Change CID on SD Card: A Step-by-Step Expert Guide That Works

Have you ever stumbled upon an “SD card locked” error while using a seemingly functional card? The underlying culprit could very well be its CID, and altering it might just be your golden ticket to resolving the issue.However, tread cautiously—it requires precision and a meticulous approach to avoid irreversible mishaps. In this guide, I’ll unravel the intricate steps to change an SD card’s CID safely and effectively.

CID: What It Is and Why It’s Crucial

CID, an acronym for Card Identification Data, represents a distinctive sequence of alphanumeric characters embedded within every SD card. This digital fingerprint encapsulates the following:

  • Manufacturer ID
  • OEM Identifier
  • Product Designation
  • Serial Identifier
  • Date of Manufacture

Why Consider Altering CID?

The idea of tinkering with an immutable feature might sound audacious. But, there are scenarios where CID modification proves indispensable. Here’s why enthusiasts dive into this realm:

  • Custom Firmware Integration: Certain systems demand SD cards with predefined CID values for authentication.
  • Data Accessibility: Resetting CID can unlock restricted or encrypted data repositories.
  • Tech Exploration: For technology aficionados, it’s a challenge akin to scaling a digital Everest.

Proceed with Caution: Pitfalls to Consider

Legalities in Question

First and foremost, consult local regulations. Modifying CID might contravene software agreements or statutory stipulations in your jurisdiction.

Potential Hazards

Before getting started, be mindful of the risks:

  • Card Bricking: An errant step might render your SD card utterly useless.
  • Warranty Nullification: Expect your warranty to vanish once you meddle with CID.
  • Data Annihilation: Ensure all essential files are backed up, as they could vanish during the process.

Essentials for CID Modification

  1. A Capable Computer: Windows, Linux, or macOS systems suffice.
  2. An Adept Card Reader: Opt for one that supports direct SD card interaction.
  3. Specialized Software: Utilities tailored for CID alteration.
  4. A Compatible SD Card: Not all cards are pliable for this procedure.

How to Change CID on an SD Card?

Step 1: Secure the Right SD Card

Conduct thorough research to identify cards capable of CID modification. These are commonly referred to as “modifiable SD cards.”

Step 2: Backup Everything

Safeguard your files by transferring them to alternate storage. This safety net could prove invaluable if the unexpected occurs.

Step 3: Evaluate Hardware Compatibility

Ensure your SD card reader allows direct communication with the card. Built-in readers in laptops often fall short.

Step 4: Procure and Install Software

Download and configure software suitable for CID alteration. Options include:

  • Linux Terminal Tools: Best for tech-savvy individuals.
  • Windows Programs: Tools like “SD TOOLBOX” for MRT3C SD cards.
  • Custom Scripts: Scour GitHub or dedicated forums for relevant utilities.

Step 5: Document the Existing CID

Before making any modifications, jot down the card’s current CID using tools like:

  1. Linux MMC Commands
  2. Specialized CID Readers for Windows

Step 6: Execute the CID Change

This is where the rubber meets the road:

  1. Attach your SD card to the computer.
  2. Launch the CID modification tool or script.
  3. Input the new CID value.
  4. Follow on-screen prompts to finalize the update.

Step 7: Verify the New CID

Recheck the CID using the same software employed earlier to confirm the modification.

Step 8: Test the Card

Confirm that your SD card remains operational by transferring files or using it with the intended device.

Troubleshooting CID Modification Issues

Problem 1: Card Not Detected

  • Reconnect the reader.
  • Try a different card reader.
  • Restart your machine.

Problem 2: CID Alteration Failure

  • Double-check card compatibility.
  • Verify that the correct software is installed.
  • Ensure you have administrative privileges.

Problem 3: Bricked Card

  • Attempt to reformat, if feasible.
  • Explore recovery solutions on online forums.
  • Replace the card as a last resort.

Best Practices for a Seamless Process

  • Choose Reliable Tools: Prioritize well-reviewed utilities and devices over dubious downloads.
  • Cross-Verify Inputs: Precision is paramount; double-check every input.
  • Stay Abreast of Trends: CID modification techniques evolve rapidly—keep learning.

Safer Alternatives to CID Modification

If the risks feel too daunting, consider these options:

  • Pre-Programmed Cards: Purchase SD cards preloaded with desired CIDs.
  • Software Workarounds: Some tools bypass CID restrictions altogether.
  • Consult an Expert: When in doubt, enlist professional help.

Conclusion

To change an SD card’s CID, you need technical skills, the right tools, and attention to detail. Verifying the card’s compatibility and understanding the legal aspects are critical first steps. The process includes creating backups, using reliable software, and keeping a record of the original CID. These precautions help protect against potential problems. While this method can fix specific issues, it carries risks. Approach it carefully, and if complications occur, seek help from an expert technician.

FAQs

1. Are All SD Cards Modifiable?

No, only specific models support CID alteration. Research is imperative.

2. Is CID Modification Worth It?

The answer hinges on your goals. For some, it’s a technical conquest; for others, the risks outweigh the rewards.

3. Will CID Alteration Void My Warranty?

Almost certainly. Proceed, but knowing this caveat.

4. What If I Fail?

A botched attempt could permanently damage your SD card, so exercise caution.

5. Are There Easier Alternatives?

Yes, pre-programmed cards or software solutions are safer options for non-technical users.

How to Install PicoFly on Your SD Card: A Step-by-Step Guide

Gaming systems often come with frustrating limits, but PicoFly offers a way around them. It can expand your options and improve performance, but installation requires precision. A single misstep might brick your system. And an SD card is the foundation of a successful installation. So, this guide breaks down the process, whether you’re starting from scratch or upgrading. From picking the right card to adjusting boot settings, it’s all here.

Follow along to know more.

Understanding PicoFly SD Requirements

Check if your SD card meets all requirements before installing PicoFly. The right setup will help you avoid common problems down the road.

Compatible SD Card Types

Your PicoFly setup needs a compatible microSD card. Nintendo Switch supports these card types:

  • microSD (up to 2GB)
  • microSDHC (4-32GB)
  • microSDXC (64GB and above)

A UHS-I compatible card with a transfer speed of 60-95 MB/sec will give you the best performance.

Storage Space Planning

Small cards might seem enough, but the system needs lots of space. You should get at least a 64GB card since 32GB goes to system files. Most users find 256GB or larger cards give them the best value for their money.

File System Formatting Guidelines

The right formatting makes your SD card work well with PicoFly. Your card needs FAT32 formatting. ExFAT might work, but it can make some PicoFly installations unstable.

Format your new SD card first to prevent corruption and ensure smooth operation. This step wipes existing files and reduces operation problems. Make sure you back up your data before formatting because this process erases everything on the card.High-quality cards from Samsung, SanDisk, or Sony will give you the best results. These brands’ cards are more reliable and perform better, which your PicoFly setup needs.

Downloading and Organizing Required Files

Your PicoFly installation needs careful attention to download and host the right files. Here’s everything you need to set it up successfully.

Essential PicoFly Components

Start by downloading these core components:

  • Latest PicoFly firmware (currently version 2.74)
  • Hekate bootloader
  • Atmosphere custom firmware
  • Required sigpatches

Important: Download these files from official sources to maintain security and compatibility.

Supporting Software Packages

Your PicoFly setup needs more software to work properly. Sthetix’s HATS pack offers a complete package that comes with overclock capabilities. Manual installation requires hosting your files according to the standard Atmosphere structure.Copy the Hekate bootloader file (hekate_ctcaer) to your SD card’s root directory. Rename the file to payload.bin to set up a smooth boot process.

File Version Compatibility Check


Check your firmware compatibility before installation. The latest PicoFly firmware supports Nintendo Switch firmware version 18.0.1. PicoFly Toolbox helps you check your current firmware version.Pro Tip: Store your downloaded files in separate folders on your computer before moving them to your SD card. It facilitates future troubleshooting if you need updates or reinstallation.Your system’s specifications must match all components. The firmware supports different board types, including Waveshare RP2040, Pi Pico, and XIAO 2040.

Configuring Primary Boot Settings

With your files prepared on your SD card, the next step is configuring the boot process. This involves setting up the necessary files and configurations for PicoFly to function correctly.

Preparing the SD Card for Boot

  1. Power off your Nintendo Switch completely.
  2. Insert your prepared SD card (containing the necessary files like payload.bin (Hekate) and the bootloader folder).

Understanding Boot Process

The Switch’s boot process involves several stages. PicoFly bypasses the standard boot process to load custom firmware. The payload.bin (usually Hekate) acts as a bootloader, allowing you to launch various payloads (like Atmosphere). The bootloader folder contains configuration files that Hekate uses. There are no “Boot0 and Boot1 partitions” on the SD card in the way the original text described; these are internal to the Switch.

Configuring Boot Entries (hekate_ipl.ini)

The hekate_ipl.ini file within the bootloader folder is crucial. It defines boot entries, allowing you to choose which payload to launch (e.g., Atmosphere, stock firmware). Consult official guides for configuring this file, as the specifics depend on your setup. Be careful—faulty settings can stop your system from booting.

Testing Your Configuration

After configuring hekate_ipl.ini, test your setup:

  1. With the SD card inserted, use the appropriate method for your PicoFly installation to boot into the RCM (Recovery Mode) or some other boot method to trigger the modchip. This will inject the payload.
  2. Hekate should appear. Use the controls (usually volume buttons and power) to navigate the menu.
  3. Attempt to launch your chosen payload (e.g., Atmosphere).

A black screen or other errors indicate a problem with your configuration (e.g., incorrect hekate_ipl.ini settings, missing files). Double-check your setup and consult official troubleshooting resources.

Implementing Advanced Features

Updating PicoFly Firmware

PicoFly firmware updates are separate from Atmosphere or Switch system updates. The process usually involves:

  1. Downloading the latest PicoFly firmware .bin file from the official source.
  2. Placing the .bin file on the SD card root and renaming it to update.bin.
  3. Using the PicoFly Toolbox or another method (consult official PicoFly documentation) to initiate the update.

Follow official instructions for updating PicoFly firmware to avoid problems.

Custom Themes

Custom themes modify the Switch’s user interface within Atmosphere.

  1. Install the Homebrew App Store through the Album applet in Atmosphere.
  2. Find and install themes from the Homebrew App Store.
  3. Use only verified and compatible themes to avoid issues.

Backups and Recovery

Regular backups are essential for data protection.

  • EmuNAND Backups: If using EmuNAND (a separate copy of the Switch’s system on the SD card), back up the EmuNAND partition regularly.
  • Game Saves: Back up game saves frequently, especially for custom firmware.
  • Configuration Files: Back up important configuration files (e.g., hekate_ipl.ini).

Recovery Options

  • PicoFly Firmware Rollback: Some PicoFly tools may offer a rollback feature to revert to a previous firmware version. Consult official documentation.
  • SD Card Backups: Keeping backups of your entire SD card content on your computer allows you to recover from card corruption or other issues.

Conclusion

The PicoFly setup process can look intimidating but becomes simple with proper guidance. Ensure your SD card meets the specs, arrange files in order, and carefully configure the boot.

Backup your data regularly to prevent issues down the line. Properly managing themes and payloads will improve your gaming and protect your system. Good hardware, precision during installation, and consistent backups are the foundation for success.

USB 2.0 vs 3.0: Key Differences You Should Know

File transfers can be unpredictable when using USB ports. Some take forever, while others finish almost instantly. USB 3.0 and 2.0 standards look alike but perform worlds apart. Understanding it can help you set up a computer, choose storage, or troubleshoot port colors. Let’s explore how USB 3.0 improves your device connections.

Understanding USB Standards

Since 1996, USB has become essential for connecting devices to computers. It’s always adapted to meet new needs. Introduced in 2000, USB 2.0 transfers data at 480 Mb/s and offers 2.50 watts of power. It’s ideal for simple devices like printers and basic webcams.Then came USB 3.0 in 2008, which boosted speeds to 5 Gbps and provided up to 4.5 watts of power. It’s also backward compatible, so a USB 2.0 device can still work with a USB 3.0 port, but it’ll be slower. USB 3.0’s SuperSpeed feature allows data to travel in both directions simultaneously, unlike USB 2.0.

Key Features Speed and Performance Comparison

The speed and performance differences between USB 2.0 and 3.0 become clear in daily tasks. These speeds have a significant impact on file transfers, and here’s what they mean:

Task

USB 2.0 (480 Mbps)

USB 3.0 (5 Gbps)

1GB Movie File

~40 seconds

~4 seconds

4GB Game File

~2.5 minutes

~15 seconds

500MB Photo Album

~20 seconds

~2 seconds

USB 3.0 performs better in many areas:

  • Video Editing: External drives handle media faster.
  • Data Backup: Backups finish more quickly.
  • High-Resolution Displays: supports monitors better.
  • External SSDs: Full speed for modern storage.

USB 3.0’s ability to send and receive data simultaneously makes it much smoother than USB 2.0. For professionals working with large files or gamers, the speed upgrade is huge. With USB 3.0, even tasks like backups and transferring photos are faster.

Physical Differences and Identification

USB 2.0 and 3.0 differ in their physical shape.

  • USB 3.0 ports have a blue interior, while USB 2.0 ports are black.
  • The extra thickness of USB 3.0 cables is due to additional wiring. They have nine wires, compared to the four in USB 2.0 cables.
  • The maximum length for USB 3.0 cables is 3 meters, but USB 2.0 cables can go up to 5 meters.
  • You’ll see the SS (SuperSpeed) symbol on USB 3.0 connectors.
  • Internally, USB 3.0 has extra wiring to support faster speeds.
  • USB 3.0 B-type and Micro-B connectors are larger due to extra wiring and won’t fit into USB 2.0 ports, although USB 3.0 Type-A connectors work with USB 2.0 ports.
  • The pins in USB 3.0 ports are arranged in two rows, with nine pins, while USB 2.0 has only four pins in a single row.

Applications and Use Cases

USB ports can make a noticeable difference in how smoothly your workflows are.USB 2.0 is perfect for basic peripherals such as:

  • Keyboards and mice
  • Printers
  • Webcams
  • Flash drives
  • Card readers
  • Audio interfaces

However, if you work with large files, USB 3.0 is the way to go. It’s useful for creative professionals using external SSDs for tasks, like video editing or RAW photo processing. 4K video transfers happen in minutes, not hours, and you can work directly from external drives.Gamers also benefit from USB 3.0. It boosts game load times, speeds up installations, and provides more power for gaming accessories.USB 3.0 proves its worth in home entertainment setups, where it handles media servers, Blu-ray drives, and high-quality webcams. High-resolution video streams are smoother, and recording is more reliable. You can even power portable displays and speakers without needing extra adapters.When it comes to mobile devices, USB 3.0 makes file transfers and backups faster. It facilitates syncing data and charging devices.

How to Choose the Right USB: Cost Vs Performance Analysis

To choose the right USB device, you need to think about both price and performance. For instance, an 8GB USB 2.0 drive costs roughly $10, while a USB 3.0 drive can cost up to $40 for a larger capacity. Here’s how prices compare:

  • USB 2.0 16GB drives are 5-7 euros
  • USB 3.0 16GB drives cost 2-3 euros more

Larger drives have an even bigger price gap.Your needs should guide your decision. USB 2.0 is fine for simple, occasional use, yet 3.0 is worth the extra cost for anyone who frequently transfers large files or needs faster speeds.The demand for faster data transfer is pushing USB 3.0 adoption up 8.43% per year, from 2024 to 2032. Despite its higher price, USB 3.0’s speed and efficiency make it a smart investment for regular data users.

Comparison Table

Feature

USB 2.0

USB 3.0

Release Year

2000

2008

Data Transfer Speed

480 Mbps

5 Gbps

Power Output

2.5 watts

4.5 watts

Port Color

Black interior

Blue interior

Number of Connectors

4 wires

9 wires

Maximum Cable Length

5 meters

3 meters

Data Transfer Mode

Half-duplex (one direction at a time)

Full-duplex (simultaneous bidirectional)

Number of Pins

4 pins (single row)

9 pins (two rows)

Typical Use Cases

Simple peripherals (keyboards, mice, simple webcams, printers, low-capacity storage)

High-performance devices (external SSDs, 4K webcams, gaming drives, external displays)

1GB File Transfer Time

~40 seconds

~4 seconds

Backward Compatibility

N/A

Yes (works with USB 2.0 ports at 2.0 speeds)

Conclusion

USB 3.0 is a major upgrade, especially for speed. It’s ideal for things like gaming or quickly moving large files. On the other hand, USB 2.0 remains reliable for simpler tasks like connecting keyboards.USB 3.0 offers better power delivery and data handling, which is key for modern users. Blue ports and extra pins are the giveaways for USB 3.0. While USB 3.0 costs more, the performance benefits are often worth it. USB 2.0 still serves basic needs and works well with newer USB 3.0 ports, allowing for gradual upgrades.

SanDisk Extreme vs Extreme Pro: Which Memory Card is Right for You in 2024?

The choice between SanDisk Extreme and Extreme Pro can significantly affect your work.
While the Extreme is ideal for standard use, the Extreme Pro offers speed and resilience for more intense demands. Read on to decide what suits you better.

Sandisk Extreme Pro vs Extreme: A Performance Breakdown

Specs often look promising but don’t always reflect actual usage. The Pro version wins with its 190MB/s read and 130MB/s write speeds, while the Extreme version offers 160MB/s read and 60MB/s write.For tasks involving small files, the Extreme Pro stands out. Benchmarks show steady performance, even during heavy, prolonged use.

Model

Claimed Speed

Sustained Write Speed

Extreme Pro 280MB/s ~110MB/s
Extreme 150MB/s ~60MB/s

Both cards support UHS U3 and V30 certifications, making them capable of handling 4K recording. The Extreme Pro is better suited for demanding tasks like professional video editing and rapid-fire photography.

Quality and Durability

Both SanDisk Extreme and Extreme Pro cards offer top-tier durability.

Weather Resistance Features

These cards can survive in wet conditions, being waterproof up to 1 meter for 72 hours in salt or fresh water. They also resist humidity, performing at up to 95% moisture.

Temperature Tolerance

For temperature extremes, both cards operate from -13°F to 185°F, and they can be stored between -40°F and 185°F. No matter where you take them, these cards are ready for anything.

Physical Protection Measures

The physical protection features of both cards are impressive:

Protection Type Rating

Shock Resistance

Up to 500G

Drop Protection

Up to 5 meters (16.4 feet)

Magnetic Resistance

Up to 5000 Gauss

X-Ray Protection

Airport security safe

The physical protection features of both cards are impressive:The SanDisk Extreme Pro offers superior long-term performance and reliability, making it the better choice for professionals. Both cards are tested for up to 10,000 insertions, but the Pro model can maintain consistent performance in demanding environments.

Storage Solutions

Storage capacity and management capabilities play crucial roles in determining which memory card best suits your needs.

Available Capacity Options

The Extreme offers a variety of sizes, from 32GB to 1TB, and the Extreme Pro focuses on larger capacities, starting at 64GB and going up to 2TB.

Storage capacity comparison:

Capacity Extreme Extreme Pro

32GB

64GB-256GB

512GB

1TB

2TB

File System Compatibility

Both cards use FAT32 for 32GB and smaller, while larger sizes use exFAT. This file system removes the 4GB limit, which helps handle large video files and photos.

Data Management Features

For those who need more advanced features, the Extreme Pro includes RescuePRO® Deluxe for file recovery and the Memory Zone™ app to help keep files organized. It also has advanced error correction that’s suitable for professionals working with critical data during photoshoots or video production.With 2TB of storage, it can hold about 47,368 RAW images or 47 hours of 4K video, offering ample space for demanding projects.

Price vs Value Analysis

The SanDisk Extreme vs Extreme Pro debate isn’t just about which card is budget-friendly.
bulk micro sdhc cards 8gb c6 bulk package bulk micro sdhc cards 8gb c6 bulk package

Initial Investment Comparison

The price gap between the SanDisk Extreme and Extreme Pro varies with capacity. A 64GB SanDisk Extreme may cost around $12.99, while its Extreme Pro version may cost about $60.25. At 256GB, the Extreme is almost 24% less expensive. Here’s how prices change by capacity:

  • Smaller cards (32GB-64GB): Expect a clear price difference.
  • Mid-range cards (128GB-256GB): The Extreme is roughly 25% cheaper.
  • Larger capacities (512GB-1TB): The Extreme Pro becomes noticeably more expensive.

Long-Term Cost Benefits

Both cards offer solid warranties. The Extreme Pro comes with a 30-year warranty in selected regions, while the Extreme offers a lifetime warranty in most countries. Both models also provide two years of data recovery software, adding value.

ROI for Professional Users

For professionals who need extra performance, like for 4K video recording or intensive tasks, the Extreme Pro’s higher price is justified by its enhanced durability and consistent performance. On the other hand, the Extreme is perfect for general users who want great value for money.

Compatibility and Usage

The SanDisk Extreme Pro vs Extreme debate comes down to one factor: performance. The Extreme is ideal for casual use, while the Extreme Pro delivers more speed, perfect for intensive tasks.

Device Compatibility

Both cards support numerous devices, including cameras, drones, and mobile gadgets.

  • The Extreme Pro stands out with its support for UHS-II devices, offering high speeds of up to 300MB/s.
  • In contrast, the regular Extreme works with UHS-I devices, ideal for general consumer electronics.

Optimal Usage Scenarios

The SanDisk Extreme Pro shines in professional settings, especially for 4K video, burst photography, and tough drone work. It also holds up well with action cameras in extreme conditions. Meanwhile, the Extreme model is great for casual users needing HD video or photography, plus extra storage for their mobile devices.

Performance Limitations

Card performance can be affected by various elements. The device interface is important—UHS-II speeds work only with compatible devices. Environmental conditions won’t slow them down; both cards work between -13°F and 185°F. However, the FAT32 file system caps file sizes at 4GB.To ensure top performance, check that your device supports SDHC or SDXC formats and meets the necessary speed class and capacity limits. While the SanDisk Extreme Pro stands out for users needing high-speed consistency, the standard Extreme serves well for most applications and provides better value for regular users.

Final Words: How to Choose the Right Card?

Choosing between the SanDisk Extreme and Extreme Pro is simple once you know what you need. For under 64GB, the Extreme offers good value. If you need more storage, like 1TB, the Extreme Pro is the only option. The Extreme Pro is faster, making it ideal for 4K video. If you just need a card for everyday use, the Extreme is enough. For professionals, though, the Extreme Pro’s performance justifies the higher price. Both cards are built to withstand tough conditions, but the Extreme Pro offers more reliability for demanding tasks.

How to Identify Fake SD Cards?

Fake SD cards can cause problems when you lose important data. Research shows that nearly all SD cards from unauthorized sellers are counterfeit.

Verifying your purchase is key before you store anything valuable. Testing your card is simple. A visual inspection and running an SD card speed test can quickly tell if the SD card is real.

This guide shows you how to spot fake SD cards and ensure you get full value. You’ll also learn about brand-specific authentication features and the right tools to test your card across devices.

Signs of Fake SD Cards

How to Tell if an SD Card is Fake: Visual Inspection

Authentic cards meet high-quality standards. Look for these warning signs:

  • Misaligned or uneven labels
  • Fuzzy printing or unclear text
  • Rough edges or peeling labels
  • Missing or mismatched serial numbers
  • Samsung cards with black instead of white edges
  • Lot codes that resemble the logo font

Suspicious Pricing

A 1TB microSD card should cost about $200. Fake cards, however, are often sold for $15–$40. Legitimate sellers offer consistent pricing. A card priced much lower from an unfamiliar seller is likely fake.

Packaging Errors

Packaging inconsistencies are another giveaway. Inspect these areas:

  • Capacity labels: SDXC should appear on cards 64GB or larger
  • Matching specs and labels
  • Warranty information that’s genuine
  • Proper UPC/EAN codes
  • Accurate manufacturer details

Counterfeit cards might display “Class 10” on the box but “(6)” on the card. Real Samsung packaging always shows the card’s capacity, which is often missing on fakes.

Functionality Concerns

Fake cards can seem fine at first but fail once their real, lower capacity is reached. They use altered chips that falsely show higher storage, risking your data.

Brand-Specific Authentication

SanDisk Verification Features

SanDisk cards are often targeted by counterfeiters. Spot the real ones from the fake Sandisk SD cards with these tips:

  • Heat-sealed packaging with precise edge indentations
  • Embossed SanDisk logo above the printed one
  • Serial number beneath the capacity marking
  • Smooth gradient coloring in the “ULTRA” text
  • Genuine seals use transparent PP film with visible tiny dots

The warranty doesn’t cover bulk-packaged cards. Contact SanDisk support to confirm authenticity with the serial number.

Samsung Authentication Points

Samsung makes verification easy:

  • Download the Samsung Card-UFD Authentication Utility from their official site.
  • Only cards with a “V mark” can be validated.
  • Format your card before starting the process.
  • The utility checks your card in seconds.

You can also inspect physical details. Genuine cards have white edges and crisp text, unlike fake ones, which often have black edges or blurry printing.

Other Brands’ Verification Steps

For all brands, keep these tips in mind:

  • Packaging should be intact with clear product details and certifications.
  • Avoid bulk packs, as they lack warranties.
  • Always buy from trusted sellers to reduce the risk of counterfeit products.

Testing Methods and Tools

Visual checks alone aren’t enough to confirm your SD card’s authenticity. You need tools to verify both storage capacity and speed across devices.

Windows Testing Options

  • H2testw: This trusted tool writes and reads test data to confirm your card’s functionality and to test SD card capacity.
  • FakeFlashTest: Checks capacity quickly but erases all data during testing.
  • ChipGenius: Reads data directly from the memory chip without deleting anything. It reveals your card’s actual manufacturer and capacity.

Mac/Linux Tools

  • F3 (Fight Flash Fraud): For Mac and Linux users, install via Terminal with brew install f3. Use f3 write to test write speeds and f3 read to verify data accuracy. It highlights corrupted sectors.
  • Linux disk utilities: These built-in tools can run basic health checks.

Fake SD Card Test Android

  • SD Insight: This Android app provides quick authenticity checks by displaying manufacturer details and specifications. However, compatibility may vary with Android 7.0 and later.
  • Speed test apps: Let you verify read and write speeds directly on your phone. These results ensure the card’s performance matches its printed specifications.

Common Red Flags Across Platforms

  • Slower speeds than advertised
  • Errors during writing operations
  • Problems with formatting
  • Mismatched capacity readings

Thorough testing takes time, especially for larger-capacity cards. Always run multiple tests for a complete analysis.

Performance Analysis

Testing your SD card reveals its true capabilities. Here’s how to evaluate its performance:

Read/Write Speed Verification

Check your card’s speed using a large file (e.g., a 1–2 GB video) to get reliable results. If your card claims 95 MB/s read and 90 MB/s write speeds, it should perform near those numbers. If it only reaches 5–10 MB/s, it’s likely counterfeit.

Steps for Accurate Testing:

  • Use a high-speed card reader.
  • Copy a large file to the card to measure write speed.
  • Transfer it back to check the read speed.
  • Watch for speed inconsistencies.

Speed Class Reference Table

Class

Minimum Write Speed

Class 2 2 MB/s
Class 4 4 MB/s
Class 10 10 MB/s
UHS-I Up to 104 MB/s

Capacity Validation Tests

  • H2testw: Writes data across the entire card to verify its actual capacity. A failed test might show messages like “1.9 GB OK, 29.3 GB DATA LOST.”

Test result for bulk Micro SD 64GB U1 Test result for bulk Micro SD 64GB U1

Steps to Follow:

  1. Format the card before testing.
  2. Perform a full write-and-verify cycle.
  3. Look for any data corruption or capacity mismatches.

Reliability Assessments

SD card reliability can decline over time. Signs of performance issues include:

  • Slower transfer speeds
  • Sudden data corruption
  • Formatting errors
  • Capacity mismatches

Consumer Protection

If you buy a fake SD card, here’s a glimpse of what you need to know:

Legal Rights Overview

Selling counterfeit goods is illegal. While buying fake products for personal use doesn’t lead to penalties in the U.S., sellers can face fines of up to $2 million for the first offense. The SD-3C consortium works with customs agencies worldwide to stop fake products.

Refund Procedures

Follow these steps to recover your money if the card is counterfeit:

  1. Take screenshots and record test results.
  2. Contact the seller with evidence.
  3. If purchased through eBay, open a case within the protection window.
  4. For credit card payments, initiate a chargeback.
  5. Don’t return the card until you receive your refund.

Reporting Counterfeit Sellers

Report counterfeit products to:

  • The brand manufacturer (e.g., SanDisk: 800-275-4932 for U.S./Canada)
  • The National Intellectual Property Rights Coordination Center
  • Fraud departments on e-commerce platforms
  • Consumer protection agencies in your country

When reporting, include:

  • Seller’s full address (from the shipping label)
  • Transaction details
  • Photos of the product and packaging

Platform-Specific Protection

Amazon and eBay have dedicated procedures for handling counterfeit products. For example, eBay issues alerts after one counterfeit report.

Conclusion

Protecting your data starts with identifying fake SD cards. Look for physical inconsistencies, test performance, and use trusted tools for verification. Authentic SD cards are reliable and fairly priced. Tools like H2testw can quickly confirm authenticity.If you suspect fraud, take action immediately: gather evidence, contact the seller, and report the counterfeit. Always buy from authorized sellers to ensure the quality and security of your SD card.

0
Back to Top
Product has been added to your cart