Are you tired of spending an arm and a leg on feeding your animals?
Do you want to give your livestock a more natural feed option that includes a lot of great nutrition for them?
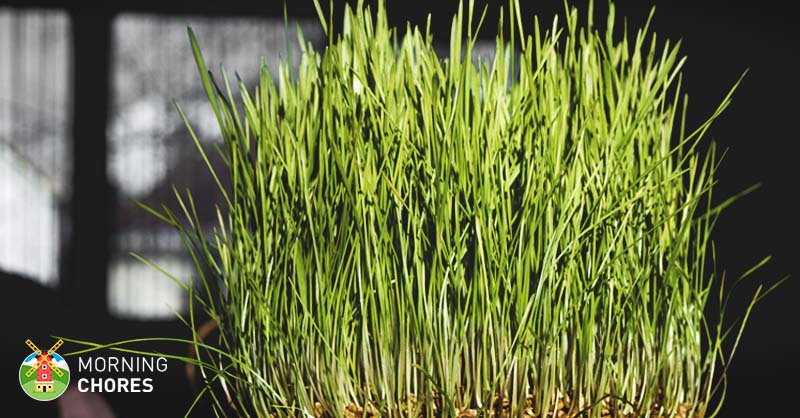
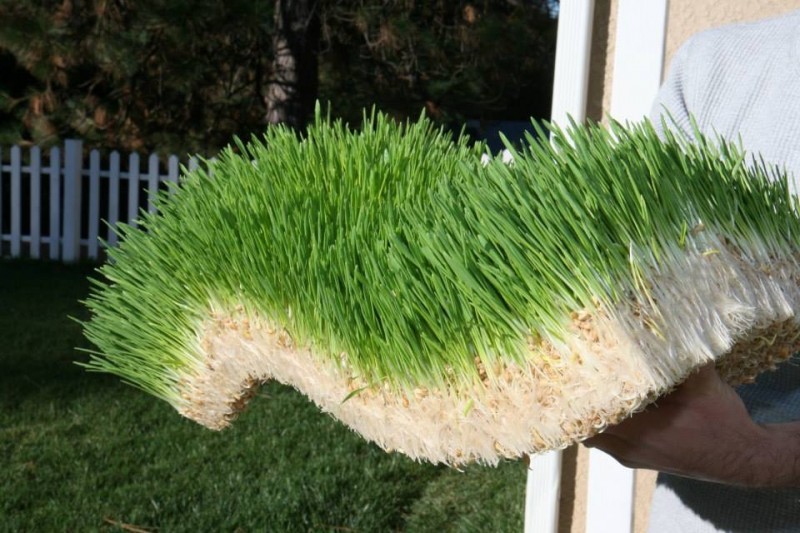
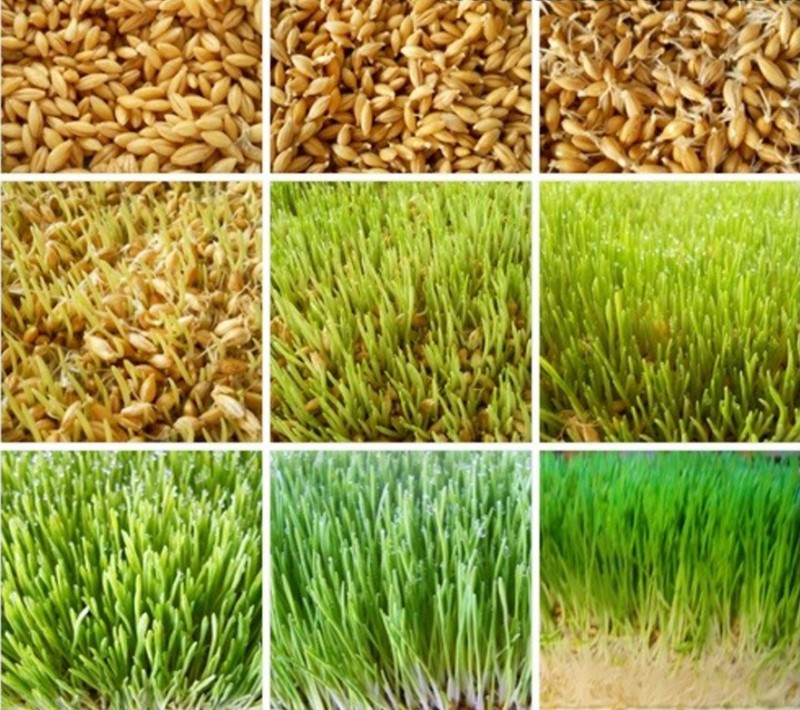
Well, if you answered yes to those questions, then you just described fodder. Fodder is when you buy quality grains, soak them, and then allow them to grow for seven days before feeding it to your animals.
As you can tell, it is pretty simple, very inexpensive, and something we do for our animals. Which is why I’m going to share with you how to set-up your own fodder systems, and how you can begin to save on your feed bill with this healthy alternative we call fodder.
Why Grow Fodder?
There are lots of reasons to grow fodder. The first would be for the animal’s nutrition. Fodder seeds are soaked prior to growth. Therefore, they ferment and that is great for the animal’s digestion.
Then they sprout lovely green foliage which is great for nutrients to the animal.
Next, fodder saves you a ton of money. You can turn 50 pounds of seed into about 200 pounds of food. Obviously, you spend less because the food goes further.
The third reasons you might grow fodder would be because of self-sustainability. I’m a homesteader. I like being self-sufficient. Even though I live on less land, I like being able to grow and produce as much of my animals’ feed as I possibly can.
So fodder is a great solution for me because I’m able to grow it and it is also very compact to do so.
Which leads me into my final reason for growing fodder. Not only is growing fodder compact but it is also very fast. You soak seeds for 24 hours and within a week, you have a ton of food ready to feed your animals.
So I ask you this, if fodder can do only one of these things for you (and often it does all of them) why wouldn’t you grow it?
What Can You Use to Grow Fodder?
Now that you realize what an awesome thing fodder is, you might be wondering, what do I use to grow it?
Well, some of the basic options are wheat, barley, and whole oats. I’ve also known people who have sprouted sunflower seeds. Truthfully, you can sprout almost any seeds. You just stop them from growing after day 7, and you must soak them before growing. It is truly very simple.
However, I will say that my preference is wheat seed. For us, it has the best growth rate, and our animals really seem to enjoy it.
Plus, wheat seeds are very inexpensive in my area. I can buy a 50 pound bag for around $7. So you really can’t beat that. Our goats prefer barley, but we have a hard time getting it in our area so it comes with a premium price when we find it, which makes it uneconomical for us.
Also, we tried to sprout sunflower seeds because black oiled sunflower seeds are supposed to be very nutritious. But by the time we paid the higher price for them, and then we didn’t have a lot of luck with sprouting them, we realized they just weren’t for us.
So you’ll need to find the seeds around you at the best price and try your hand at sprouting them. You’ll find what works best for you. It just might take some trial and error until you find the right one.
How to Grow Fodder
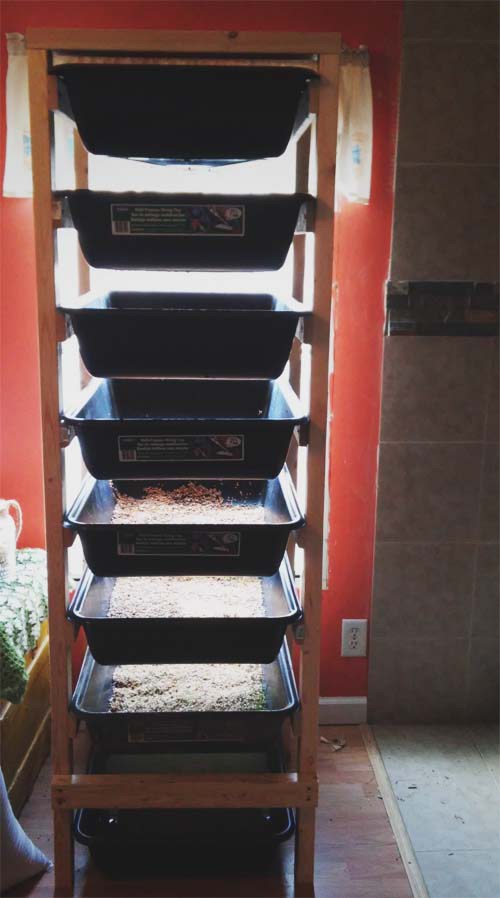

My actual fodder system before we moved it outside.
Now that we’ve covered why you would want to grow fodder to begin with, and what you use to grow it, let’s discuss the actual process.
What You’ll Need:
- 7 Trays with holes drilled in the bottom
- Wood to create a sliding drawer system
- An under-the-bed box
- Seeds
1. Buy Your Seeds
You’ll begin by buying your seeds. We purchase our seeds from a local feed mill. As mentioned above, I get 50 pounds of wheat seeds for around $7.
Then you bring them home, and you are ready to get the party started.
2. Set-up a Soaking System
The first thing you’ll need to do is figure out how and where you are going to soak your seeds. You’ll need a container to soak them in.
So for us, we had a bunch of milk jugs that we had been saving for an herb garden project. Since we had too many, we just cut the tops off of them and began by placing two scoops of seeds into each milk jug.
Now, I have a two tower fodder system (which we’ll discuss in a minute) so I knew I needed two milk jugs because you need one jug per tower.
Once I got the seeds scooped into the milk jugs, I covered the seeds completely with water and let them sit. They’ll need to soak for about 24 hours. When you return the next day, you’ll want the seeds to be fat and the water to be virtually gone from the container.
3. Create Your Fodder System
Now, this is the big step. You are going to need to create a towering system. You’ll need one tray of fodder per day. I actually raise two trays because I feed one tray to my rabbits and one tray to my chickens.
However, depending upon the size of your trays and how many animals you have, you’ll need to estimate how many trays you need per day. How many trays you need, will determine how many towers you need to start. Keep in mind that animals need between 2 and 5% of their body weight in fodder per day to remain healthy.
But it will be less, if you are using fodder as a supplement. For instance, I feed my rabbits fodder, hay, and pellets. So they don’t require as much. That is the same for our chickens and any other animal I feed fodder. They all get a variety of foods.
Then you are going to create a rain chain. We built our towers from scrap wood we had. It is basically a tower with little slats for the trays to slide on like a drawer system would. Our trays are actually oil pans we purchased with holes drilled in the bottoms of them.
Next, you’ll need a tub at the bottom of the tower to catch all of the water that you are going to pour through the rain chain.
Then you’ll pour the soaked seeds into the tub. The water will run down through the holes and water the trays beneath it. You’ll work your way down with each new day and when all of the trays are full of soaked seeds, you’ll see that the first tray (7 days later) should be tall enough to feed to your animals.
Now, you have two options when it comes to watering your fodder system. You can either water it by hand twice a day. I usually take a gallon pitcher and dump a gallon on it in the morning when I’m dumping the seeds into the trays and soaking the next days seeds.
Then my husband will water it that evening when he comes home from work. But we did discover that if you fill up the tub under the fodder system, you can put a small fountain pump in the bottom and set a timer on it. This way, the fodder will be automatically watered twice a day.
So during our prime time of year, we use this method because the more water the better it usually grows.
4. Feed the Seeds to the System
After you have your fodder system in place, you’ll need to get in a routine of dumping your soaked seeds into the next empty tray each day.
Then you’ll add one or two more scoops (depending upon how much fodder you’re growing) into each jug and soak them for the next day. You’ll do this every day and then water your entire system (unless it is set up to water automatically) after the seed rotation in the morning.
Plus, you’ll need to water the seeds again later in the day. Keep in mind, you can place your fodder system anywhere that is around 70 or so degrees Fahrenheit. It does not have to have sunlight to grow so it can be grown in a basement or closet even. The main thing is that the grow system doesn’t get too hot or too cold.
For us, we’ve grown fodder in our bathroom, in our living room, and now we’ve created a small greenhouse so it can grow outside all year long. Then I can add a heat source in the winter or a cooling source if needed in the summer.
But I don’t have to move it all over, nor do I have to have it taking up space in my house either.
5. Let Them Grow
So after you’ve got your seed rotation down, you’ll just need to let the seeds grow. You should have a tray to feed to your animals at the end of the 7 days.
Then you’ll feed a tray a day. Each tray takes 7 days to reach full size.
6. Feed to the Animals and Repeat
After each tray has reached full size, you’ll feed it to the animals. Then repeat the same process again and again. It does take a little effort to keep the process going, but really not much different that scheduling that trip to the feed store every week or so.
Plus, this method is much more frugal (in my opinion), naturally since you are growing it from start to finish, and it is healthier for your animals as well.
So keep it in mind when you are thinking of inexpensive ways to feed your animals.
Also, if you are a visual person, here is a great tutorial on video.
https://www.youtube.com/watch?v=RX4VoV7DeG8
Hopefully that will help you grasp this idea as well.
Well, now you know the ins and outs of growing your own fodder. I hope this inspires you to consider growing more of your own feed.
Also, I hope it empowers you a little as well. Don’t think that just because you live on a small amount of land that you can’t still be self-sufficient. It just requires thinking outside of the box a little.
But I’d love to hear how you grow fodder. Do you have a unique fodder system? How did you design it? Does your animals love fodder? Do you have any advice to those that are new to the idea of growing fodder?
We love hearing from you all so please leave us your thoughts in the space provided below.

