Know your options and enjoy better results
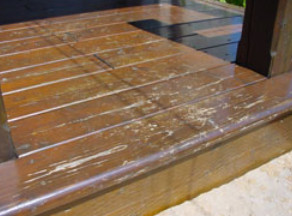 Outdoor wood finishing disasters top the list of cries for help I get from homeowners across Canada.That’s because successful exterior wood finishing isn’t as simple as you’d think it should be. New wood is always bright, fresh and clean looking, and most homeowners want to keep it that way. Nature, however, has different plans. Water, sunshine, wide temperature swings and microbes are constantly vying to turn your outdoor wood into rotted organic matter, and they’re pretty good at it, too. Over the last 25 years I’ve been searching for, testing, and implementing the best strategies for finishing outdoor wood that I can find. My favourites have changed over the years as product chemistry improves, and though I’ve yet to find a perfect outdoor wood finish, what you’ll find here are the optimal methods and products in a step-by-step guide.
Step #1: Identify Your Situation
When it comes to outdoor wood, there are three main categories of surfaces:
- wooden decks
- vertical surfaces (like fences and siding)
- outdoor furniture
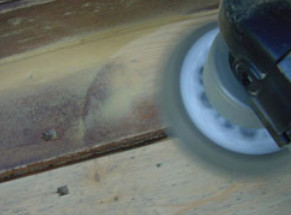 Although all made of the same material, the finish that makes sense in one situation can sometimes be a disaster on another. Decks take a lot of water, foot traffic and UV rays, for instance. That’s why you finish them differently than vertical wood surfaces such as fences and siding. A wooden garden lounge may have a small surface area, but there are countless nooks and crannies that will make finish maintenance a nightmare if you start off with the wrong product. Vertical surfaces, such as fences and siding, tend to be large, so minimizing maintenance work is crucial for most people supplying their own labour.
Step #2: Determine Your Personal Stamina Level
For each of the three main outdoor wood situations, there are various finishing options to choose from. The one that’s right for you depends on how much ongoing work you’re willing to invest in exchange for a specific appearance. As you’d expect, the greater the level of bright, fresh appearance you want, the more effort you’ll need to invest regularly to stave off weathering.
Step #3: Understand Your Choices
There are five main families of outdoor wood finishes:
- Tinted, film-forming finishes are one of them. They make outdoor wood look as refined as furniture, allowing grain patterns to show through added colour. The results are gorgeous, and the protective film is second-to-none at preventing surface cracks in wood caused by weathering. But as good as film-forming finishes look when new, maintenance can be challenging. As the film inevitably breaks down and peels (mostly from UV exposure), it usually requires complete stripping of the finish before fresh coats can be applied.
 Opaque, film-forming finishes are another choice. These products look like paint, except the best formulations are tough enough to stand up to the abrasion on decks. Since these finishes are not transparent, they resist UV break-down better than tinted, film-forming products, while also protecting against surface cracking of wood.
- A third choice is coloured, no-film stains. These soak into the wood and form no surface film. They don’t let visible wood grain show through (a drawback to most people), though peeling is not a problem. No-film stains either don’t peel at all, or peel so daintily that all loose material can easily be brushed off. Although no-film stains are easier to maintain than either tinted of opaque film-forming finishes, they don’t offer much protection again surface cracking of wood caused by weathering.
- Clear, transparent wood sealers are a fourth choice, and they make sense if you want to preserve the natural, bright, uncoloured look of new lumber as long as possible. Just realize that “as long as possible” won’t actually be that long. The best transparent wood sealers offer about a year’s worth of protection against graying caused by weathering, then they start to break down. Retaining the natural look of new wood requires annual treatments with a deck brightening chemical, followed by pressure washing and possibly sanding before reapplication.
- Exterior oils are a little-known fifth option. They don’t form a surface film, but do impart a slightly golden colour. Exterior oils never peel and they’re ideal for light-duty surface protection. Annual reapplication is always necessary.
Step #4: Choose a Finish to Fit the Job
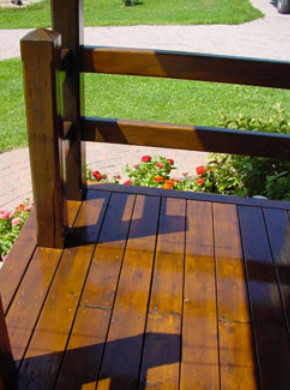 Got a deck? Four of the five main finishing choices are options here. The only exception is exterior oil. It’s too fragile. When I want a refined furniture look on a deck, I choose use Sikkens DEK finish, using a dark colour for the first coat, then the lightest possible colour for subsequent coats. DEK is a translucent, film-forming finish that delivers about 36 months of life in a sunny location and more than double that in shady, low traffic areas. Cabot Decking Stain is an opaque, film-forming finish offering about 60 months of respectable appearance in hight traffic areas. You’ll find it easier to maintain a deck with a no-film coating since these don’t peel. Transparent, wood sealers are appropriate for maintaining the bright look of a new deck, as long as you’re okay with annual maintenance. No-film stains work too, but some brands track colour into the house.
Got a fence? Since these are big – and fences are usually okay looking a little rustic anyway – you might consider leaving the wood bare. If you want to add some kind of colour, no-film stains are way less time consuming to maintain than film finishes since they never require stripping.
Wood siding usually covers large areas, like fences do, but a rustic look isn’t in keeping with most houses. If you’re not happy with barnboard-grey siding, a film-forming finish is your best choice. Anything less allows surface cracks to form in the wood from weathering, eventually allowing water to penetrate the siding and possibly enter wall cavities.
Outdoor wood furniture should never be finished with any kind of film-forming finish – either translucent or opaque. That’s because it’s so difficult to strip an old, peeling finish because of all the nooks, crannies and narrow gaps between parts. Some no-film stains work well for furniture, but test products to make sure they don’t rub off on clothing. Annual application of exterior finishing oil is an excellent option that maintains a refined appearance. Minwax Teak Oil is currently my favourite choice.
Finishing exterior wood isn’t as simple as it looks, and that’s why you’re wise to do your homework before walking into a hardware store on a sunny Saturday morning, choosing whatever looks good. Select products with care, come to terms with the maintenance chores they require, then avoid the nasty surprises that catch a lot of Canadians off guard when it comes to outdoor wood.
Sidebar: Sanding is Key
New wood can’t hang on to a finish well, and neither can old wood. The best surface for longest finish life is a dry, freshly sanded one. Pressure washing new wood, then letting it dry before sanding, is faster than sanding alone and works at least as well.
Sidebar: Wooden Windows a Special Case
Finishing wooden windows sashes requires a special approach on three counts. First, stripping, sanding and recoating windows is a huge pain. You can easily spend three or four hours on each one. Second, stress on the finish is huge, thanks to intense UV exposure and lots of places where water can slip between glass and sash. And third, the amount of finishing product required for windows is tiny compared to the labour involved in applying it.
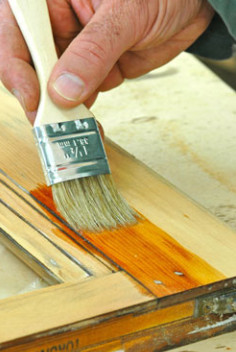 These three issues led me to try a traditional linseed oil paint back in 2008, and after four years of watching the results weather, I wouldn’t choose anything else for wooden windows. The claim-to-fame of this stuff is that it never peels, even after four or five decades of exposure. All it does is wear out, meaning that finish maintenance is simply a matter of recoating. If you’re stripping an old finish, as I did, slake the thirst of the old, bare wood with linseed oil made especially for use with the paint. The paint itself is slow to dry, expensive, prone to runs and must be brushed out extremely thin or it will krinkle as it dries. Why put up with all this? Since linseed oil paint doesn’t peel, it eliminates the need for the scraping, stripping and mind-numbing insanity that refinishing wooden windows usually involves. I consider it a good trade. The stuff I’ve used is called Allback (866.516.7787)
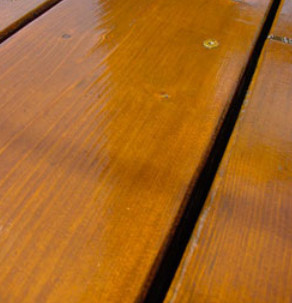 Opaque, film-forming finishes are another choice. These products look like paint, except the best formulations are tough enough to stand up to the abrasion on decks. Since these finishes are not transparent, they resist UV break-down better than tinted, film-forming products, while also protecting against surface cracking of wood.


