- What is Japanese Rice Cakes?
- What is The Difference Between Mochi and Onigiri?
- Onigiri Filling and Seasoning Ideas
- Variations and Substitutes
- When to Eat Japanese Rice Cakes
- What Ingredients Do You Need to Make This Onigiri Recipe?
- How to Cook The Rice
- A sushi rice cooker? Yes Please!
- How to Season the Rice
- How to Shape Onigiri Without Mold
- 5 Tips For Making The Perfect Onigiri
- What kind of rice should you use to make japanese rice cakes
- This is not labeled "sushi" rice but it's half the price and makes it just the same!
- A Brief History About Japanese Rice Cakes And its Role In Japanese Culture
- Onigiri, Lady Murasaki, the Heian Period and Shimokuzae
- About the Recipe
- How To Cook The Rice
- How to Shape Japanese Rice Cakes
- Our Take on the Recipe
If you’re new to eating Japanese rice cakes, the thought of making your own might seem a little intimidating. Don’t worry! It’s actually super easy and fun once you get the hang of it. It also has a familiar taste since it resembles sushi!
What is Japanese Rice Cakes?
Onigiri is a Japanese rice ball. It’s a common street food in Japan, and also a popular lunch at home. It’s pretty simple and easy to make, too—just take some cooked rice, shape it into balls with your hands (or use cupcake liners) and fill it with whatever you want! You can eat them hot or cold, but often served cold, so it’s great as a summer treat!
They’re made from rice which makes them very filling and great for traveling or lunch at work because they’re portable and easy to eat.
What is The Difference Between Mochi and Onigiri?
In terms of taste, mochi is a lot sweeter than onigiri. Mochi is made from steamed glutinous rice, which is then stuffed with a sweet filling such as bean paste.
Onigiri on the other hand have fillings that is mostly fish or some other type of vegetable or protein and is eaten more as an appetizer or snack than a dessert. In fact, it’s often eaten with soy sauce!
Mostly think of mochi has a dessert and japanese rice cakes (onigiri) as a snack or appetizer.

(on Amazon)
Onigiri Filling and Seasoning Ideas
Here are some ideas for an onigiri filling that would go great with this rice cake recipe:
- Rice, salmon and tuna (or any other meat or fish)
- Pickled radish slices and sesame seeds for seasoning
- Furikake (on Amazon) (a Japanese seasoning mix)
Seasoning ideas: soy sauce, mayonnaise, sriracha (on Amazon)
Variations and Substitutes
Variations: the sky is the limit! Try swapping out the salmon for tuna, crab, shrimp or even an egg (crack egg into middle of rice cake base and cook 2-3 minutes). Get creative with shapes like squares or diamonds. Cucumber and avocado are always great additions to any roll. You can also add some pickled ginger or sesame seeds as a topping.
When to Eat Japanese Rice Cakes
Onigiri are very popular in Japan and have been for hundreds of years. They’re not just a snack food though—they can be eaten at any time of the day as a light meal or as an appetizer! There’s nothing wrong with eating an onigiri for breakfast, for example (and people do it all the time). People commonly eat them as snacks, too, especially if they’re out and about. It’s also not unusual to find onigiri sold at convenience stores in Japan—they’re a great choice when you want something portable and filling when you’re on the go!
In general, most people eat their onigirii with soy sauce and pickled ginger (gari). Some recipes will ask that you mix together salt and wasabi instead of using soy sauce—but if you prefer spicy foods then feel free to adjust your seasoning accordingly!
What Ingredients Do You Need to Make This Onigiri Recipe?
For this onigiri recipe, you’ll need:
- rice – cooked long grain white rice or any kind of short grain rice is fine.
- nori – these seaweed sheets are available in most Asian grocery stores
- salmon – we recommend freshly grilled salmon, but you can also try sushi-grade salmon and eat it raw
How to Cook The Rice
The easiest way to cook onigiri rice is with a rice cooker. If you don’t have one, or are in the mood for something more hands-on, try using a saucepan.
When making onigiri rice this way:
- Rinse the rice gently before cooking (this will help prevent it from clumping).
- Bring the water to a boil on high heat, then lower it to a simmer with lid on and fluff halfway through.
A sushi rice cooker? Yes Please!

(on Amazon)
How to Season the Rice
It’s pretty simple – we melt some sugar in rice wine vinegar, season it with salt, and sprinkle this concoction onto the rice after it’s done cooking. By the way, if you’re looking for a rice cooker to make this process simpler and more automated – and have the most perfect sushi rice, check out our other article where we talk about the absolute best sushi rice cooker.
How to Shape Onigiri Without Mold
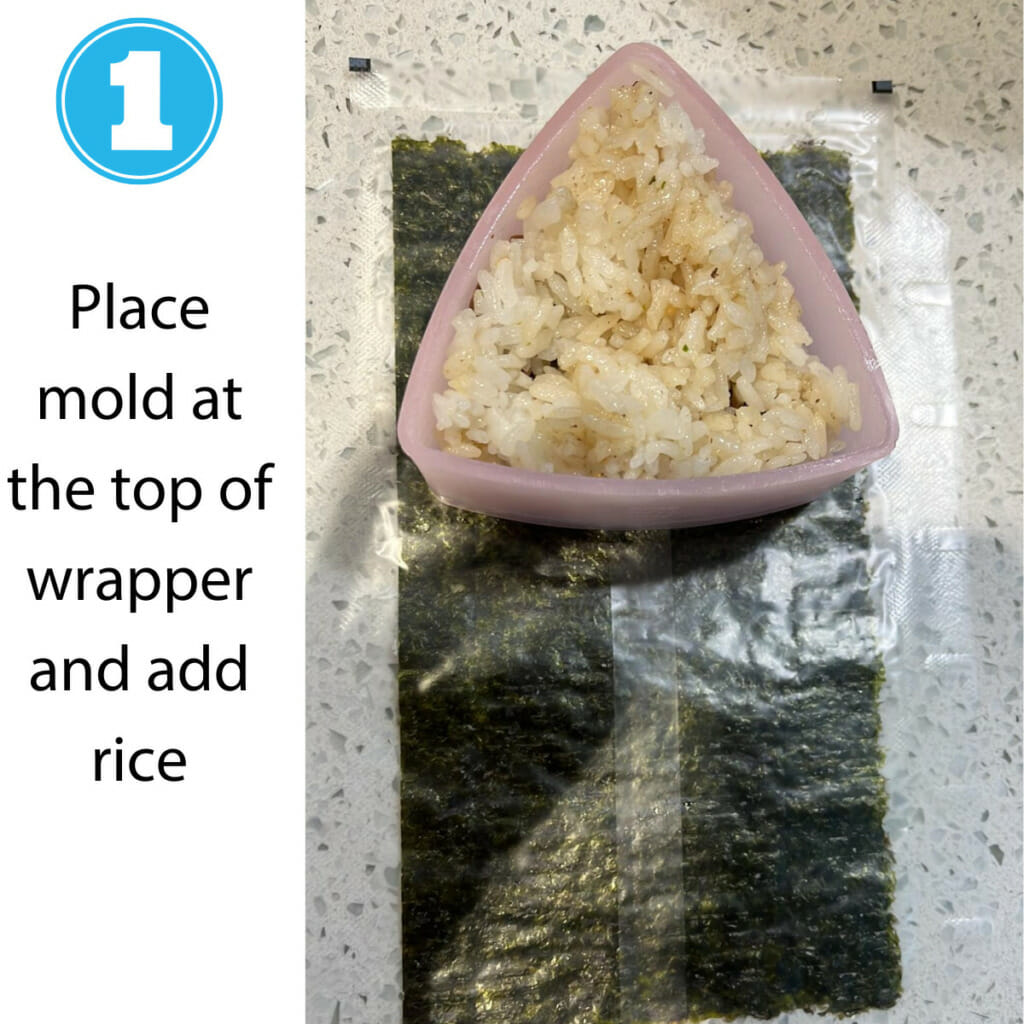
In this article we’ll talk about how to shape the onigiri with your hands, but it is much faster and much easier if you have a mold. For a complete tutorial on that, with step-by-step instructions, see this other article on how to wrap onigiri with mold.
Now that you’ve learned how to make the rice and the filling, it’s time to shape them into onigiri. While there are many ways to do this, there are two main ways: using a sushi mat or using plastic wrap.
If you don’t have a sushi mat or nori sheets (wet seaweed used for making sushi rolls), fear not! You can still make some pretty impressive onigiri without them. There are several ways of shaping your onigiri without these tools—you can even use your hands! The key is making sure that each ball has an indented middle so that it will hold together better when filled with the salmon mixture (see pictures down below in the recipe section).

5 Tips For Making The Perfect Onigiri
- Add the rice to a rice cooker. The water-to-rice ratio should be 1:1, so if you’re using a 2 cup/500 mL measuring cup, use 2 cups/500 mL of water.
- Place the lid on your rice cooker and turn it on!
- When your rice is done cooking, let it rest for about 5 minutes before removing from heat (this will keep any loose steam from escaping and sticking to your bowl).
- Fluff with a fork, then transfer to a large mixing bowl. Allow to cool slightly until safe enough to touch with wet hands; if not using immediately, cover with plastic wrap or aluminum foil until ready to use. Do not refrigerate or freeze! Yuck! We do not want soggy nori-wrapped monstrosities here people!
What kind of rice should you use to make japanese rice cakes
This is not labeled “sushi” rice but it’s half the price and makes it just the same!

Nishiki Premium Short Grain Rice
Buy Now →(on Amazon)
The type of rice used to make Japanese rice cakes is short grain. This type of rice has a sticky texture that makes it ideal for use with onigiri. The biggest advantage to using short grain over medium or long is that it cooks faster, producing a softer texture inside your onigiri.
Short grain rice tends to be stickier than other types of rice, so you’ll want to season it before cooking it in order to prevent too much sticking together when rolled into balls. To season, add some salt and sugar; mix well until evenly distributed throughout your bowl of uncooked grains (you don’t want more salt than sugar). It’s also important that you wash your hands thoroughly beforehand—this prevents any soap residue from getting stuck between fingers during shaping!
Once you’ve prepped all of this information about what kind of potatoes there are out there in the world today — now we can move onto one very important question: How do I cook them?
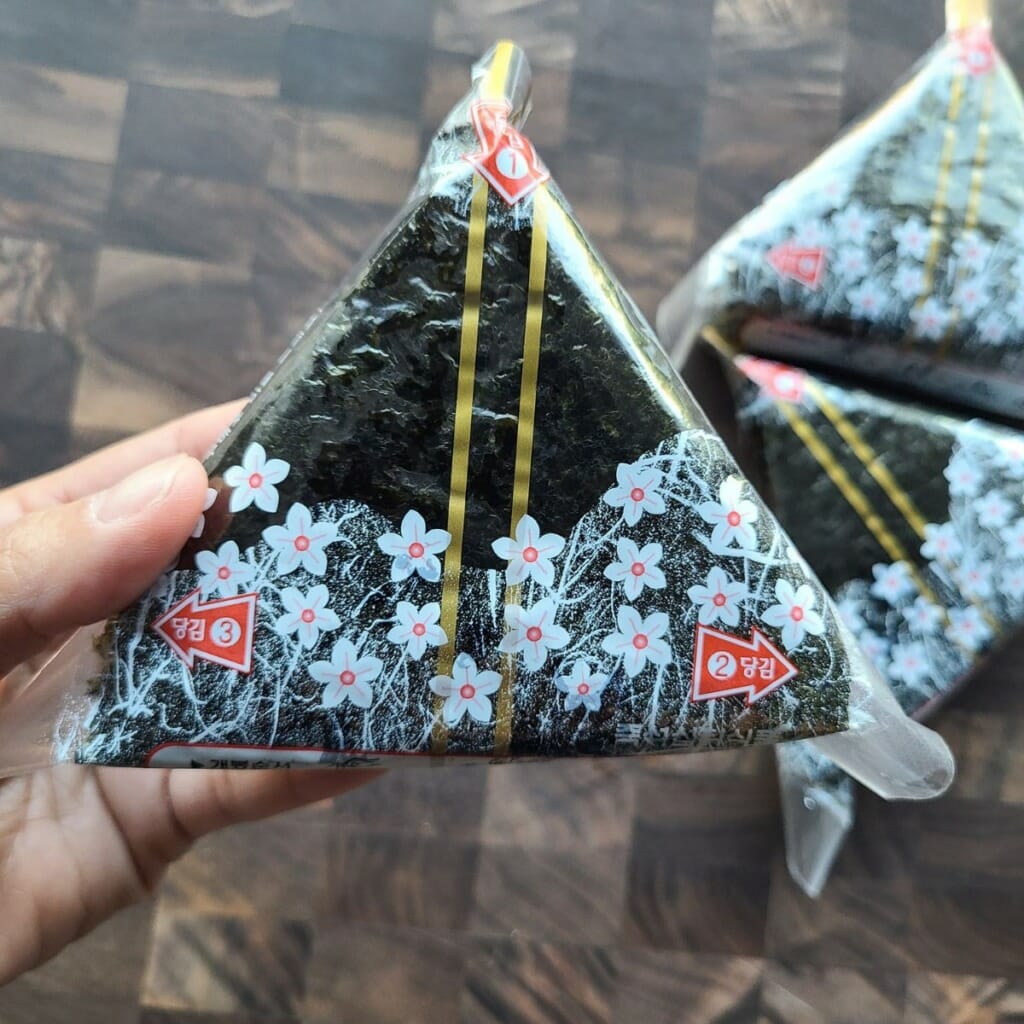

A Brief History About Japanese Rice Cakes And its Role In Japanese Culture
Some of life’s greatest treats come in the smallest packages.
Onigiri is most definitely one such small-packaged large-sized treat. What originally started as an effective, efficient way to feed a large scale of people has turned into, well, an effective, efficient way to feed a large scale of people… with style.
Whether as an ornate decorative edible rice treat or as some simple comfort food, there’s so much that can be done with these delectable rice cakes.

Onigiri, Lady Murasaki, the Heian Period and Shimokuzae
In one form or another, onigiri has been a staple food and a mainstay Japanese recipe throughout much of their modern history.
Archaeologists discovered a carbonized chunk of rice balls dating back to somewhere between 300 BC and 300 AD during the Yayoi period, making it the oldest evidence of this sticky, filling rice cake.
Even today, the consumption of onigiri is simply staggering. In Japanese 7-Eleven stores alone – meaning just on the lower end of the market spectrum – 2.84 million onigiri are eaten per day!
The true rise of this onigiri as a decorated and special food, however, can be traced back to a particular period and to a particular lady: Lady Murasaki during the Heian era.
The Heian Period and Culinary Growth
Before diving into the Heian period, it’s important to point out a key innovation in Japan’s history that would play a massive role in the development of onigiri.
Before the Yaoyi’s, there was the Jomon period, and for nearly 10,000 years, the Jomon’s flourished as a hunter-gatherer society. Archaeological evidence and other discoveries lead many to believe that not only were the Jomon a fairly affluent and prosperous society but that they were very much ahead of their time.
By 300 BC, however, that changed with the Yaoyi period. Especially due to the invention of irrigated wet-rice cultivation, Japanese society transitioned to be more sedentary, agriculturally-based. It was at this point that rice first came to the forefront of Japanese cuisine, where it has stayed in the millennia since then.
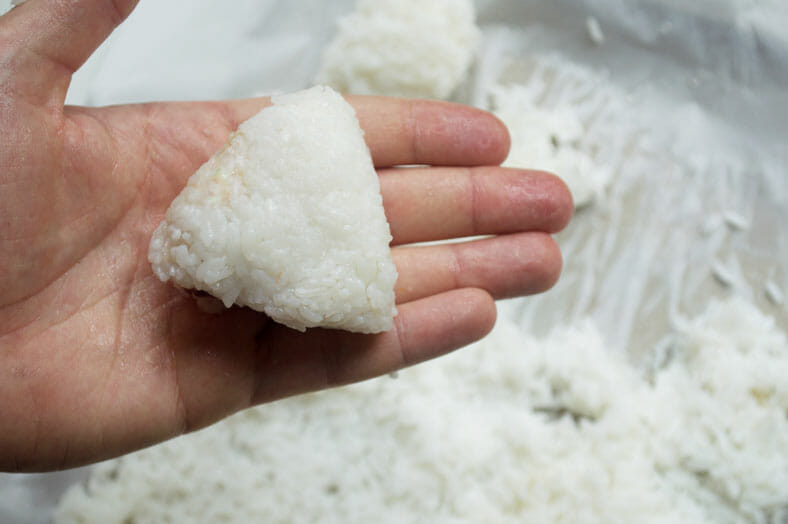
While the Yaoyi did appear to eat triangular rice cakes shaped into the form of balls (particularly for soldiers), the apex in the history of onigiri came centuries later during the Heian period. Generally, the Heian period is considered to be the peak of Japanese cultural development, especially as it pertains to literature and art.
The Heian period, however, also played a pivotal role in overall Japanese cuisine. The aristocracy enjoyed multiple meals and snacks a day, and everybody enjoyed a broadened diversity of ingredients that corresponded to an overall ban on meat consumption. Four of the main seasonings used in Japanese cuisine – salt, soy sauce, vinegar and sake – are thought to have been innovations coming from the Heian era as well.
It was during this particular era that onigiri began to flourish and become a food as symbolic as it was practical.
From here, we’ll let Lady Murasaki take the stage.
Lady Murasaki and Tonjiki
Rice balls for the retainers were set out in the garden – Murasaki Shikibu Nikki
As the Heian Japanese veered away from Chinese influences during this time, some of the greatest windows into the societal psyche have been found in the diaries and writings of individuals, particularly women. One such woman was Lady Murasaki Shikibu, who wrote a diary of vignettes outlining her daily life and observations in the courts.
Her writings – both her diaries as well as her slightly more fictional novel – have been revered as classical writings of a period in which the Japanese kana written language was still defining and developing. Coupled with her brutally honest depictions of the court in her diary, and these vignettes and musings have been celebrated as instrumental to understanding Japanese history.
When it comes to onigiri history, Lady Murasaki lends an important insight into the role of rice as nourishment in the courts. In addition to playing a role in aristocratic diplomacy, Murasaki writes of balls of glutinous rice and stuffing – referred to as tonjiki – being served as nourishment to the shimozukae, or the lower class servants and soldiers of the court.
It’s Lady Murasaki’s mention of tonjiki that some considered as proof to the introduction of what would eventually become onigiri into the modern Japanese diet.
About the Recipe
Nowadays, there are so many preparations and types of onigiri, and it’s truly completely up to the maker how and what to do with it. This indeed can be the beauty of the recipe – in addition to it being a perfect quick dinner recipe – although the abundance of options and choice (even spam onigiri!) can also be slightly overwhelming.
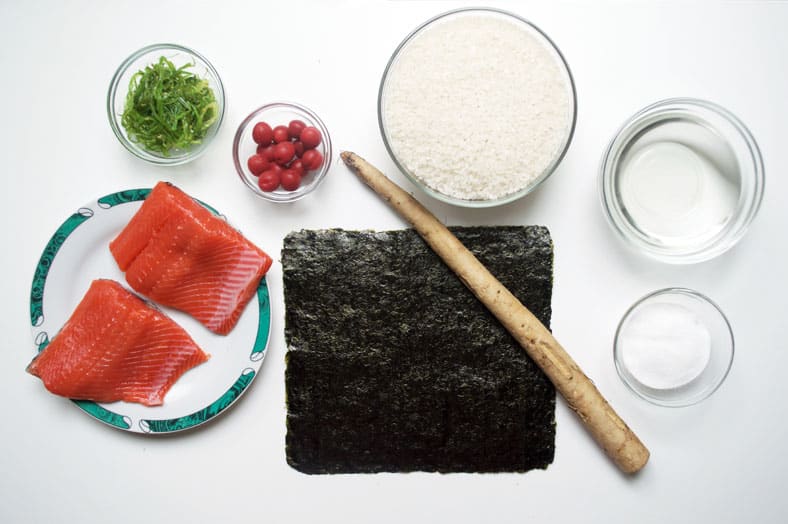
Still, the core of what making onigiri is lies in the translation of its name. O-nigiri (お握り) translates roughly into “a grasp of rice,” which is pretty much the only requirement for this everyday treat.
How To Cook The Rice
To start, you’ll want to cook some of the right rice for onigiri either in a rice cooker or in a regular pot. Longer grain rices like jasmine and basmati will not do the trick here. Ideally, if you can find some japonica rice on which this recipe is based, then you’re in good shape. Failing that, you should try to find a short or medium grain that can stay slightly sticky when cooked. Italian short-grain rices like risotto rice can work well, although if you’re stuck on what else might work, have a look at this page for great detail on what you can use. We’ve also seen recipes using black rice and wild rice as well, but those are more the edge cases than the norm.
As your rice is cooking, you’ll want to prepare (cook if needed) your filling and to set up your onigiri station. If you’re following a recipe like ours (though you don’t have to), your setup station will have three basic parts: your rice, the filling and the roasted seaweed. The seaweed will come at the end and should be kept as dry as possible until it’s time to assemble.
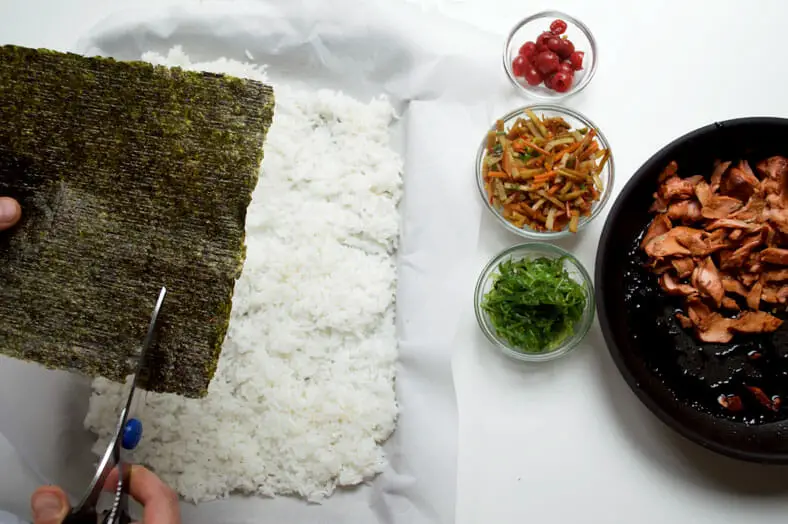
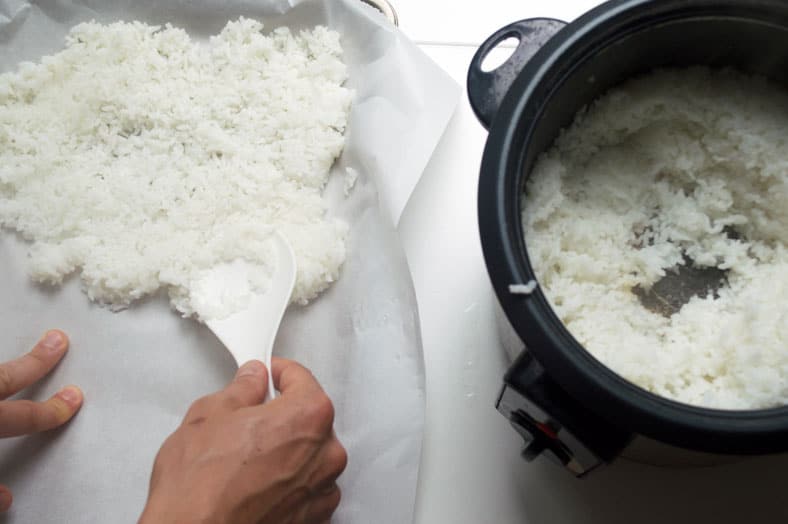
Once your rice is done cooking, spread it on a flat pan and sprinkle rice vinegar on top of it as seasoning. From there, take a scoop of your pseudo rice pudding with your hand to start building your onigiri mold. Using your hand here is important, since there is a common belief that you improve the rice’s flavor with tejio ni kakeru (“hand salt”) that cannot be replicated otherwise. Just be sure to dip your hands in water before handling the rice so that you’re not left with rice stuck on your hands afterwards.
How to Shape Japanese Rice Cakes
Again, there’s just so much versatility and customizability for onigiri that it can be a little daunting, but in our case we broke it down into a fairly simple process. Use your hands to create a small divot in your flattened ball of rice, add some filling into the divot, then very carefully use the edges of the rice to surround and encapsulate the filling in the middle. From there, you can decide to mold it into a shape like a triangle or a ball, and you’ll finish by using a piece of seaweed as your onigiri wrapper around the edges of it.
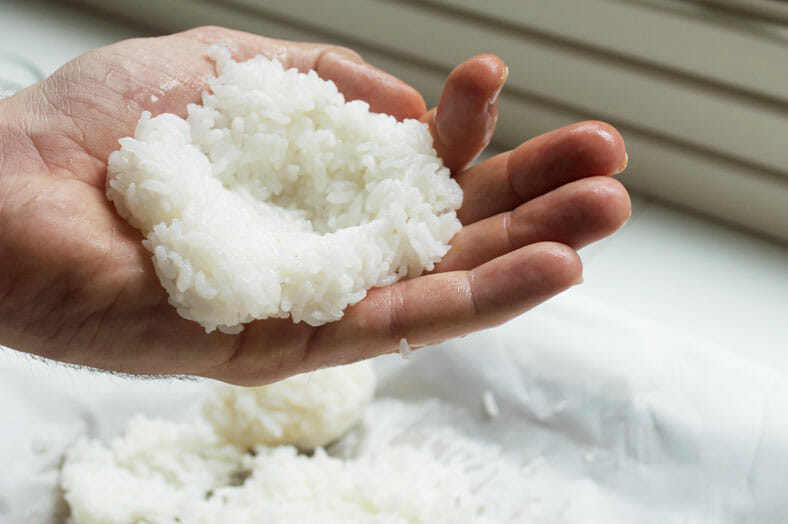
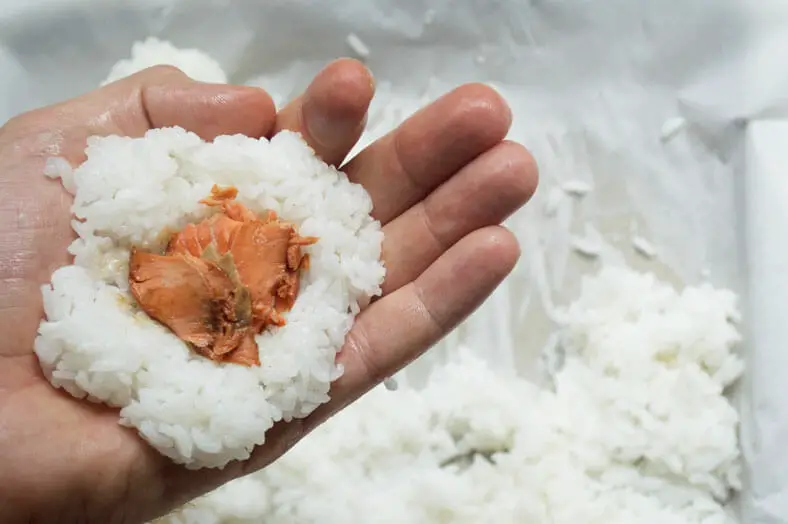

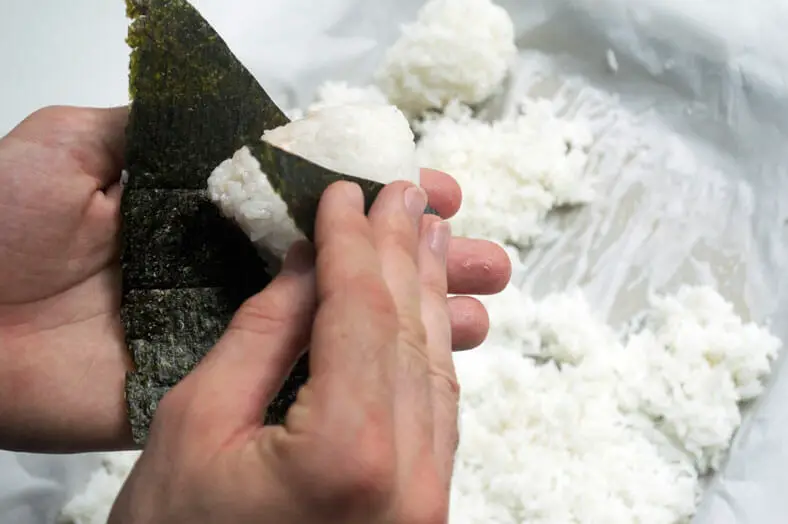
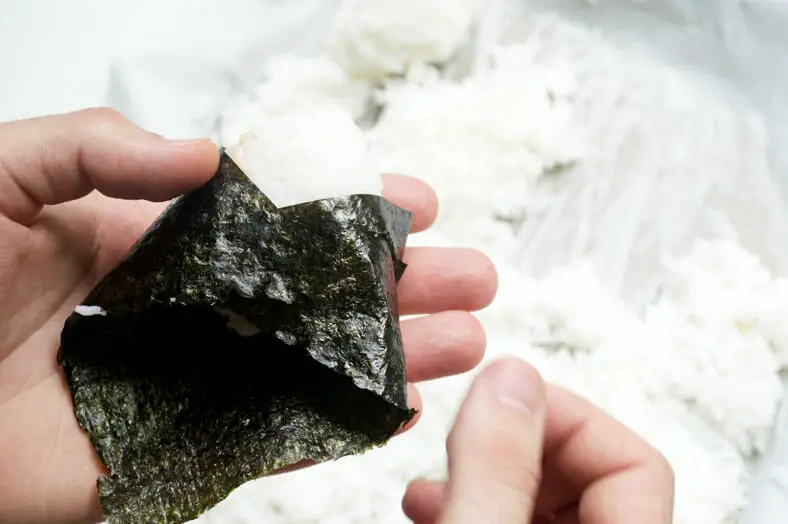
Repeat until all your rice has been turned into onigiri, and then enjoy your little treasure!
If you prefer to do the above using a mold and onigiri wrapper, see our other article for a complete tutorial on how to make onigiri with wrapper and mold.
Our Take on the Recipe
Like we said, there’s so much out there in terms of what you can do with onigiri that you might be left up to some analysis paralysis. That was definitely the case with us… until we consulted the parent of a dear friend. With her help, she was able to guide us towards a recipe that we’ve used as our original reference recipe.
Still, we did want to experiment a little in our version. Her most common recipe for onigiri uses a simple filling made from matchsticked gobo root (which you can find in Japanese supermarkets) and carrots that are cooked, softened and seasoned with chili pepper and soy sauce. If you’re looking to make a vegan-friendly version of this onigiri, this filling is for you.
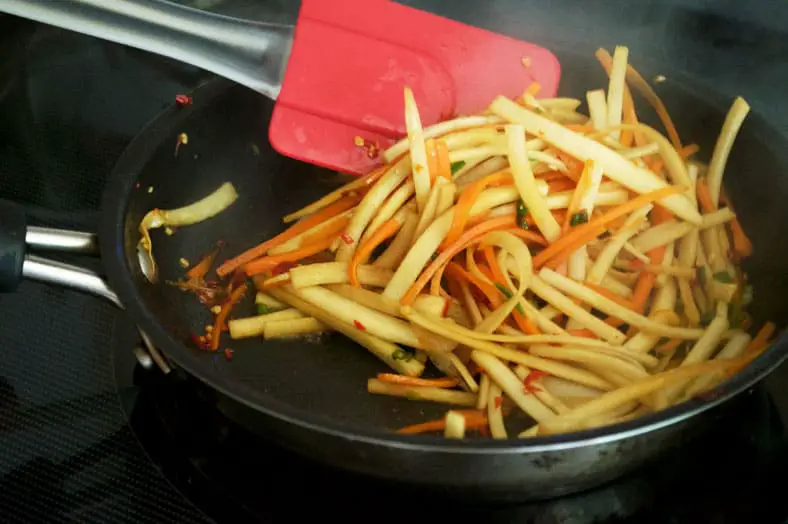
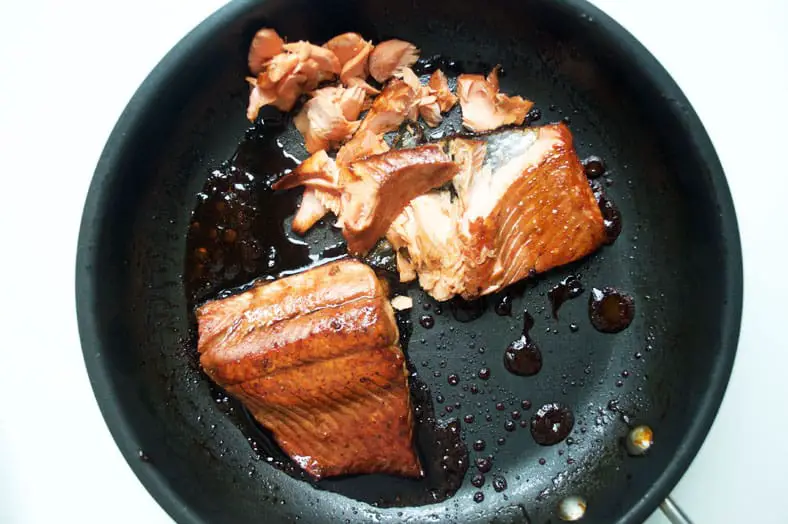
We did try another filling loosely based on the concept of shiozake, or salted salmon. We added some honey and soy sauce as additional seasoning to the salmon as we cooked it through, then we flaked it to make it easier to act as filling in the onigiri. Personally, we preferred this salmon onigiri between the two and the one we’d highly suggest you try.
As for the rice itself, we cooked ours in the rice cooker almost all the way through, though we tempered the total amount of cooking time so as to keep the rice sticky and glutinous. Other than that, we did nothing terribly out of the ordinary with the rice itself.
All in all, onigiri is not only a really easy rice recipe, but it makes for a fun, unique dinner any time of the week! Enjoy!
Have you tried your hand at making onigiri before? What’s your favorite filling? Comment below!
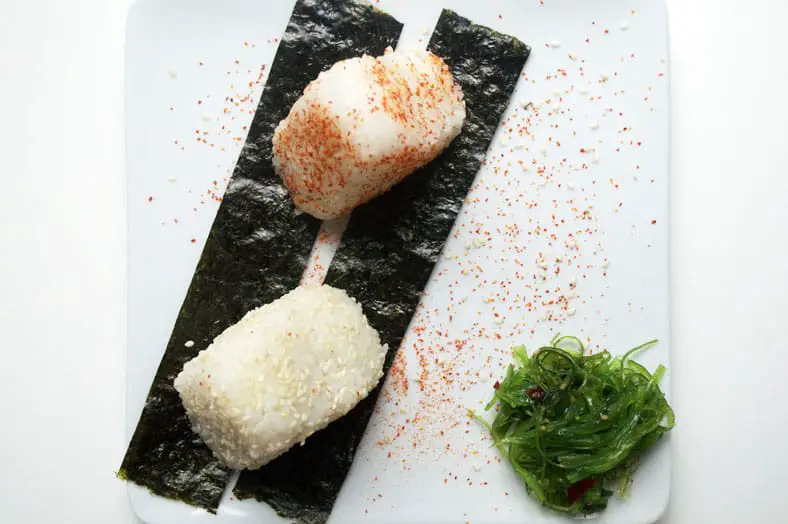
Food styled by: Phil Roepers

- Total Time: 25 minutes
- Yield: 4 people 1x
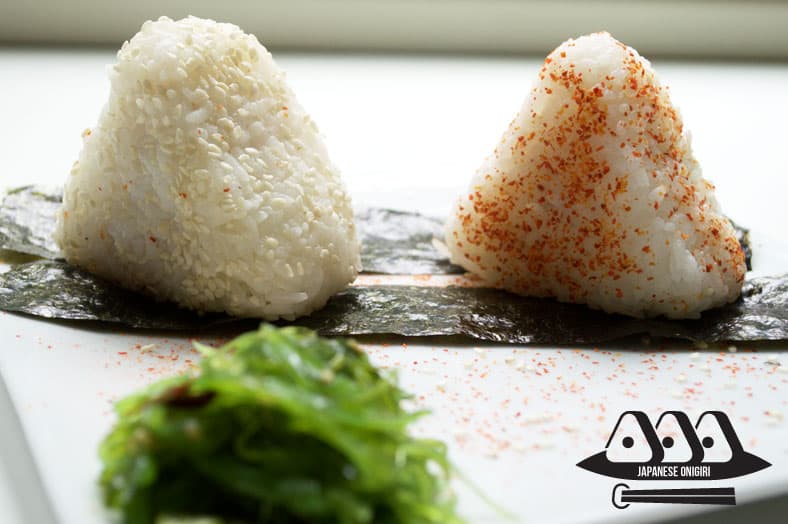
Onigiri: Japanese Rice Cakes with salmon and honey.
Rice Cakes
- 1 cup short or medium-grain rice
- 1 1/2 cup water
- 1/4 cup rice wine vinegar
- 1/8 cup sugar
- salt, to taste
- At least 2 sheets of roasted seaweed
Filling 1
- 1/2 pound salmon filet
- 1 tablespoon soy sauce
- 1 tablespoon honey
- 1 teaspoon garlic powder
- 1 teaspoon ground ginger powder
- 1 teaspoon water
Filling 2
- 1/4 cup gobo root, peeled and sliced into matchsticks
- 1 medium sized carrot, peeled and sliced into matchsticks
- 1 chili pepper, minced
Stage 1 – Cook Onigiri Rice
- Take your rice and water, and either cook it in a rice-cooker for ~15 minutes, or bring it to a quick boil then a ~15 minute simmer in a small pot
- After ~15 minutes, take your cooked rice and lay flat on a baking dish lined with parchment paper
- Melt the sugar in the rice wine vinegar in small saucepan.
- With a small spoon, sprinkle your rice wine vinegar and sugar concotion over all of your rice. Set it aside and cook your filling
Stage 2 – Cook Onigiri Filling
- In a small bowl, mix your soy sauce, honey, water, garlic powder and ginger powder together to create a quick teriyaki-style dressing
- Heat a saucepan over medium-high heat with a dash of oil. With the oil hot, add your salmon and begin to sear
- After a minute of initial searing, pour in your teriyaki sauce over the salmon, and mix around to integrate the sauce into the salmon
- Begin flaking your salmon filet, then remove from the saucepan and set aside
- In the same saucepan, heat a dash of oil and add your gobo root, carrot and chili pepper
- Cook for 3-4 minutes until the gobo root begins to soften, then remove your saucepan from the heat and mix your gobo root and flaked salmon together
Stage 3 – Prepare the Onigiri
- With your filling made, start making your onigiri by taking a handful of your rice in the palm of your hand. To keep the rice from sticking to your hand, wet your hands with water first
- Create a small pocket in your rice, and spoon some of your filling into the pocket
- Close your rice around the filling to create your rice ball. If you’d like, you can shape your onigiri into any type of shape you want (i.e. square, triangle, etc)
- Cut a piece of your roasted seaweed, and wrap it around your onigiri. It can be as much seaweed as to cover all the rice, or it can be as little as a strip of seaweed around. It’s completely up to you
- Set it aside, and continue making as many onigiri as your ingredients will allow. Then enjoy!
- Prep Time: 10 mins
- Cook Time: 15 mins
- Category: Lunch
- Cuisine: Japanese
These are beautiful and I’ll bet they are delicious. Although the explanation made them seem rather exotic, when I got to the actual ingredients and preparation steps, they look relatively easy to make. I haven’t tasted them before, but could well imagine making them now.
Thanks Laura! And right you are that they’re relatively easy to make. Once you get the hang of molding the rice into various shapes and sizes, it’s really simple 🙂
Great pictures! These look amazing! I’m currently in Japan for a year and onigiri are lifesavers! I do love the shiozake and the gobo root, but maguro wasabi (tuna sashimi and wasabi) is my favorite. 🙂 We also make these “onigiri rolls” at home a lot – with salted salmon and avocado! http://www.frugalnutrition.com/salmon-avocado-seaweed-rolls-onigiri-rolls/
Ooh, a maguro wasabi filling sounds delicious, Caitlin! That’s a great post on your onigiri rolls, and we’re going to try them out over here. We’ll keep you posted on how they turn out 🙂
Anyone else love salmon in their onigiri? 🙂 What’s your favorite filling? I also love spam!
This recipe sounds absolutely delicious! I love the idea of combining salmon with rice cakes for a unique twist. Can’t wait to try making these for my next snack!