We may receive a commission when you use our affiliate links. However, this does not impact our recommendations.
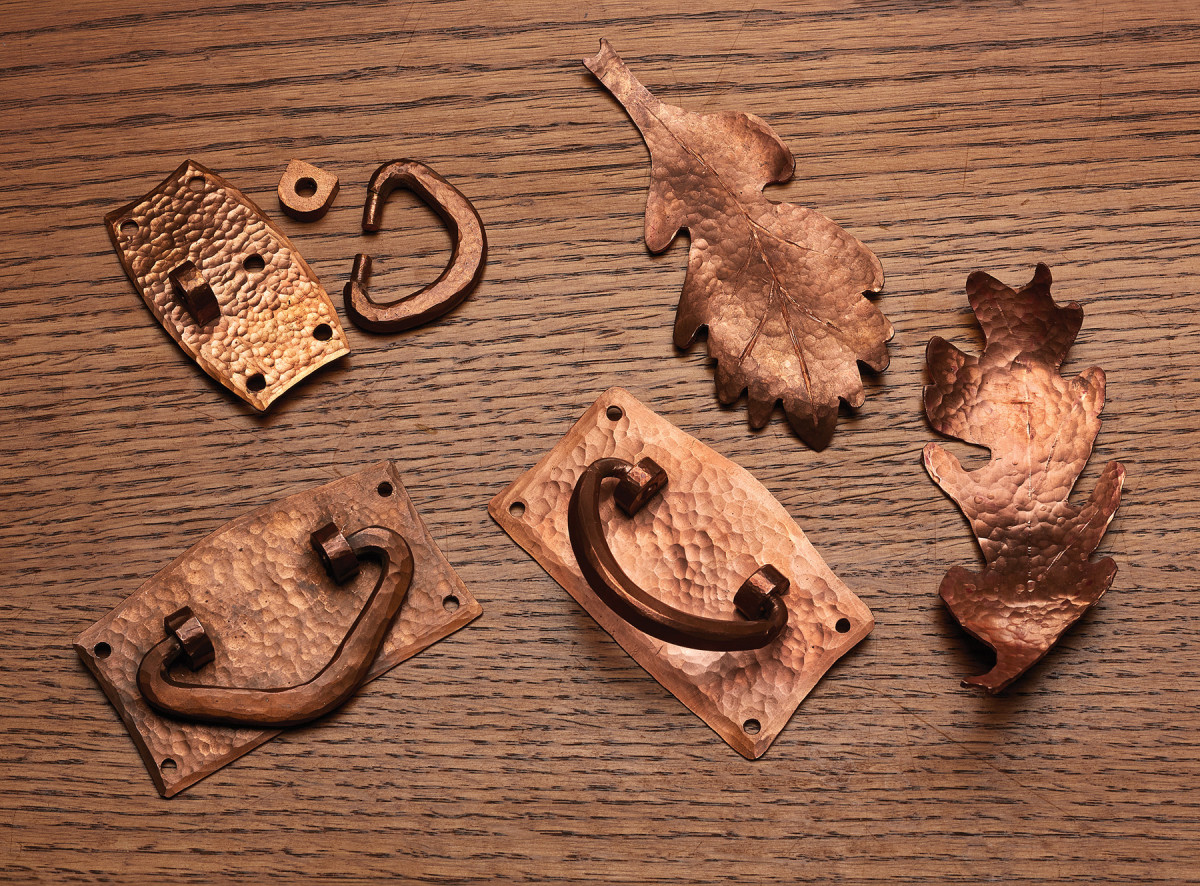
It’s surprisingly simple to make your own Stickley-style pulls.
The simple lines and honest joinery of the Arts & Crafts period have always appealed to me. The fumed quartersawn white oak and the warm patina of the copper hardware add a wonderful effect to the overall design.
But I have never been satisfied with the reproduction hardware that I have seen, so I prefer to make the hardware by hand. Copper is an easy metal to work, so making custom hardware is not as difficult as it might seem – and by making it yourself you have total control over the size, shape and design.
The pulls here are similar to those found on Gustav Stickley’s pieces from about the turn of the 20th century. Most modest shops will have all the equipment needed to make them.
What You’ll Need
The basic toolkit consists of a hardwood block, propane torch, hacksaw, files, a bench vise, some form of an anvil and a ball-peen hammer.
The anvil can be as simple as a block of metal. The ball-peen hammer shapes and textures the components of the pulls. Its striking ends need to be polished because any roughness on the faces of the hammer will transfer to the pulls. I use a smaller hammer in the 8- to 12-ounce range because only light blows are needed.
In addition to polishing the hammer’s faces, it is helpful to grind a slight bevel (maybe 10°) along the lower half of the flat face. The bevel enables a more comfortable grip when planishing the perimeter of the back plate. Be sure to radius any sharp edges after grinding the bevel.
You’ll also need 1⁄16“-thick copper sheeting (110 alloy) for the back plates; 5⁄16“-diameter copper rod for the bails and 1⁄2“-square bar for the posts. Sources include McMaster-Carr (mcmaster.com) and Online Metals (onlinemetals.com). I use 8-gauge grounding wire from a big-box store to make the rivets.
Back Plates
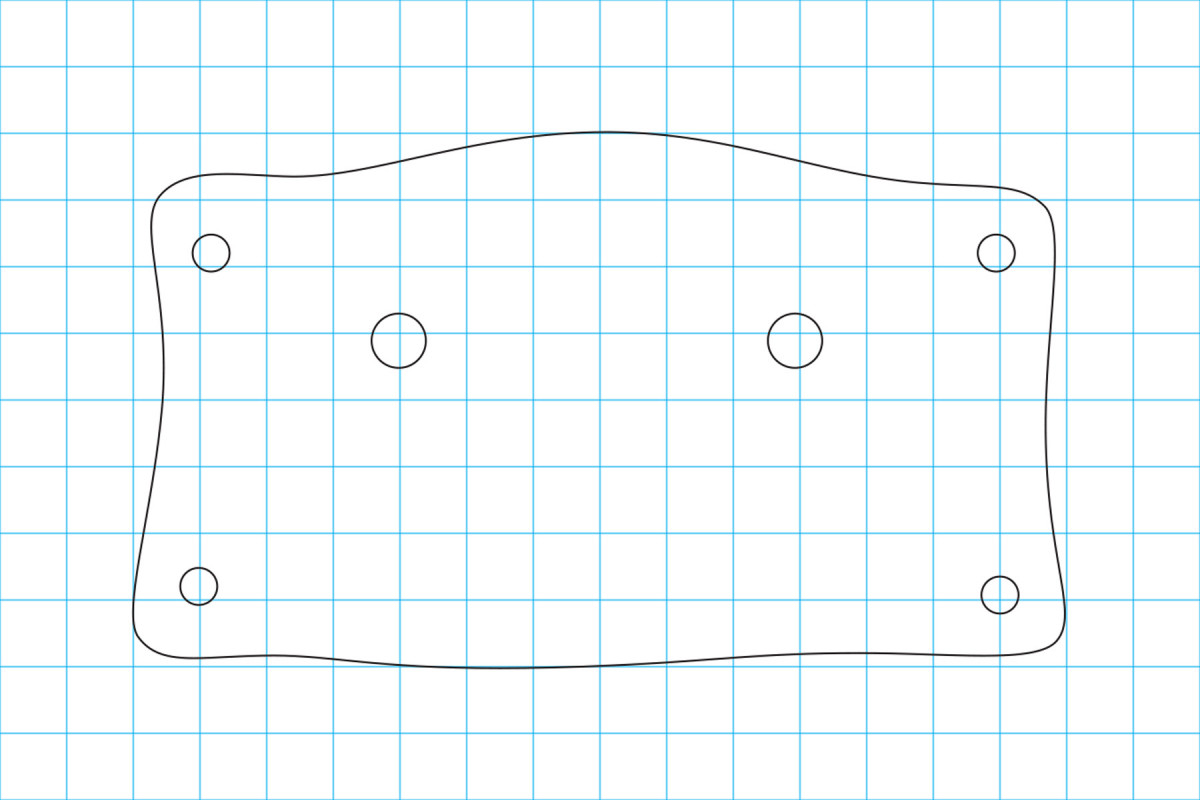
Copper pull Shown full-size One square = 1⁄4″
Trace the plate pattern onto the copper, being sure to include the hole locations.
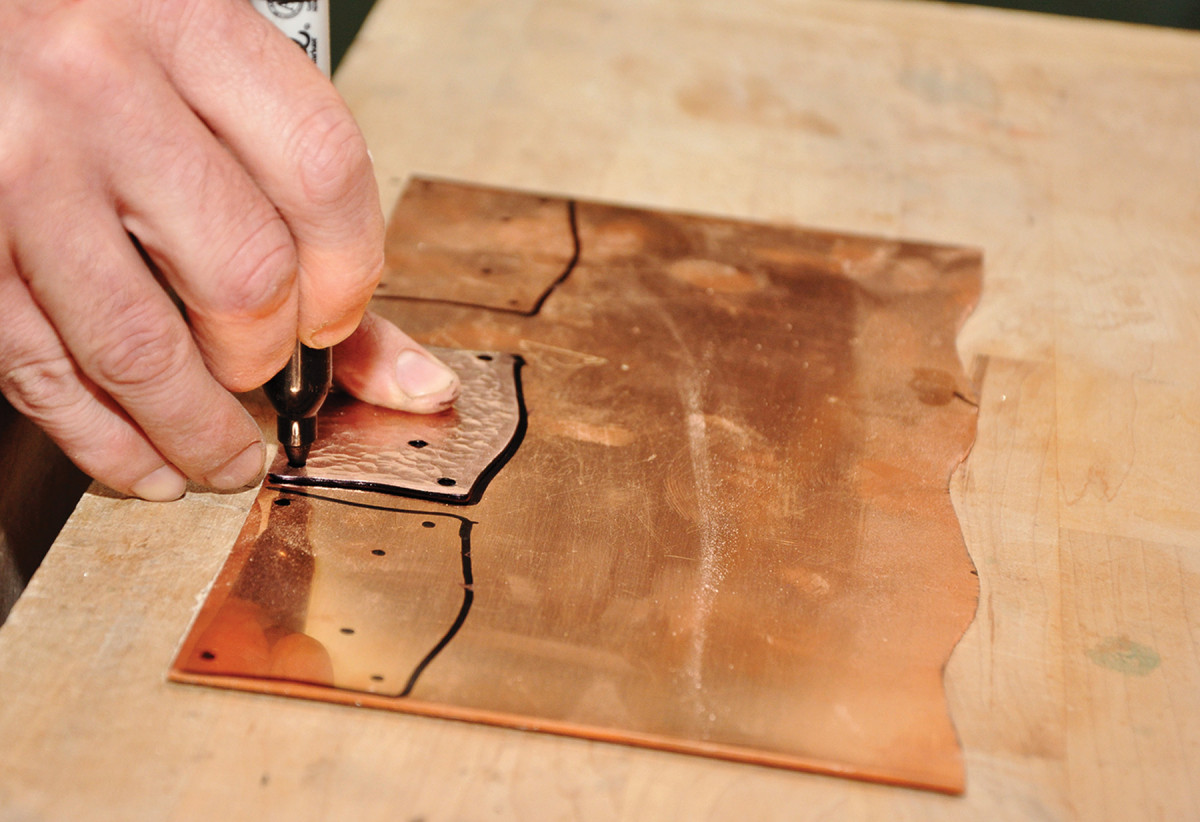
Trace the pattern. The back plates can be cut from the sheet copper using a variety of saws, from a band saw to a jeweler’s saw
You can cut out the shape using a hacksaw, jeweler’s saw, scrollsaw or even a band saw equipped with a fine-toothed blade.
Once you’ve cut them from the copper sheet, smooth the sawn edges of the plates with a file.
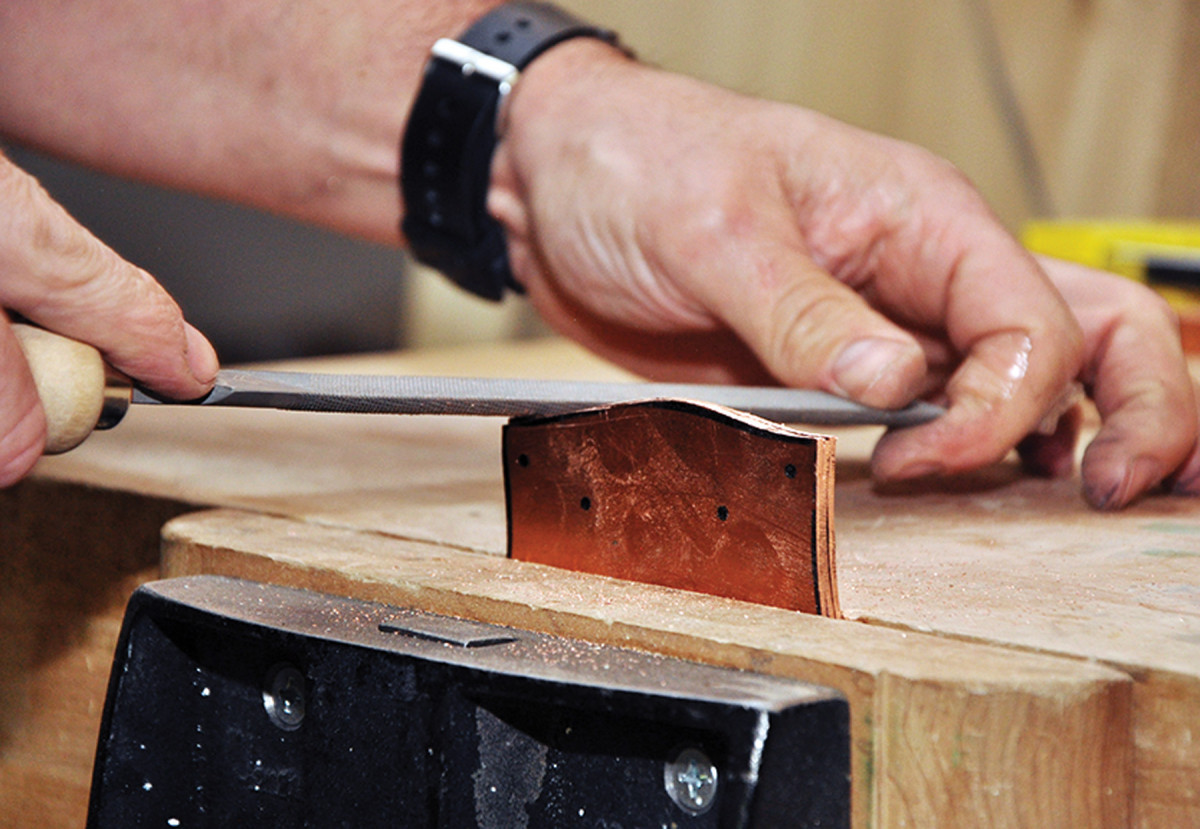
Smooth operator. After you’ve sawn the plates from the copper sheet, smooth the edges with a file.
Drill 1⁄8” holes for the two posts and 3⁄16” holes for the four hardware mounting holes. Because copper is such a soft metal, a twist bit tends to grab and lift your workpiece; be sure to clamp the back plate to prevent injury.
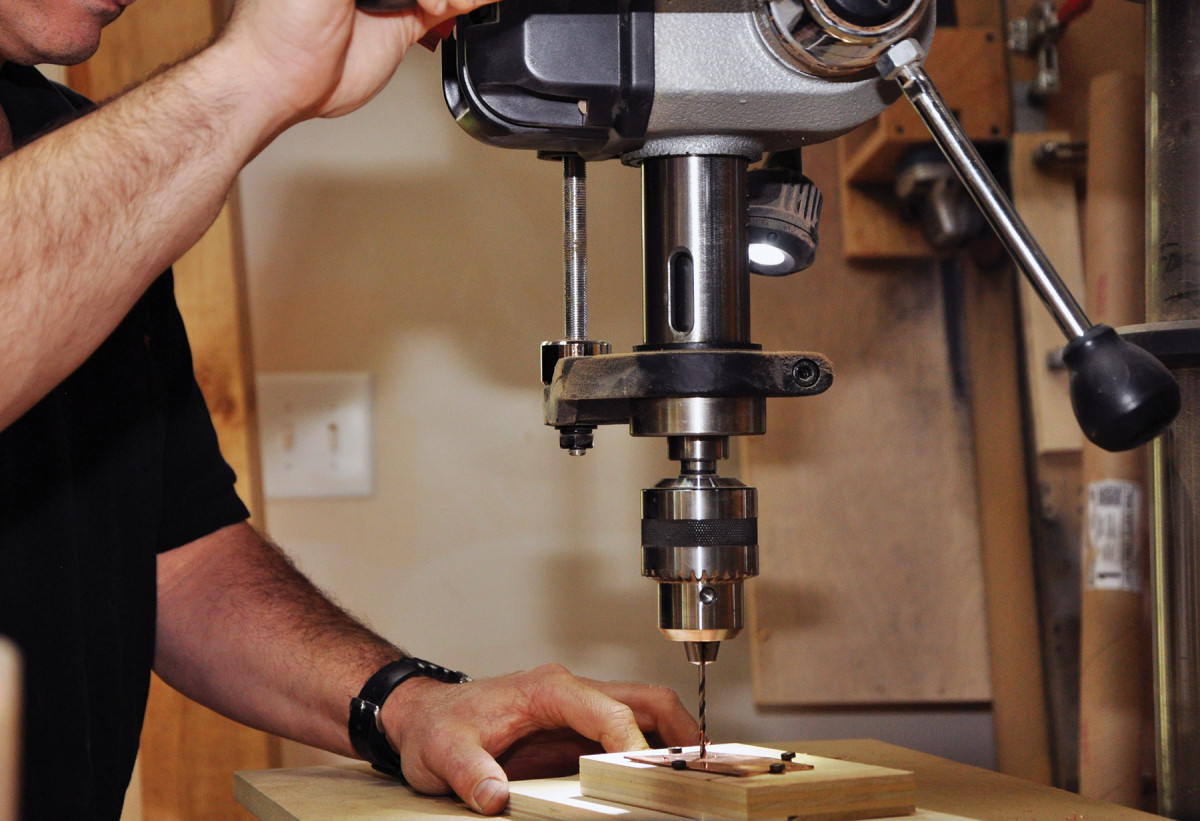
Drill safely. Secure the back plate when you drill the holes. Here I use angled screws to hold down the workpiece.
Add Texture
Texturing the back plates is done with many light taps from the ball-peen hammer; the goal is to leave no flat spots anywhere on the plate.
As you hammer, the plate tends to curl up. Flatten it out by placing the textured surface face-down on a hardwood block, then strike the back with the flat face of the hammer.
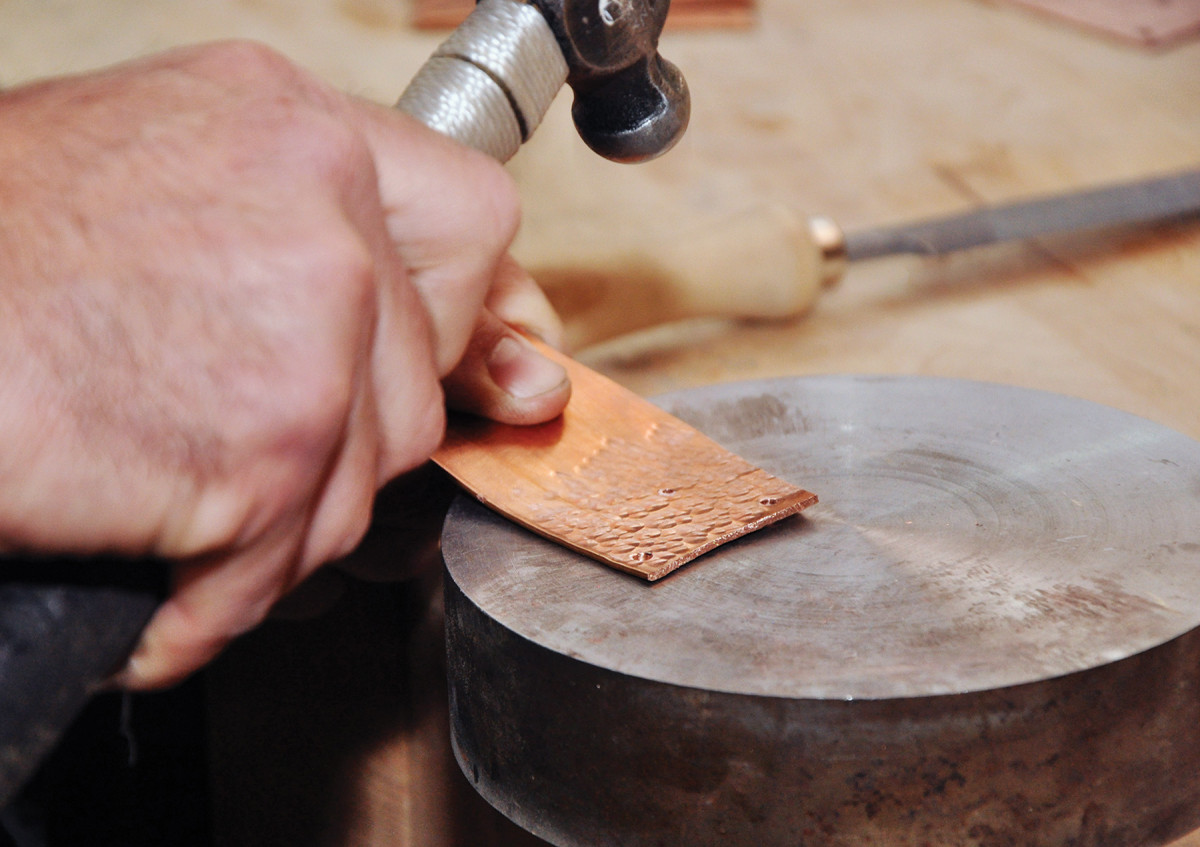
Tap dance. Many light taps with the ball end of a ball-peen hammer give the back plate its dimpled texture.
Texturing will slightly distort the holes you drilled, but this is easy to clean up later.
After the front is uniformly dimpled, I like to smooth the edges roughly 3⁄16” around the perimeter. This forms a frame of sorts for the textured area.
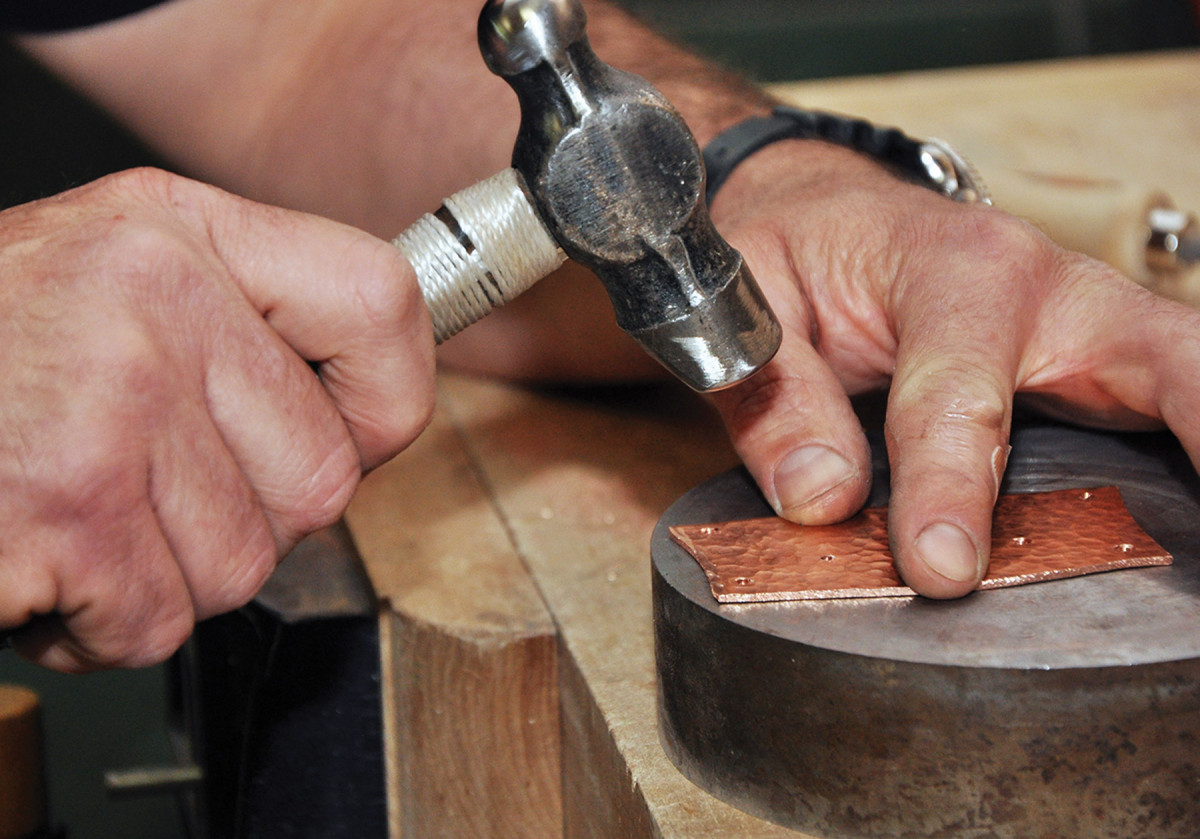
Border patrol. Use the flat face of the hammer to smooth the perimeter of the back plate, just a few 16ths in from the edge.
To do this, hold the back plate close to the edge of the anvil and work around the plate with the flat face of the hammer. Try to keep the planished edge uniformly wide.
Now run your 3⁄16” drill bit back through the mounting holes to clean them up.
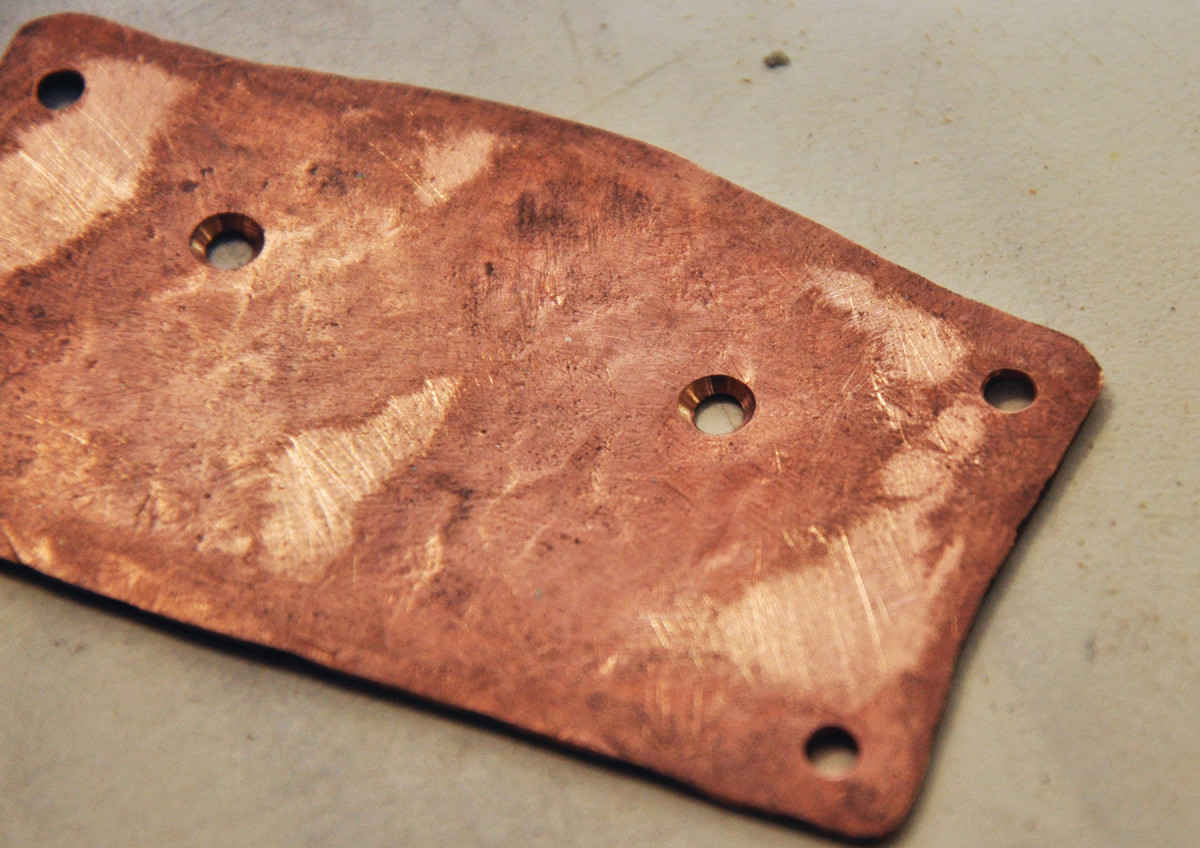
Room to grow. Chamfering the holes in the back plate (shown here from the back) gives the rivet heads room to expand and be flush to the surface.
Flip the piece over to the non-textured side and use a countersink to chamfer the holes for mounting the posts. This chamfer gives the rivet heads a place to go while keeping the back plate flat. The chamfer should go almost through the back plate.
Bails
The bails are formed from 5⁄16“-diameter copper rod. For this design the blanks start off at 4” long.
To make it easier to size the bail to the posts, I turn each end of the blank to a little less than 3⁄16” in diameter. Use a drill press and file for this work.
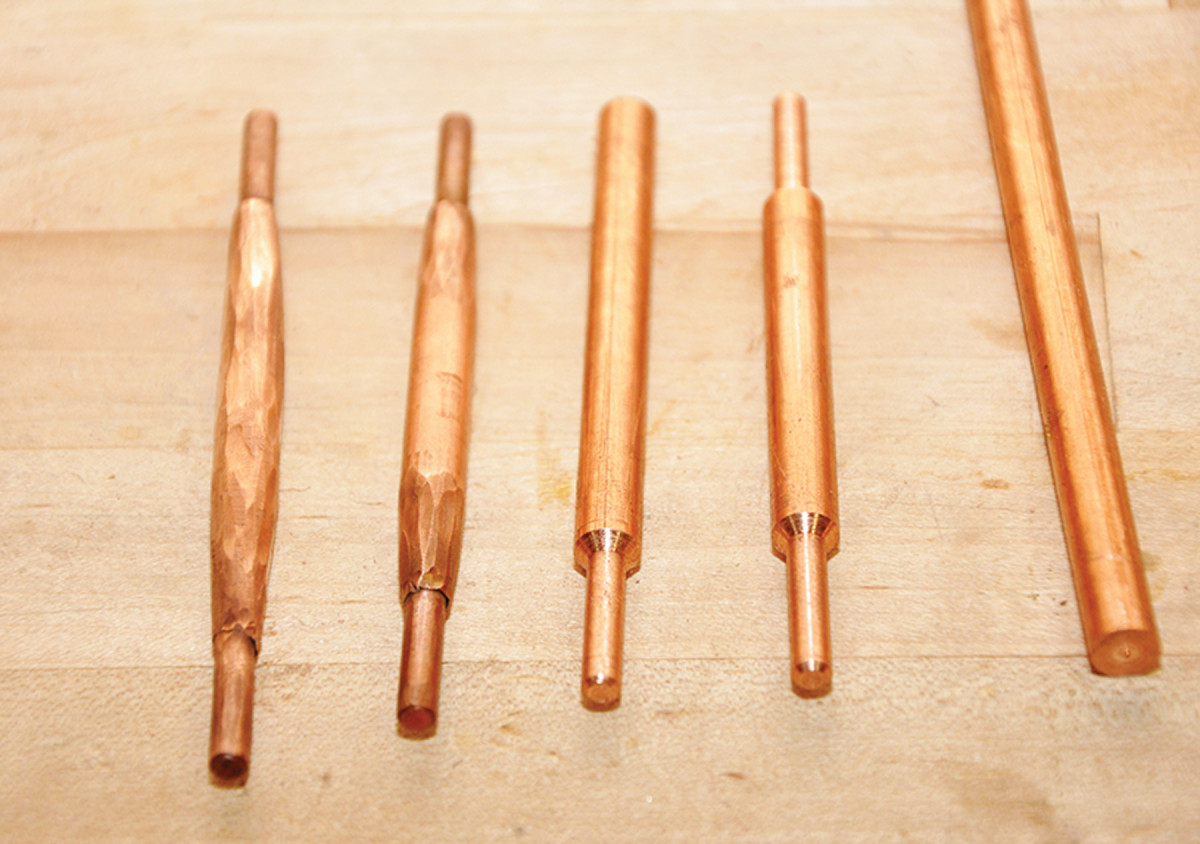
Birthing the bails. Each bail starts as 5⁄16″ copper rod. I use a drill press and file to cut “tenons” on each end, then use the flat face of a ball-peen hammer to shape and draw out the bail.
The 3⁄16” “tenons” need to be about 5⁄8” long and terminate in the bail stock with a chamfer.
The copper will quickly fill the teeth of the file, so have a file card handy to clear the swarf.
Start drawing out the bail blank by tapering the ends and blending the diameter down to the 3⁄16” tenons. Use the flat face of the hammer to shape the bail and texture the surface.
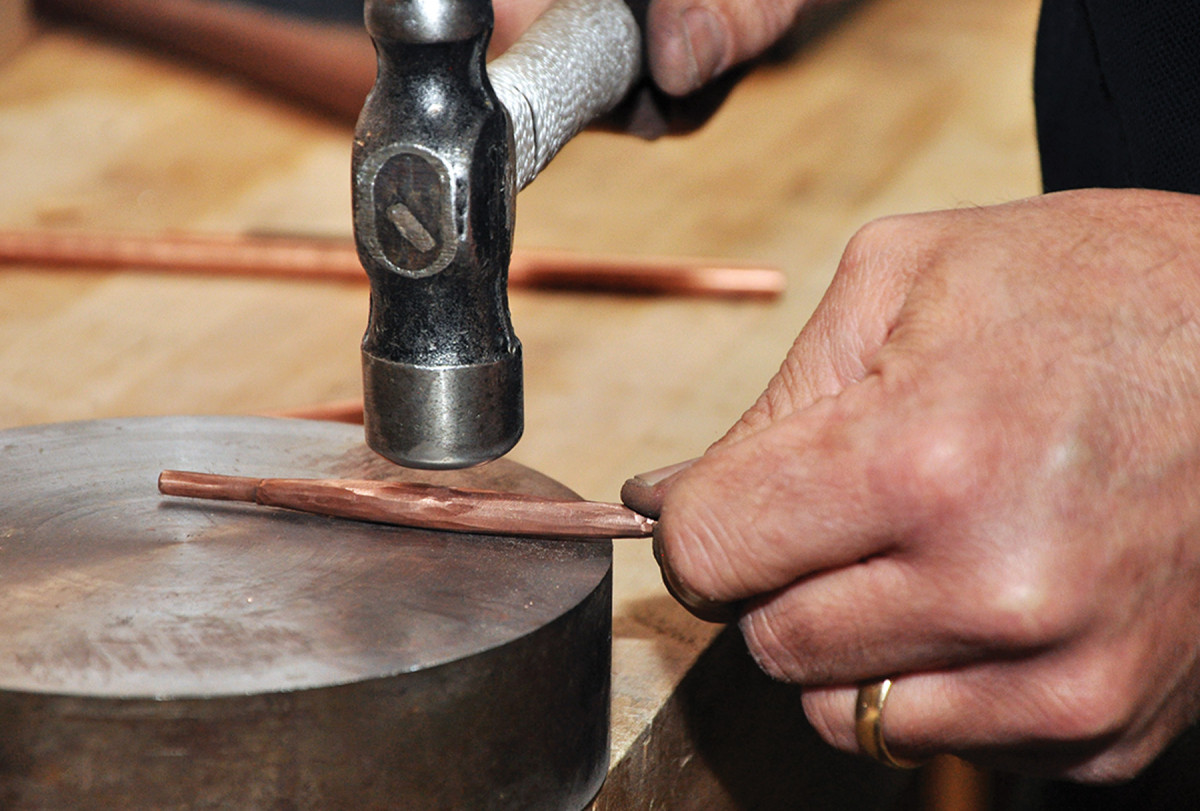
Hard work. Hammer blows will harden copper, so stop and anneal the bail frequently to keep it easy to work.
Copper will harden after repeated hammer blows and become difficult to work. It will need to be annealed frequently to keep it easy to shape and prevent cracking.
Use proper safety equipment and be sure that the work area is clean and free of flammable material before beginning the annealing process.
To anneal copper, heat the blank with a propane or MAPP torch to between a dark grey or dull-red heat (between 800°F and 1,200°F) and quench it in water.
Copper is an excellent conductor of heat, so use pliers or tongs to hold the work.
Continue to draw out the bail until it is about 4-1⁄2” long. The final product should be a little less than 5⁄16” in diameter in the center and taper to the 3⁄16” tenons.
Straighten the blank and finish texturing the surface. Anneal the blank and prepare to bend it.
I shape it around a form made from a 1-1⁄4” NPT pipe coupling. Clamp one end of the bail to the coupling.
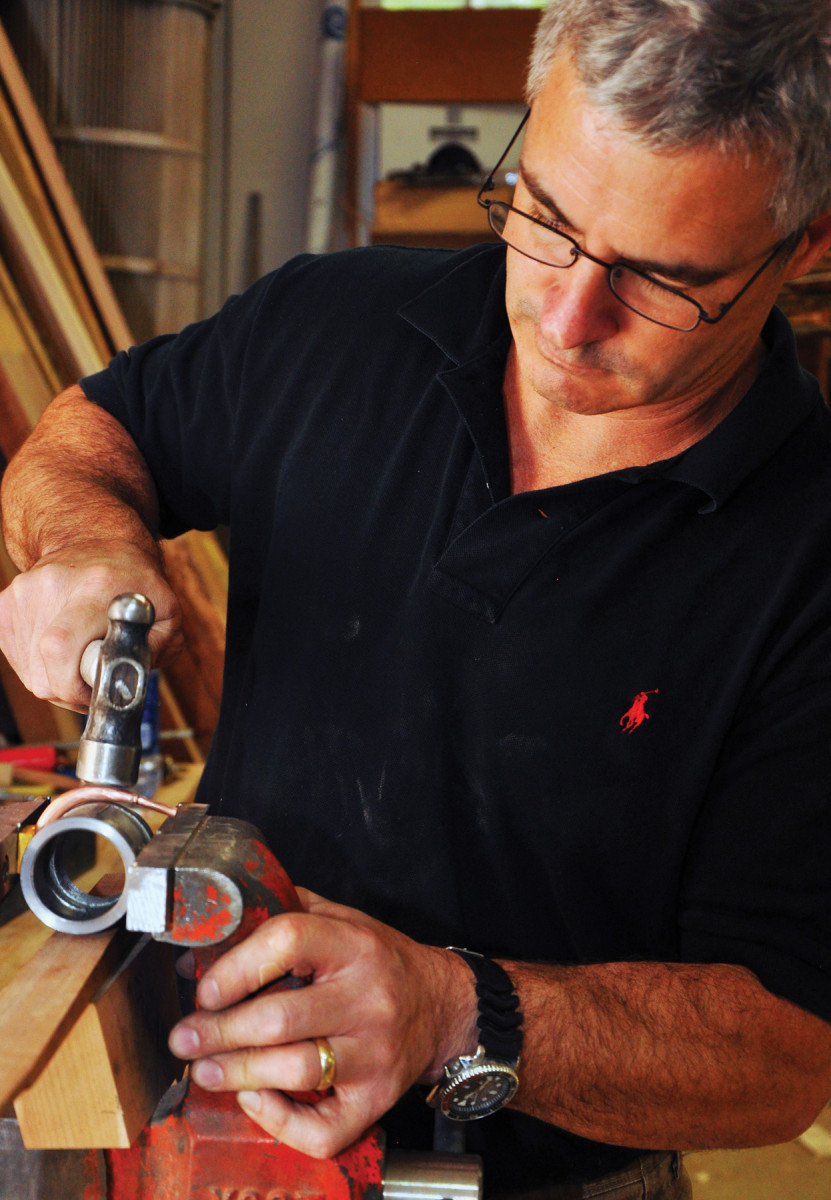
Shop-made form. I use a bending form made from a pipe coupling to help forge the bail into a “C” shape. Re-anneal the copper if it becomes difficult to work.
A small brass V-block protects the bail and distributes the clamping pressure. The V-block also helps to keep the parts oriented as you wrap the bail around the form.
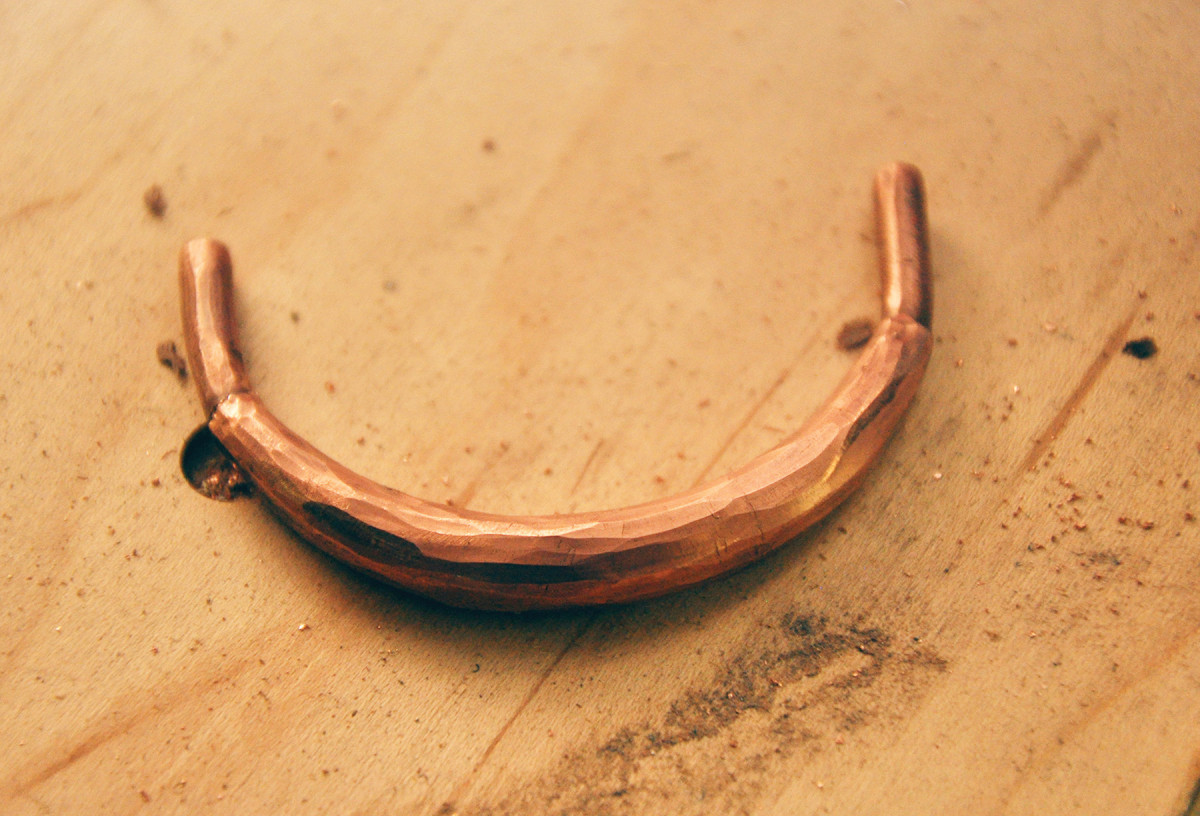
No mortise. This bail is almost finished, but the “tenons” must be bent inside to insert into the back posts.
After forming a C-shape, anneal the bail once again. Using pliers, turn the tenons inward to made a D-shape. Sight down the tenons and adjust them until they are in a straight line.
Back Posts
The back posts (the D-shapes into which the pulls are inserted) start off as 1⁄2“-square copper bar. It is best to work the end of the bar into the D-shape while it is still long. This allows you to grip it in the vise and file the end without the vise interfering.
Draw centerlines down three faces to help guide the file cuts. The lines show the termination of the radius, so avoid cutting into them.
With a coarse file, begin rounding over two adjacent edges to form a 1⁄4” radius along the edges.
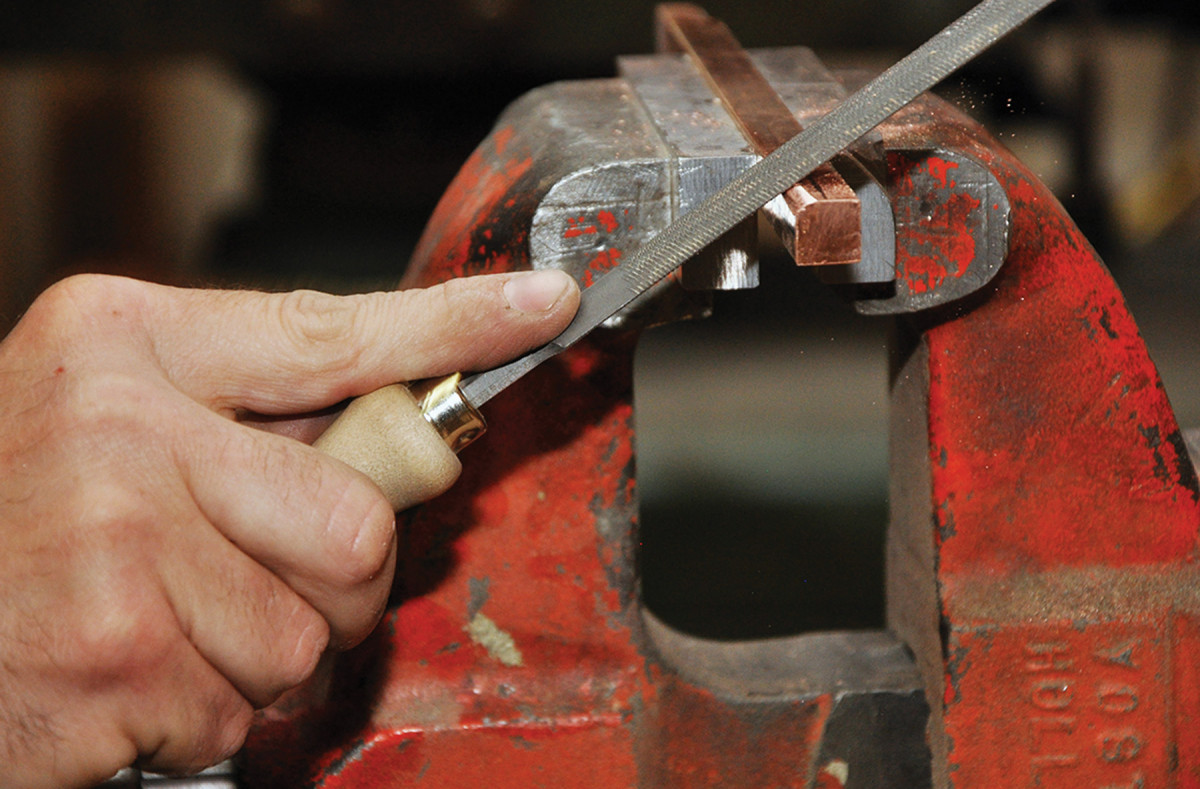
Bar tending. I form the back posts from 1⁄2″-square copper bar. Round over two sides with a coarse file to begin making a D-shaped cross-section.
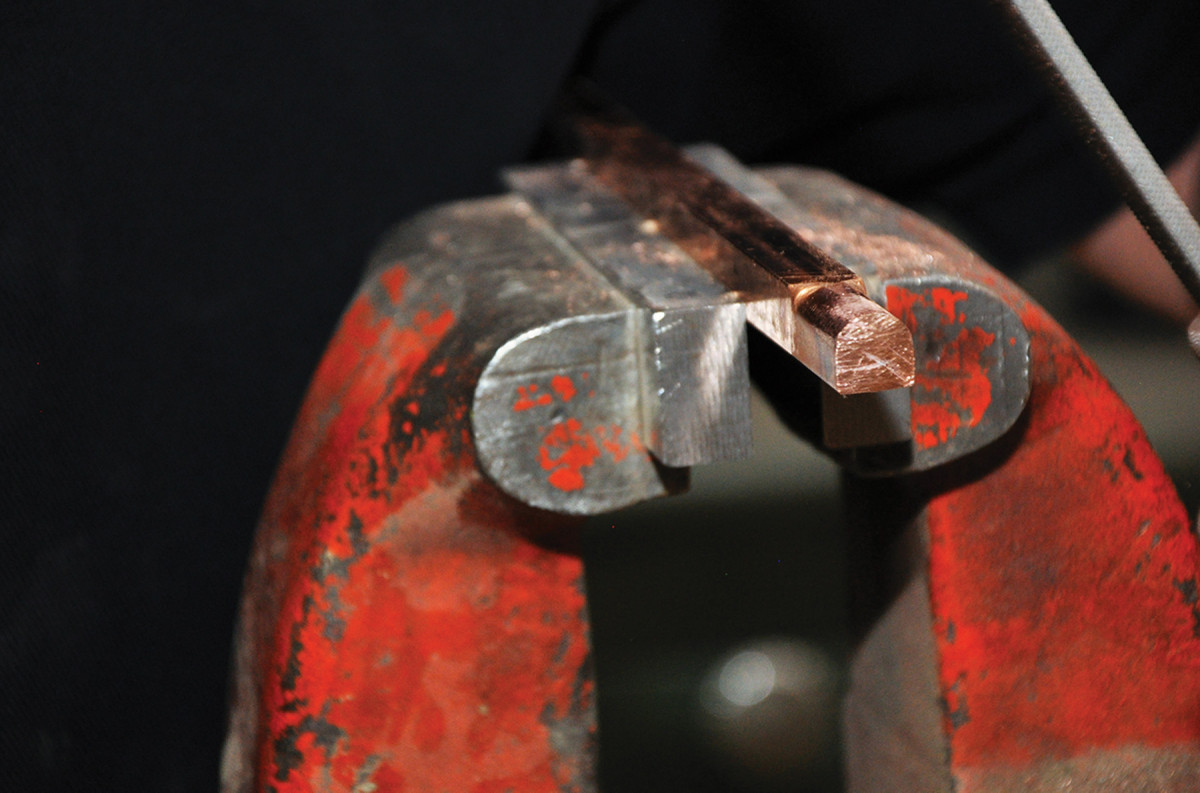
Closer to fine. After roughing out the cross-section, move to a finer file and eventually to sandpaper to finish fairing the curve.
Refine the surface with a finer-cut file, then work up to #320-grit sandpaper. Mark the bar for the saw cuts that will separate the individual posts. Each post should finish at 1⁄4” after the saw cuts have been cleaned up.
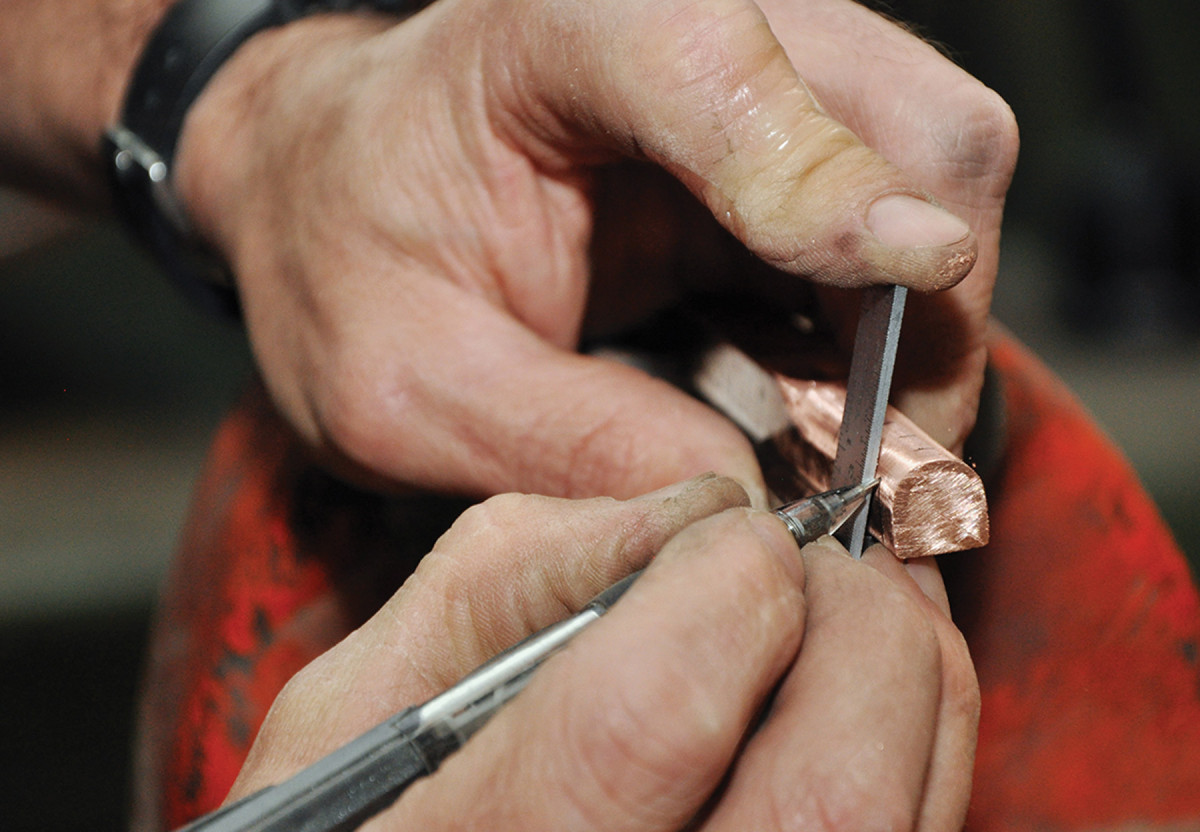
Mark & make. Mark the cuts to separate each back post. Each post should be about 1⁄4″ long after your cuts are cleaned up.
With a fresh 18-teeth-per-inch hacksaw blade, begin cutting the posts from the bar. Cut about 85 percent of the way through the bar and bring the cut down so it just cuts into the bottom face.
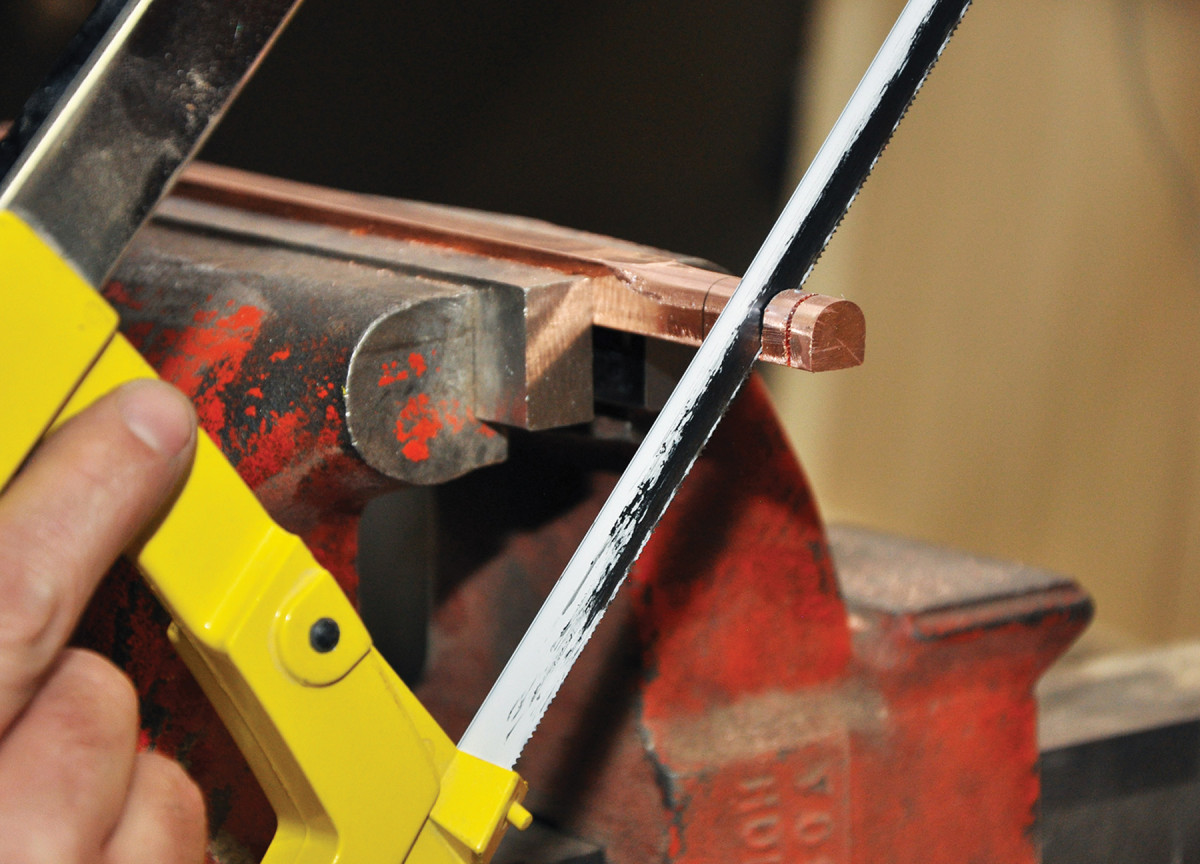
Cut, but stop. Cut the back posts most of the way through, but leave them connected together until you solder in the rivets.
The posts need a 1⁄8“-diameter x 1⁄8“-deep hole drilled in the center of the bottom. The rivet for attaching the posts to the back plate will be soldered into this hole.
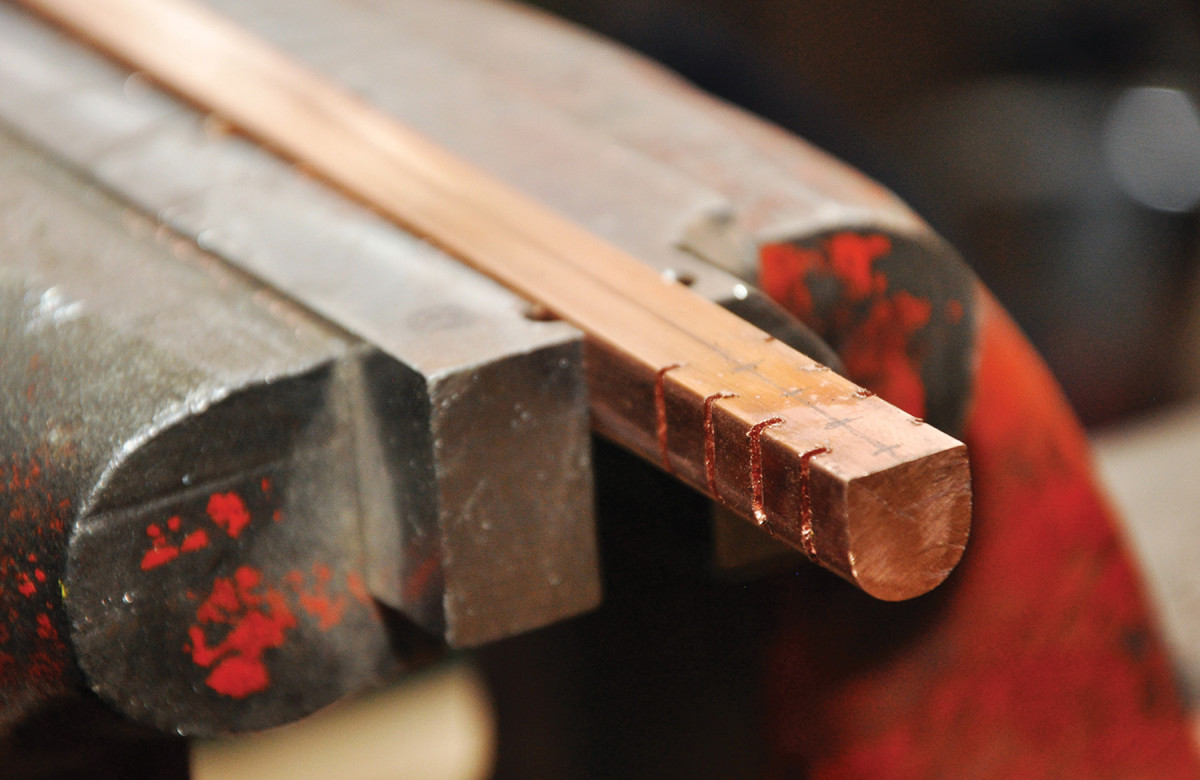
Center it up. Mark the hole for the rivet on the flat face of each back post.
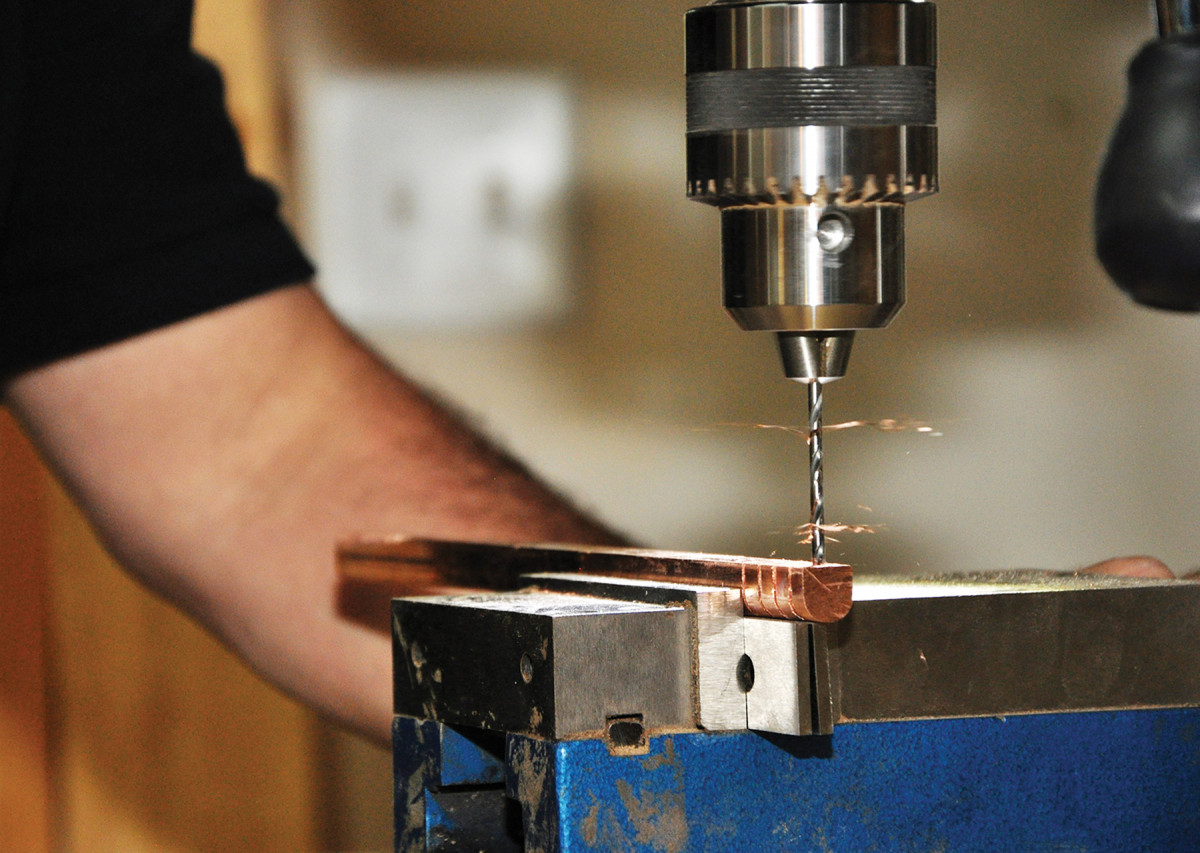
Back & side. Each back post will have two holes – one for the rivet in the flat face, and a through-hole in the side for the 3⁄16″ tenon on each end of the bail.
Mark the centers for the holes and use a drill press to bore the openings. (Use a drill press vise or clamp to hold the bar while drilling.)
Rivet
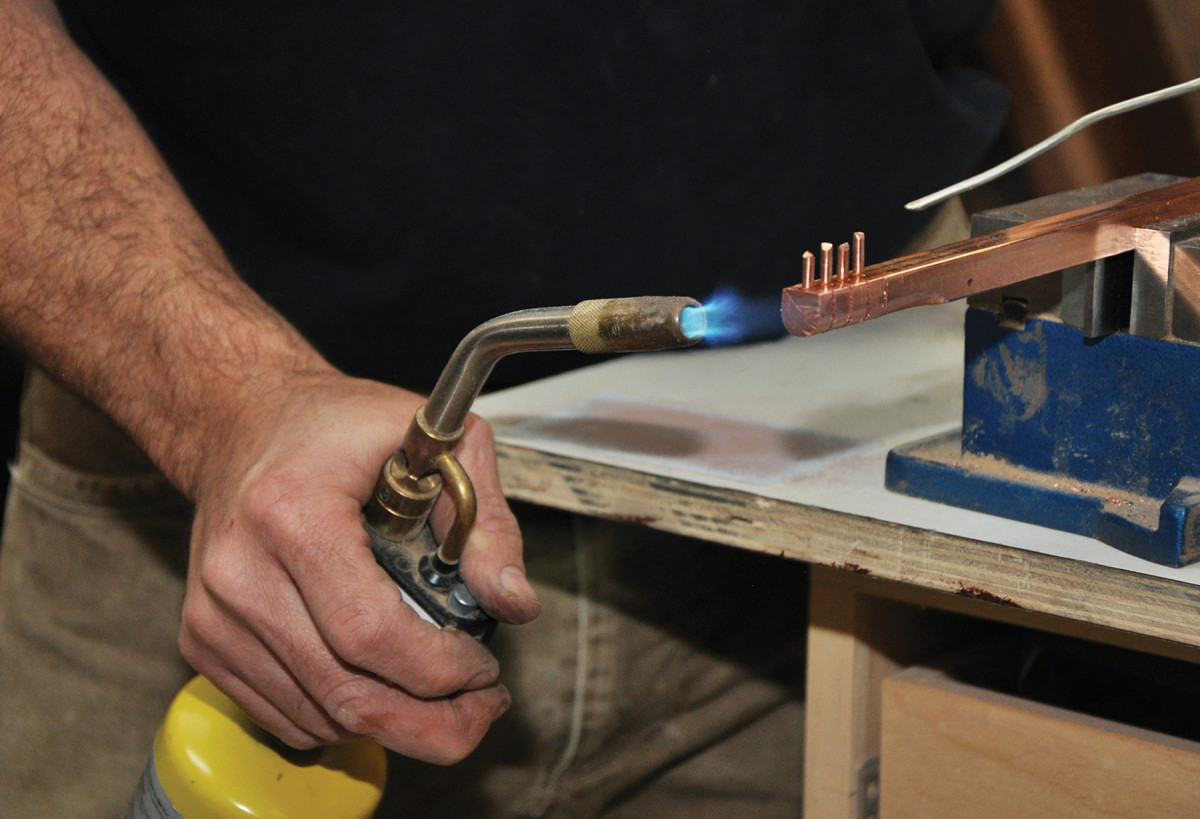
Torch it. Take care when soldering and annealing in your shop – flames and wood shavings don’t mix.
Soldering the rivets to the posts is easy, but all the parts need to be clean and free of oxidation for the solder to flow. (And take the same safety precautions as with annealing.)
The surface should be bright and shiny. Avoid touching it with your bare hands after cleaning (the oil in your skin may contaminate the surface).
Cut the grounding wire into 1⁄2” lengths. Apply flux to the holes and the ends of the rivets, then place each rivet into a hole.
Begin soldering by applying heat with the torch, and keep the flame moving. When the parts are hot enough, the solder should flow freely.
Apply enough solder so that it just begins to flow out of the hole. Adding too much creates a bead around the rivet and will prevent the posts from flushing up with the back plate when it’s time to rivet them together. (If this happens, sweep away the excess solder with an acid brush dipped in water while the solder is still molten.)
I have used both silver solder and regular solder alloyed for copper pipes. Silver solder is much stronger, but not worth the extra difficulty.
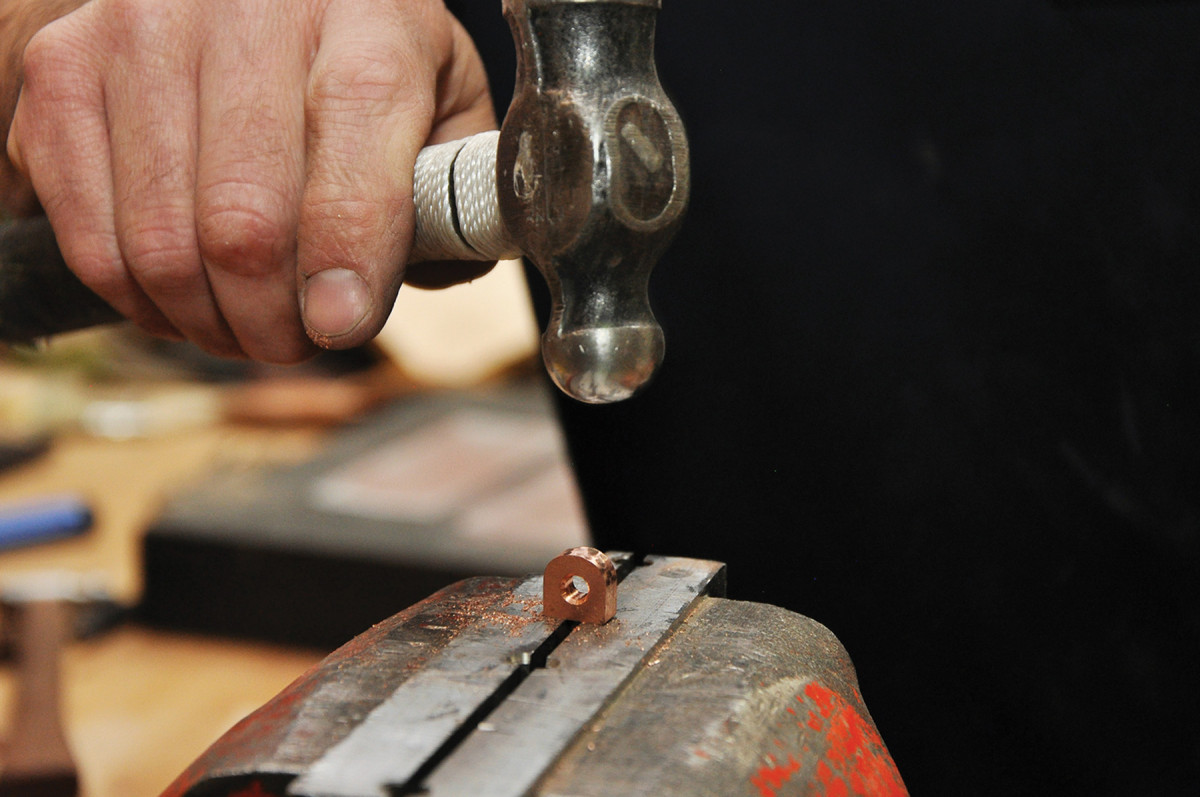
Consistent decoration. After soldering in the rivet, dimple each back post with the ball-peen hammer.
After everything cools down, cut the posts from the bar, then clean the sawn face with files and abrasives. The posts need an additional hole to receive the bails. Mark the center of the post and drill a 3⁄16” through-hole while holding it in a vise. Chamfer the hole and lightly texture the post’s surface, then knock off the edges with a file.
Assembly
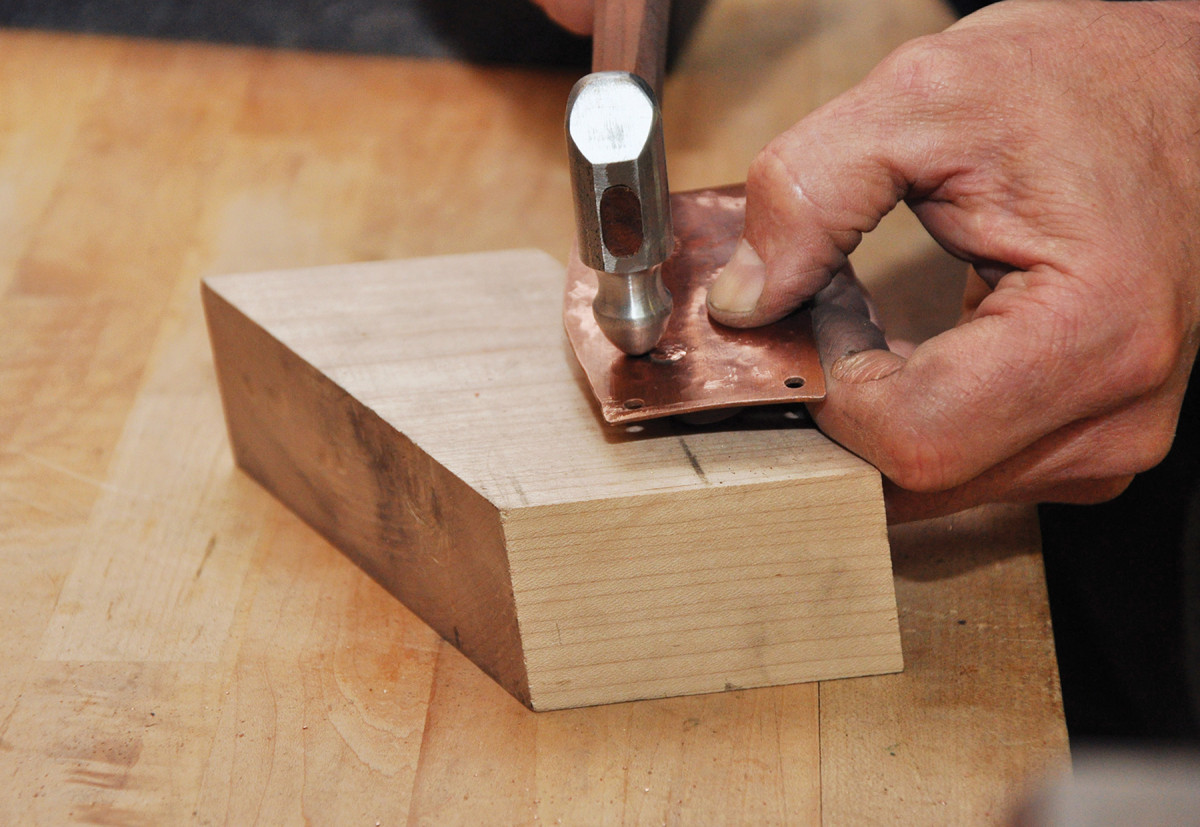
Chamfer music. To attach the back post to the plate, you’ll tap the rivet head to make it expand and fill in the chamfer on the back side of the plate.
Assemble the components and make sure the bail rotates freely in the posts. If necessary, adjust things by either bending the bails or filing their ends to fit the post holes. Once satisfied with the fit, rivet the posts to the back plate.
Flip the pull over and clip the post rivets off about 1⁄8” proud of the back plate. Using a hardwood block to back up the hammer blows, begin lightly tapping the end of the rivet. Work on each side to evenly fill the chamfer with the now-formed rivet head.
Flush up the rivets to the back face of the pull with a file to ensure it will lie flat on the drawer or door.
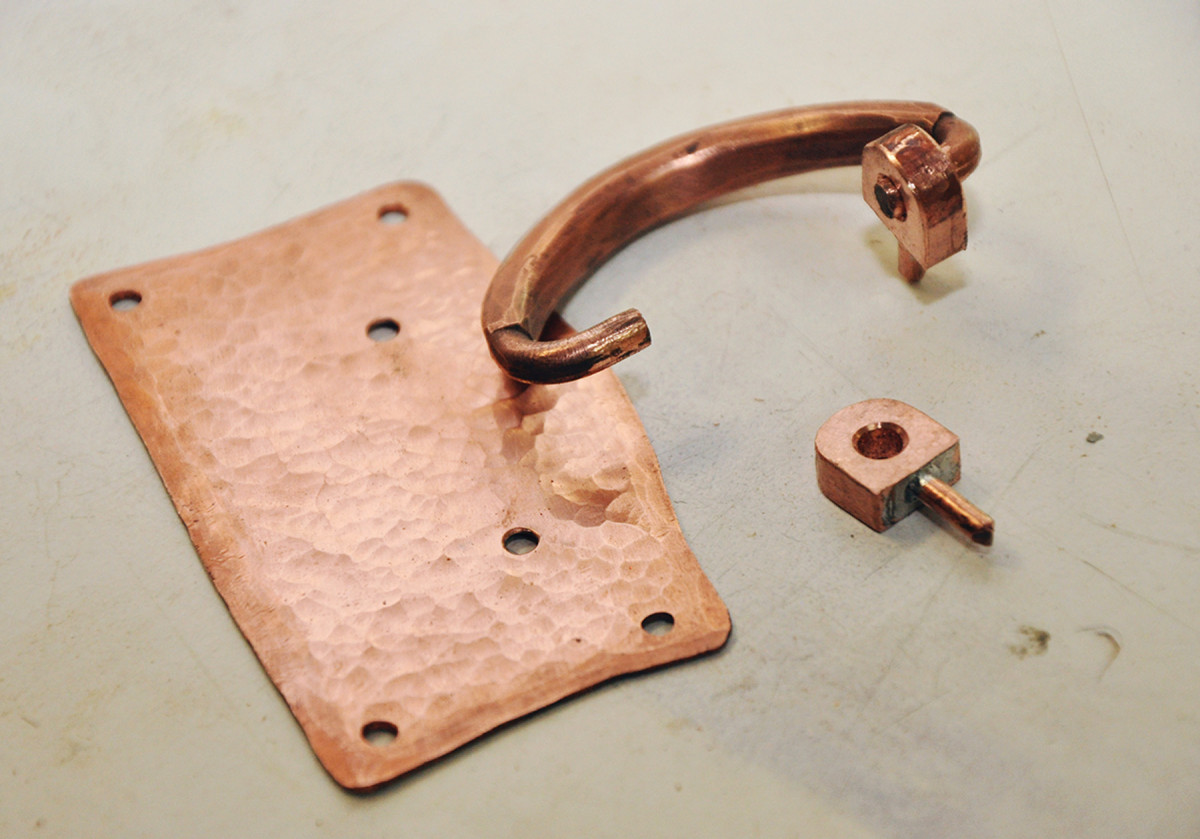
Pull it together. The elements that make up the drawer pull are ready to be assembled.
Original Arts & Crafts pieces typically used pyramid-head nails or screws to mount the hardware to the furniture. I prefer using 3⁄16” round-head copper rivets. These rivets can be purchased from most industrial supply houses.
To mount the hardware, locate it on the piece and drill one 3⁄16” mounting hole to start. Insert a rivet, then drill a second hole. Insert the second rivet and drill the remaining holes. If you drill all four at once, I can assure you that at least two holes will be off.
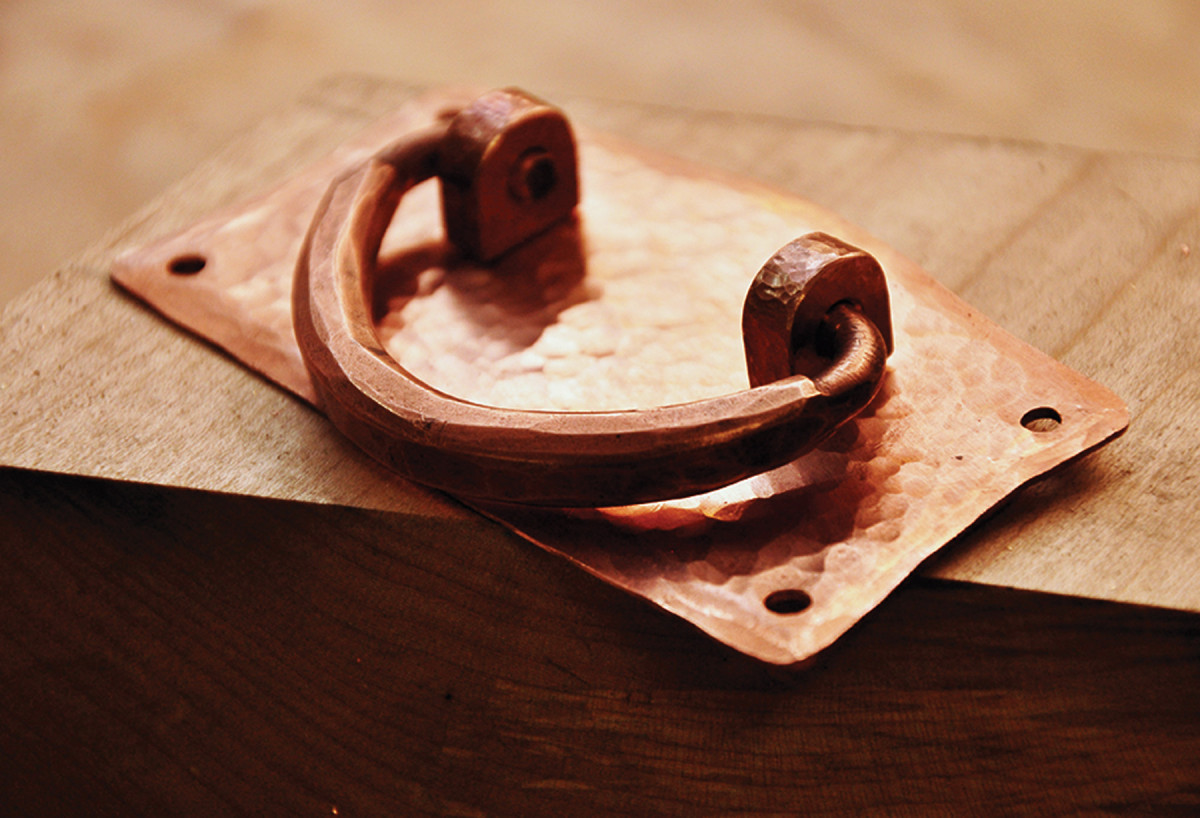
Ready to go. The finished pull is ready to be mounted using your fasteners of choice. I prefer 3⁄16″ round-head copper rivets.
Riveting the pulls to the piece is the same as riveting the posts. The one exception is that a washer is needed on the inside of the door or drawer. (The wood is not hard enough to back up the rivet head as it is formed.)
While I have described here making only one style of pull, the same techniques can be easily applied to many different designs, as shown in the opening photo.
Cut, shape, assemble and attach – it really is that simple.
Here are some supplies and tools we find essential in our everyday work around the shop. We may receive a commission from sales referred by our links; however, we have carefully selected these products for their usefulness and quality.


