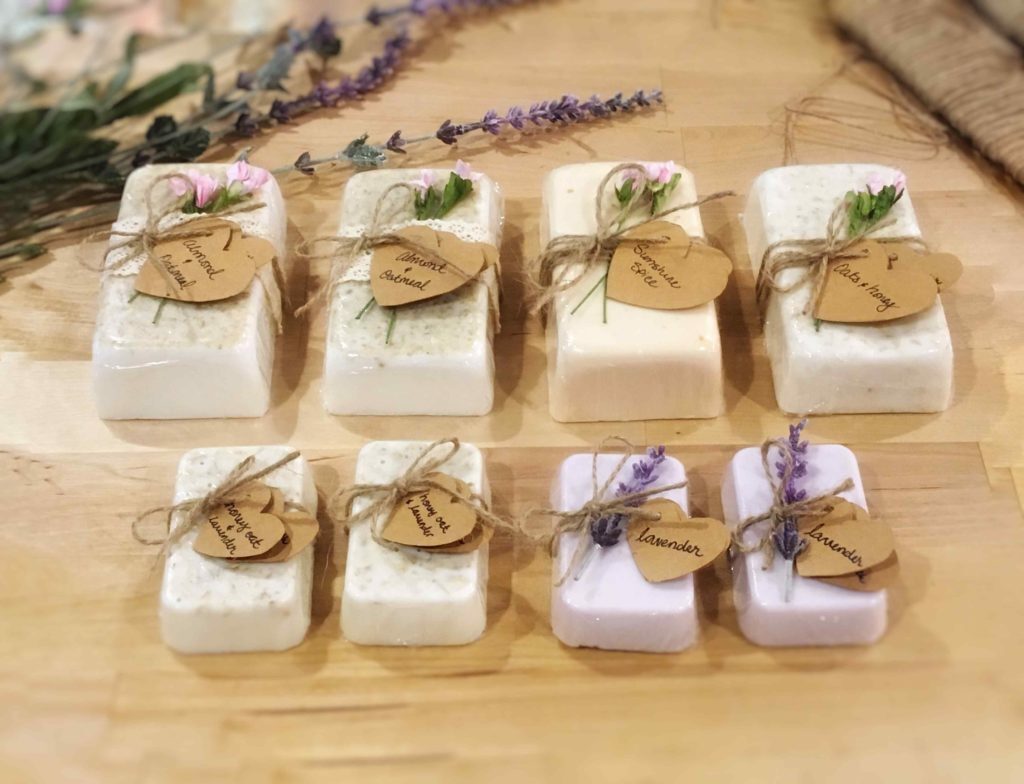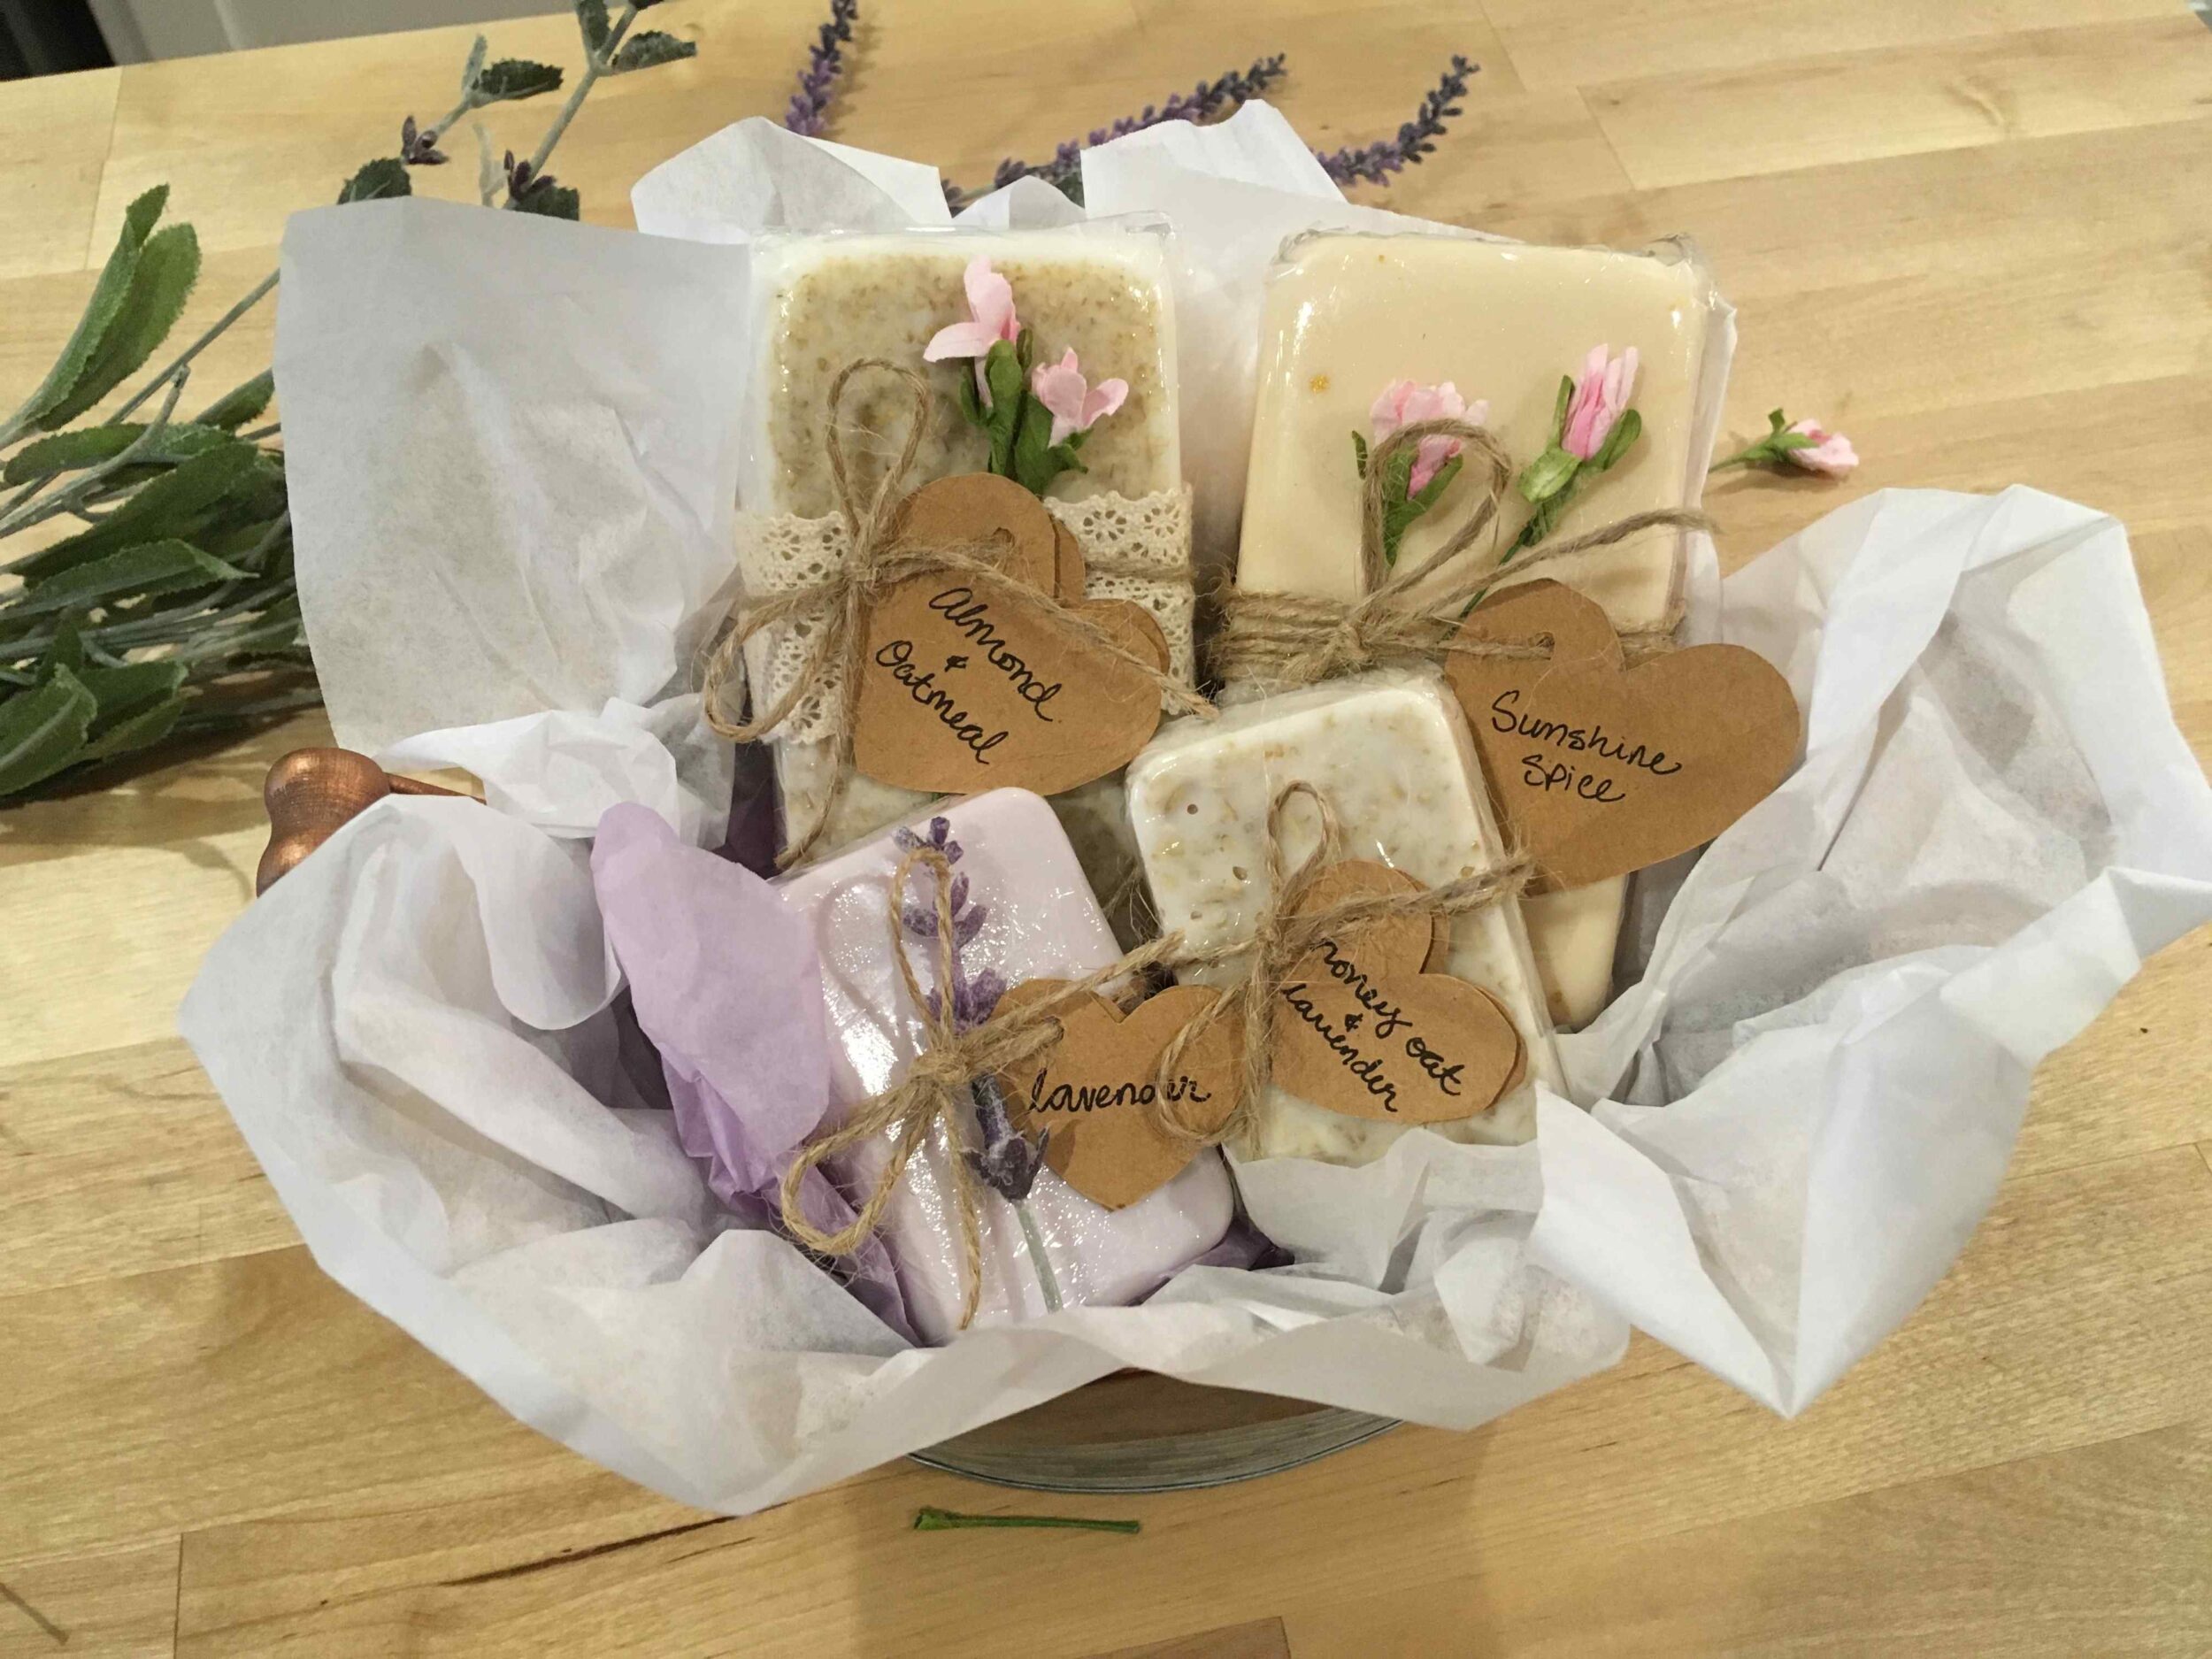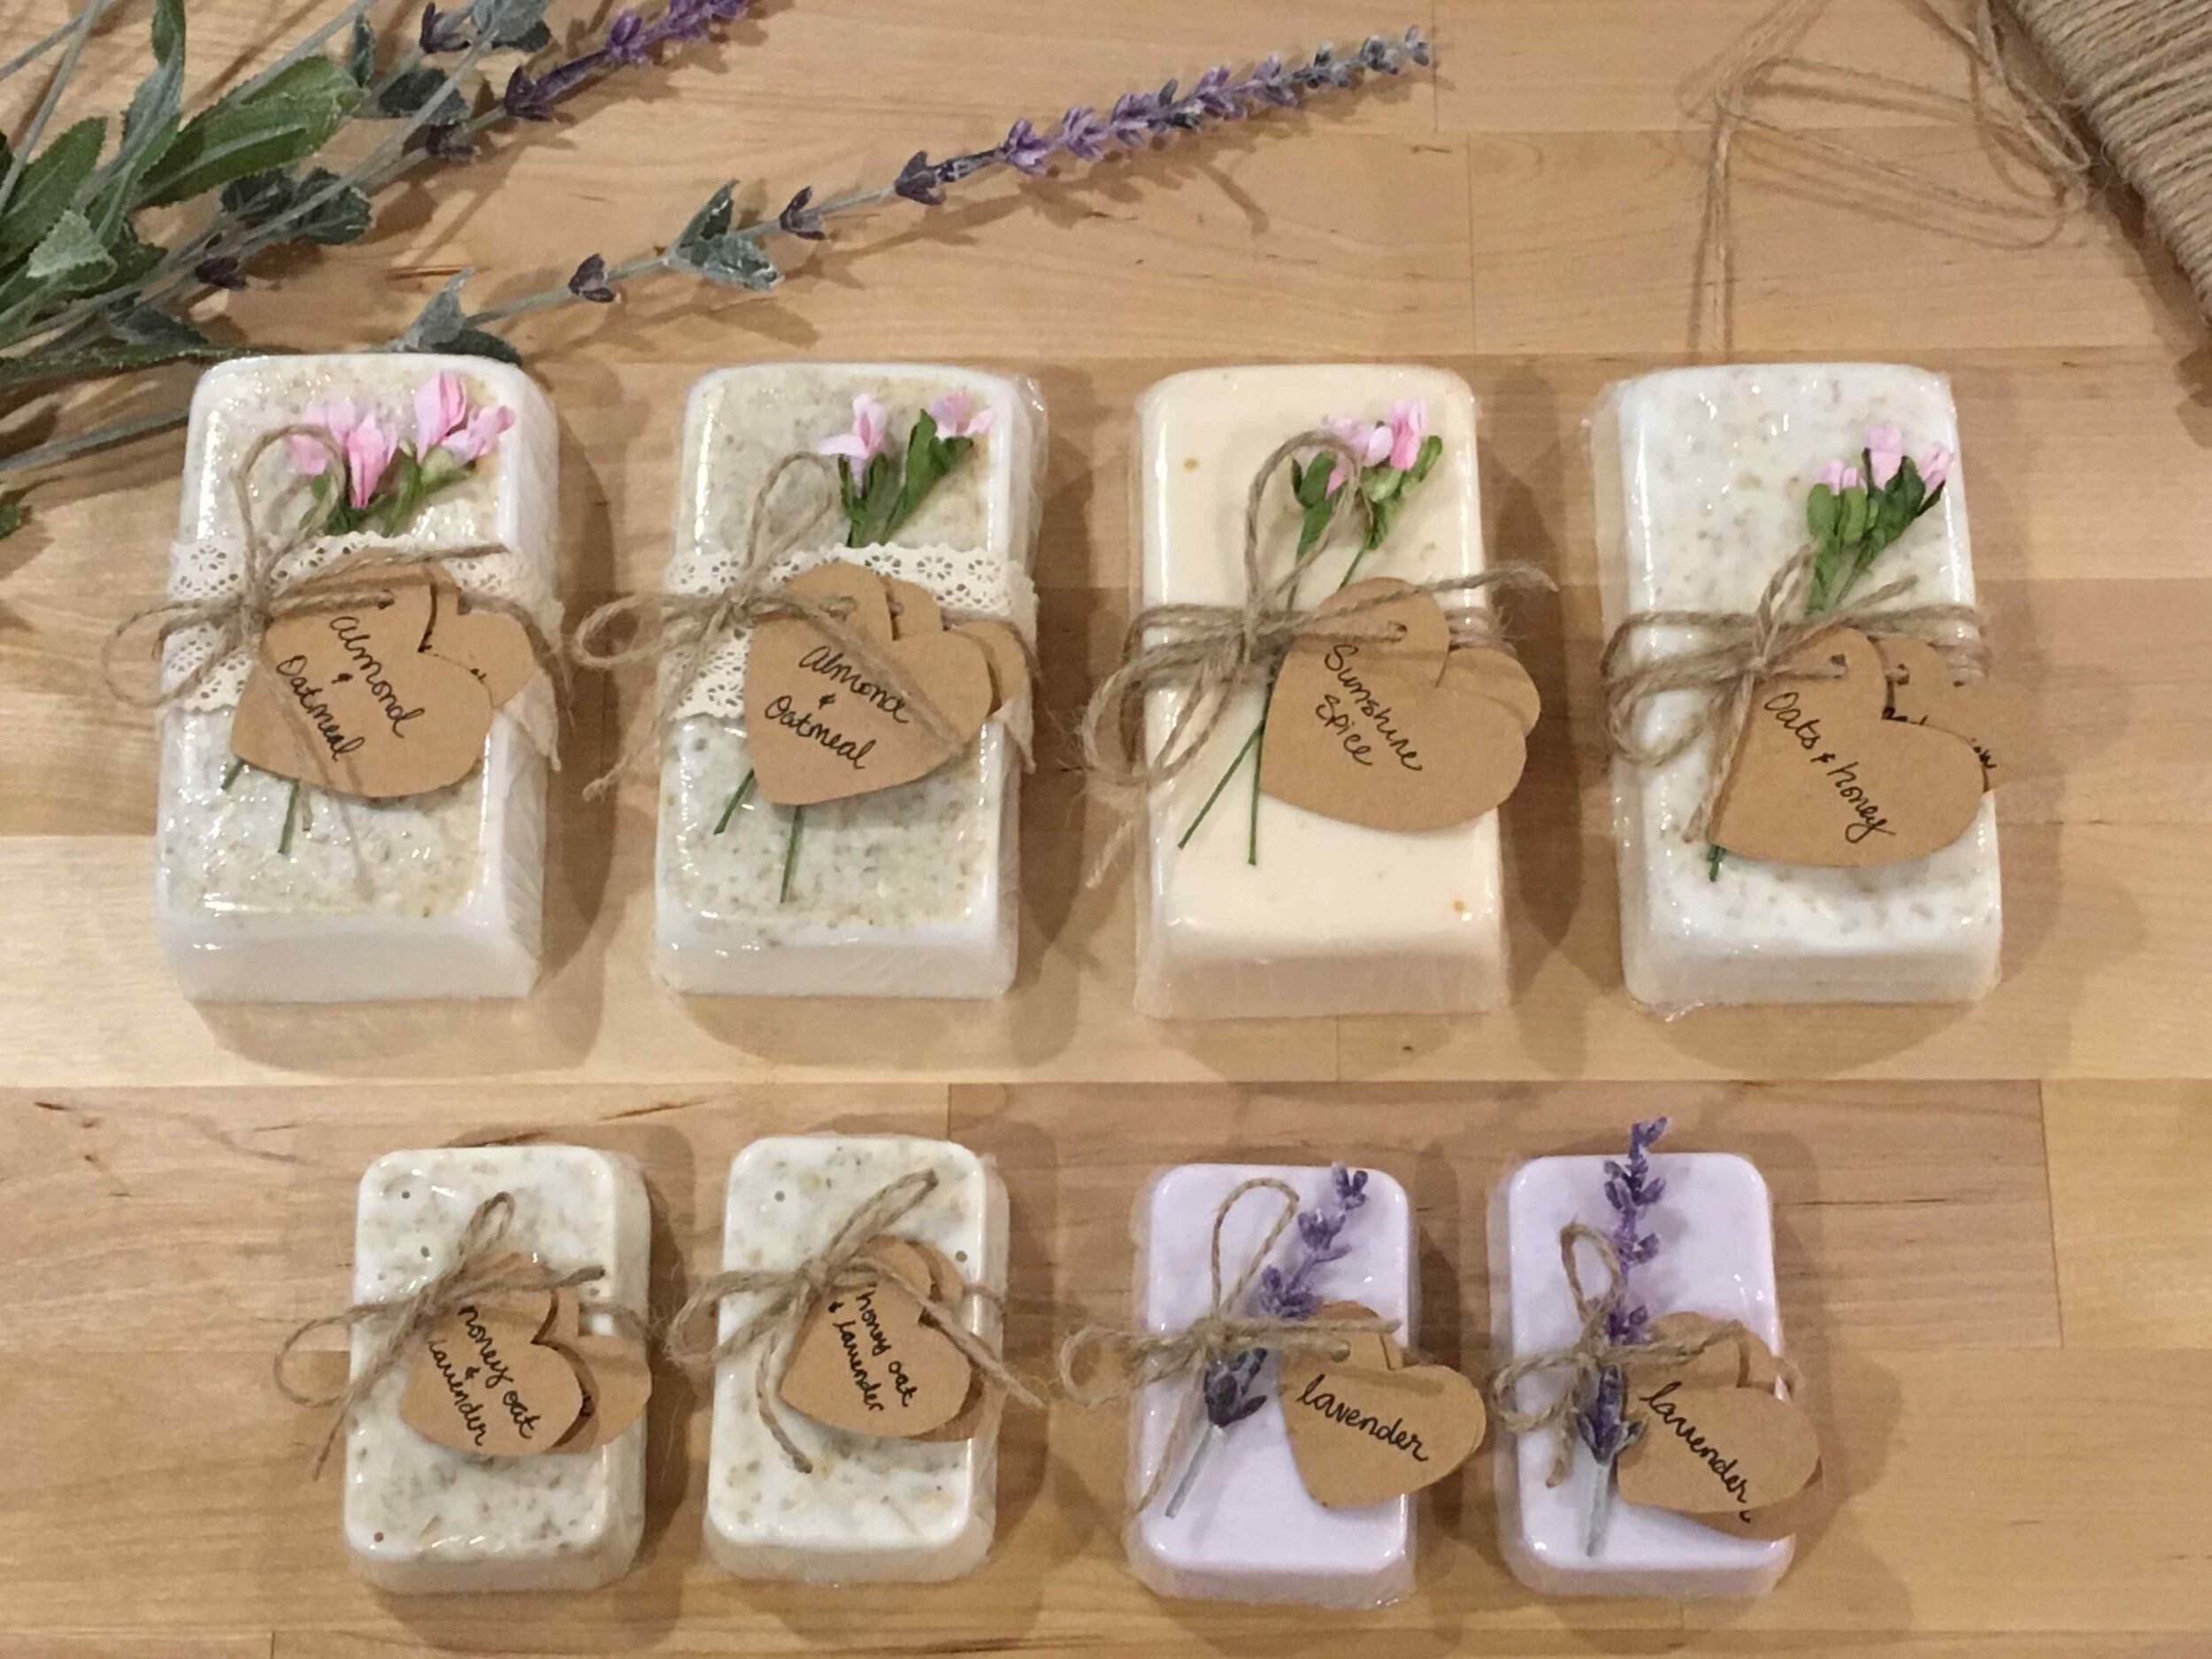

I (N) have had an itch for crafting lately… and what’s a better use of crafting than gifting? I love making personalized, handmade gifts.
For Mother’s Day this year, I decided to make some handmade soaps for our moms. They’re so easy and fun to make. I made mine with a Shea Butter Melt and Pour base, oatmeal, honey, lavender essential oil, and almond fragrance. I was in a pinch to get the almond fragrance so picked up what Hobby Lobby carried in store, but next time I’ll definitely order some almond essential oil instead – I like to keep things natural!
Ingredients and Supplies
For the Soap:
- Melt and Pour Soap Base – I used this Shea Butter Melt and Pour Base
- Essential oils/fragrances of your choice
- Mica Powder Pigments for coloring
- Soap Mold – size and shape are totally your preference! There’s a lot of fun ones out there.
- Rubbing alcohol & cotton balls if you’re using metal pans/mold.
- Glass bowl
- Cutting board and knife
- Twine, Ribbon, Dried Flowers – or anything else you’d like to use to dress up your soap bars.
- Cardstock for making labels (or labels of your choosing)
Gift Baskets:
- Metal tin, basket, decorative container
- Tissue Paper
- Ribbon for a bow if you’d like! (I attached mine using hot glue gun.)
Step 1: Melt Soap Base
Because I wanted to make several soaps in different sizes and fragrances, I worked in small batches. You’ll want to cut your soap base into small pieces before microwaving. Microwave according the package directions. In most cases, you’ll microwave for 30 seconds, and then in 5 second increments after that until your base is melted, but not boiling!


I don’t have a scale to measure out my soap base, but I found cutting off a piece of the base to fit in whichever soap mold I was using worked great.

Step 2: Add Fragrance & Fillings
Once your soap is melted, mix in your fragrances and fillings. Stir gently when mixing to keep bubbles at a minimum.

Here’s what I did:
- 2 Small Bars: 1 TBSP Ground Oats, 1 TBSP Honey, 5-7 drops Lavender Essential Oil.
- 2 Small Bars: 5-7 drops Lavender Essential Oil, a few pinches of purple Mica Powder pigment.
- 2 Large Bars: 2 TBSP Ground Oats, 15 Drops (follow packaged directions) Honey Almond Soap Scent (by Soap Expressions – found at Hobby Lobby)
- 1 Large Bar: 5-7 drops of Sunshine Spice Essential Oil Blend (Edens Garden), a few pinches of Gold Mica Powder Pigment. I totally would’ve done 2 bars of this, but I ran out of essential oil! 🙁 I wasn’t sure how it would turn out, but it was actually perfect!!
- 1 Large Bar: 1 TBSP Ground Oats, 1 TBSP Honey
I used just over 2 lbs of soap base for all of these.
Step 3: Pour into Soap Molds and Cool
Once you have your fragrances and pigments mixed in, pour the melted base into the soap molds.


There’s no prep work needed if you’re using a silicon mold. If you’re using a metal mold, rub the bottom and sides with rubbing alcohol (use cotton ball) before pouring the base in. This will (hopefully) prevent the soap from sticking to the mold. All of my soaps came out just fine except one, which I’m fairly certain I just didn’t use enough alcohol.
I didn’t have a lot of bubbles in my base after I pour it into the mold, and having few on the bottom doesn’t bother me. If you do want the bottom of your soap bubble-free, you can spray a light mist of rubbing alcohol on the base after you’ve poured it into the molds.
Next, carefully place molds in the fridge to cool for 1 hour.
Step 4: Wrap, Label, and Decorate Soaps!
Once your soaps have hardened, pop them out of the molds and place on some wax paper.
TIP: If you used a metal pan, and any of your soap does get stuck, use a plastic credit card, rewards card, etc (thinner than a knife!) wrapped in plastic wrap to wedge between the soap and the sides of the metal mold. Your soap should slide out easily.

Yay soap!! I had made my two small honey, oat, and lavender soaps earlier in the day, and I got excited and couldn’t wait for the others to finish cooling so I started wrapping. Anyway…


Next, wrap each soap bar in plastic wrap. This will protect the soap and keep it from getting all over everything (eww) as you’re adding final touches.
Now it’s time to add decorations and labels!
I used a combination of jute twine and ribbon to wrap the soap, and then added some dried flowers. I cut my labels out of card stock using a heart cutout and an Xacto knife.


Sooo pretty!!!

Step 5: Assemble Gift Basket
Grab your tin, basket, or whatever container(s) you like for your gift basket(s). I found these cute tin buckets at Hobby Lobby for about $4/ea on sale.

Add the tissue paper to your basket. I found it easiest to put in the outside layer first, being careful not to wrinkle the edges too much, and then fill in the basket with additional tissue paper to prop the soap up.


Add your soap and any finishing touches to your baskets. I made some simple bows that I hot glued to the the tin and also added some little signs to mark the occasion.


Aren’t they pretty?? What I love about handmade soap and gift baskets is you can completely personalize them with different shapes, sizes, colors, fragrances, containers, and finishing touches. And you can go as simple or as fancy as you want. Perfect for gifts for so many occasions!


