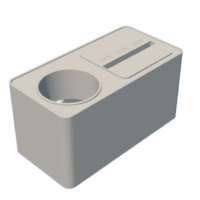
Introduction: HabitSpark 7
When you want to build a habit or achieve a goal, you can use this box I designed to help! Our box has 7 switches, and each day you complete a task, you can flip one switch. After successfully completing tasks for 7 consecutive days, the box will release colorful confetti to celebrate! It encourages you to cultivate your habits in 7-day cycles.
Supplies
Required Materials for the 7-Day Habit Box:
- 7 x 5mm LED Lights
- 7 x ON-OFF Toggle Switches
- 1 x 5V Electromagnet
- 1 x Balloon
- 1 x Arduino UNO Board
- Electrical Wires
- 1 x iron piece
Step 1: 3D Printing All Required Parts
3D Printing All Required Parts
Step 2: Connect the Electronic Components on the Uno Board As Shown.
Replace the servo motor in the diagram with an electromagnet. The electromagnet has two wires: connect one wire to the ground line and the other to pin 4.
CODE:
int celebrationState = false;
int previousCelebrationState = false;
void setup()
{
pinMode(5, INPUT_PULLUP);
pinMode(6, INPUT_PULLUP);
pinMode(7, INPUT_PULLUP);
pinMode(8, INPUT_PULLUP);
pinMode(10, INPUT_PULLUP);
pinMode(11, INPUT_PULLUP);
pinMode(12, INPUT_PULLUP);
pinMode(4, OUTPUT); // 控制EG的引脚
digitalWrite(4, HIGH); // 默认保持EG通电
Serial.begin(9600);
}
void loop()
{
bool sunday = digitalRead(12);
bool monday = digitalRead(11);
bool tuesday = digitalRead(10);
bool wednesday = digitalRead(8);
bool thursday = digitalRead(7);
bool friday = digitalRead(6);
bool saturday = digitalRead(5);
// 检查所有灯是否亮了(所有输入为LOW)
if (sunday == LOW && monday == LOW && tuesday == LOW && wednesday == LOW && thursday == LOW && friday == LOW && saturday == LOW) {
celebrationState = true;
if (celebrationState == true && previousCelebrationState == false) {
// 切断EG电源
digitalWrite(4, LOW);
}
} else {
celebrationState = false;
digitalWrite(4, HIGH);
}
previousCelebrationState = celebrationState;
}


