
No Thanksgiving feast is complete without pumpkin pie. But that doesn’t mean you have to go the traditional route. Instead, put a new twist on the classic dessert with pumpkin pie slice cookies.
Not only are these sugar cookies way too cute to pass up, but they can also be baked and decorated up to a whole week in advance. You know what that means: one less thing to save for day-of food prep, so you can spend more time with the fam. Just store them between layers of wax paper in an airtight container and they’ll stay perfectly soft.
Pumpkin Pie Slice Cookies
Level: Easy
What You Need
Instructions
1. Prep the Dough
Mix the ingredients for your cookie dough according to the instructions. Then roll out your dough until it’s flat and even.
2. Cut Out the Shapes
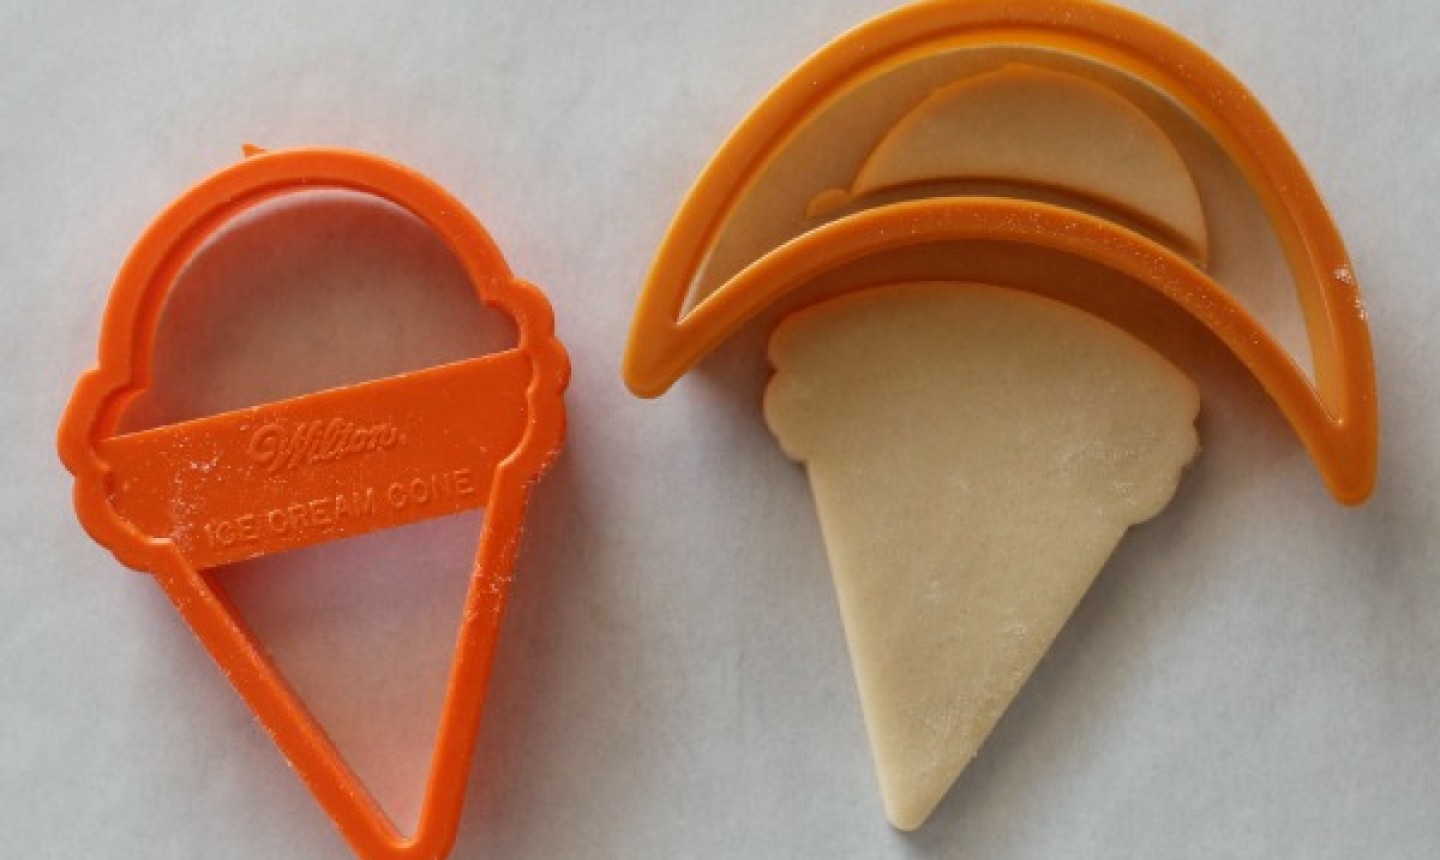
Use an ice cream cone cutter to cut out the dough and remove the excess. Once you have all your pieces cut out, use a moon cutter to trim off the rounded edge so the cone now resembles a slice of pie.
3. Prep the Icing
Bake the the cookies according to the recipe and let them cool. As they’re cooling, make the royal icing. You need to create three colors: pumpkin orange (orange gel color mixed with a little brown), a light brown crust color (white mixed with a touch of golden yellow) and plain white.
For the orange, you need to make both piping and flooding consistencies. For the white and light brown, you need stiff piping consistency.
Good to Know: Royal icing is great for cookies because it dries hard. But it also dries quickly, which means you need to take precautions to prevent the icing from drying as you work. As you prep your icing, keep it in small bowls with a lid or plastic wrap over the top. Once you spoon the icing into a piping bag, keep a damp paper towel around the tip to keep the icing from hardening and clogging the tip.
4. Pipe and Flood
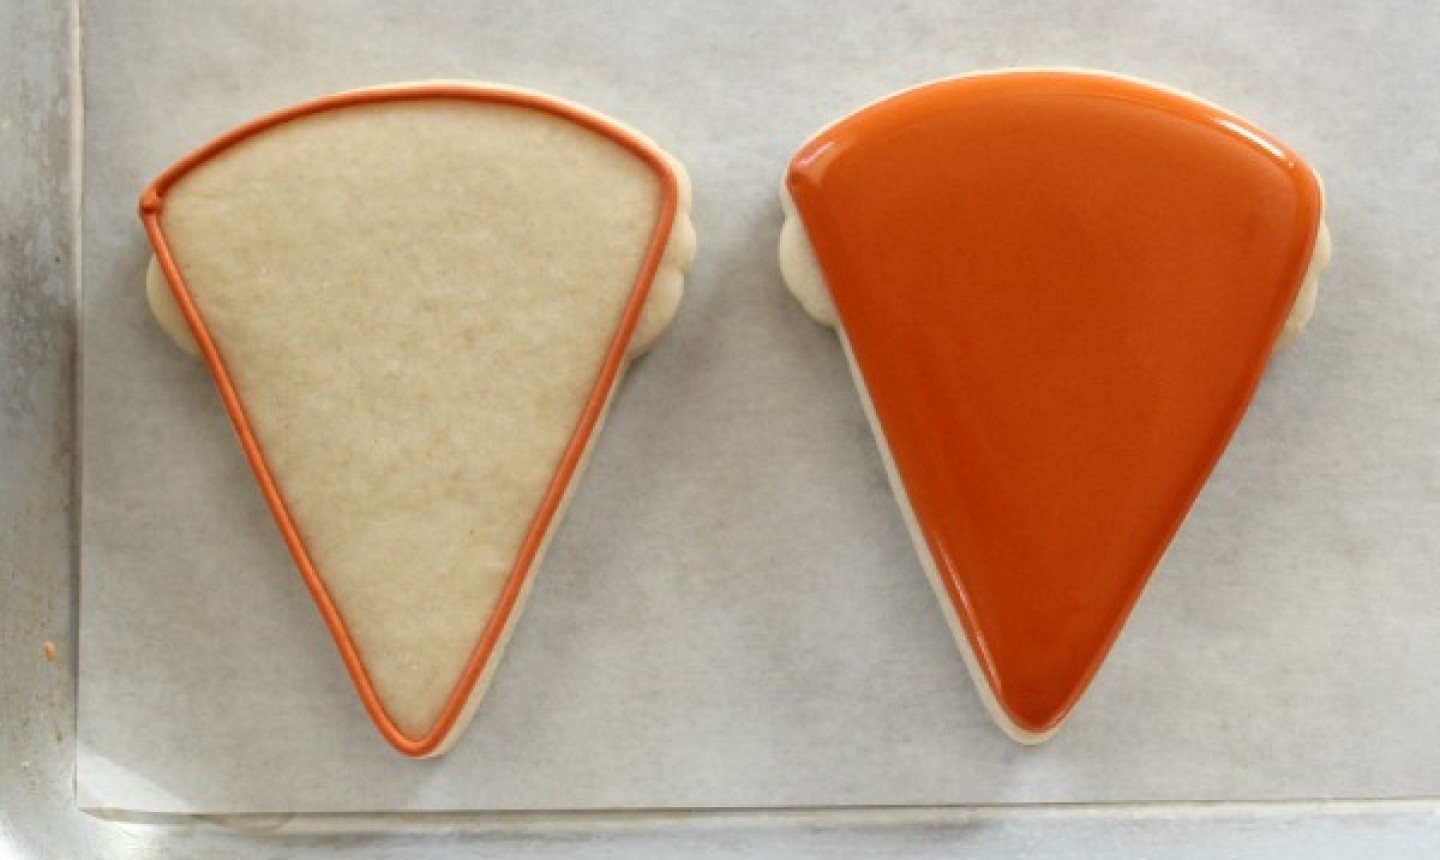
Fill a piping bag fitted with a No. 2 piping tip with the piping consistency orange icing. Pipe an outline around the cookie, as shown above.
Fill another piping bag fitted with a No. 3 piping tip with the flooding consistency orange icing. Flood the cookie, then use a toothpick to remove any air bubbles that appear.
Set the cookies aside until they’re completely dry. This can take up to 24 hours, depending on the humidity of where you’re decorating, so make sure to plan ahead.
5. Pipe the Details
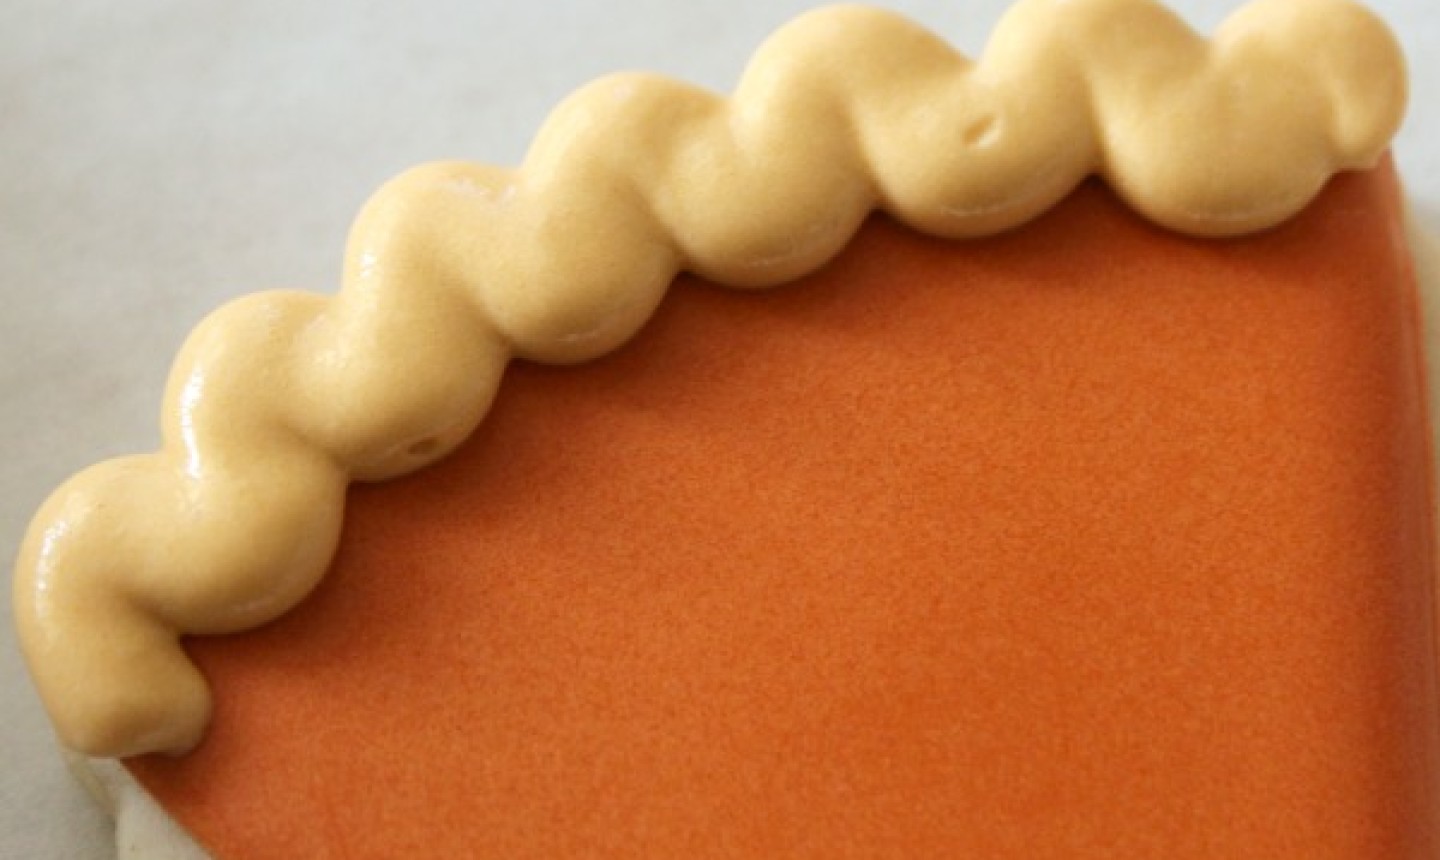
Fill a piping bag fitted with a large round tip (we used a No. 8) and pipe a wavy line across the curved edge of the cookie to create the pie crust.

Finish the cookie by adding a dollop of white royal icing in the center as the pumpkin pie’s whipped cream. To create dimension, you can do this in two steps. First, use a piping bag fitted with the large round tip to pipe a simple dot. Leave it to dry for 10-20 minutes, then add a smaller dot on top.
Or you can use a large star tip to pipe a rosette — whatever you think looks best!

Once all the cookies are dry, arrange them on a platter and serve!
Cute!